Category Archives: Manuals

pedal covers manual

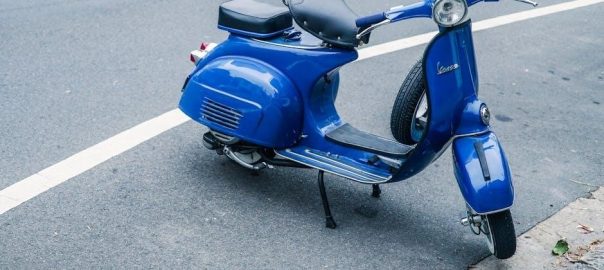
Pedal covers enhance a manual car’s aesthetics and grip, offering improved control during driving. They cater to enthusiasts seeking a personalized and performance-focused experience.

What are Pedal Covers?

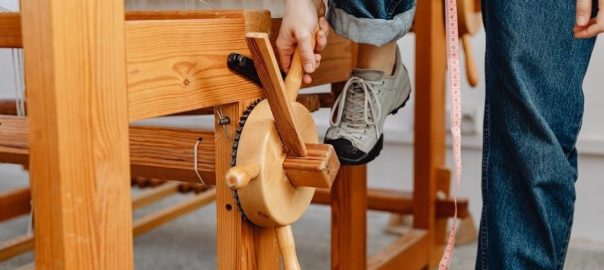
Pedal covers, also known as pedal pads, are cosmetic accessories designed to enhance the appearance and feel of a vehicle’s pedals – specifically the brake, gas, and clutch in manual transmission cars. They typically slip over or attach to the existing rubber pedal surfaces. Constructed from materials like aluminum, stainless steel, rubber, or carbon fiber, they offer a more aggressive look and improved grip.

These covers aren’t structural components; they don’t replace the pedals themselves, but rather augment them for aesthetic and functional benefits, contributing to a sportier driving experience.

Why Upgrade Pedal Covers on a Manual Car?

Upgrading pedal covers on a manual car offers several advantages beyond aesthetics. Enhanced grip, particularly with perforated designs, improves pedal feel and control, crucial for techniques like heel-toe downshifting. Aluminum or stainless steel covers provide a sportier, more refined look to the interior.

They can also restore worn or damaged pedal surfaces, improving safety and comfort. For driving enthusiasts, they represent a simple, cost-effective way to personalize their vehicle and enhance the driving experience.

Types of Manual Transmission Pedal Covers

Various materials define pedal cover types: aluminum, stainless steel, rubber, and carbon fiber, each offering unique aesthetics, grip, and durability characteristics for manual cars.

Aluminum Pedal Covers

Aluminum pedal covers are a popular choice, celebrated for their lightweight nature and sleek, sporty appearance. Dinan offers premium aluminum sets specifically designed for BMW manual transmissions, like the D700-0000 kit. These covers often feature a brushed finish or anodized coloring, enhancing the interior’s visual appeal.

Beyond aesthetics, aluminum provides a good balance of grip and durability. They resist corrosion effectively, ensuring longevity. Installation is generally straightforward, often involving adhesive backing or pre-drilled mounting points. They are a cost-effective upgrade, delivering a noticeable improvement in the driving experience.

Stainless Steel Pedal Covers

Stainless steel pedal covers represent a premium upgrade, prioritizing durability and a sophisticated aesthetic. Known for their resistance to corrosion and wear, these covers maintain a polished look even with extensive use. They often feature a brushed or polished finish, adding a touch of elegance to the vehicle’s interior.

While slightly heavier than aluminum, stainless steel provides excellent grip and a substantial feel. Installation typically involves adhesive pads or screws, ensuring a secure fit. These covers are a long-lasting investment, offering both style and functionality for manual transmission vehicles.

Rubber Pedal Covers

Rubber pedal covers are a cost-effective and practical solution for enhancing grip and comfort. Often designed as direct replacements for the original rubber pads, they provide improved foot traction, particularly during wet or demanding driving conditions. These covers are known for their non-slip surface, promoting safer and more controlled pedal operation.

Installation is generally straightforward, frequently involving simply fitting over the existing pedals. Rubber covers are durable and resistant to wear, offering a functional upgrade without significantly altering the vehicle’s aesthetic.

Carbon Fiber Pedal Covers

Carbon fiber pedal covers represent a premium upgrade, blending lightweight construction with a sporty aesthetic. These covers offer a high-performance look and feel, often featuring a textured surface for enhanced grip. The material’s inherent strength ensures durability, while its low weight contributes to a more responsive pedal feel.

Installation typically involves adhesive backing or mounting hardware. Carbon fiber covers are ideal for drivers seeking a visually striking and functionally superior pedal set, elevating the interior’s overall style.

Installation Guide: Manual Transmission Pedal Covers

Proper installation ensures secure fitment and optimal performance. This guide details the tools needed and step-by-step instructions for a successful upgrade.

Tools Required for Installation

Successfully installing manual transmission pedal covers requires minimal tools, making it a DIY-friendly project. A basic toolkit will suffice for most installations. Essential items include a screwdriver – both flathead and Phillips head – to remove existing clips or screws.

Often, a small wrench set is needed for certain bracket adjustments. Protective gloves are recommended to prevent hand injuries, and a clean cloth is useful for surface preparation. For stubborn original rubber covers, a plastic pry tool helps avoid damaging the underlying components. Finally, ensure you have appropriate adhesive or screws, depending on the cover type;

Removing Existing Pedal Covers (If Applicable)

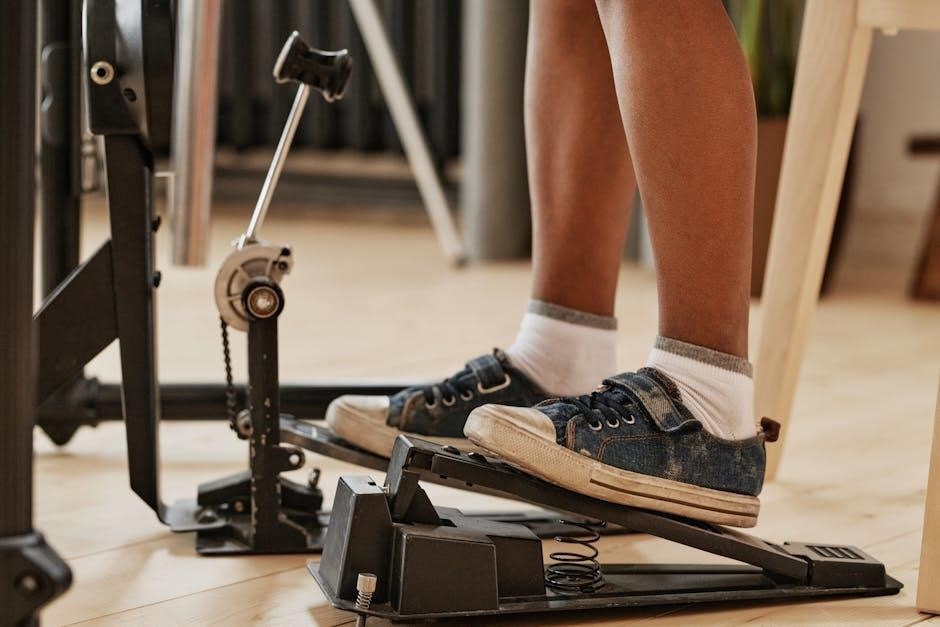
Before installing new manual transmission pedal covers, removing existing ones is often necessary. Many vehicles feature rubber covers secured by clips or screws; carefully detach these using a screwdriver or appropriate wrench. Some installations allow covering the original rubber, eliminating removal.

If the original cover is firmly attached, a plastic pry tool can gently lift edges without causing damage. Thoroughly clean the pedal surface after removal to ensure optimal adhesion for the new covers. Inspect for any remaining adhesive residue and remove it completely.

Installing the Brake Pedal Cover

Brake pedal cover installation typically involves tearing off the original rubber cover, as indicated in many guides. Align the new cover precisely over the brake pedal, ensuring a snug and secure fit. Some covers utilize adhesive backing; peel off the protective layer and firmly press the cover onto the pedal.

Verify the cover doesn’t impede pedal travel or create slippage. Secure attachment is crucial for safety; double-check its stability before driving. Proper alignment enhances both aesthetics and functionality.

Installing the Gas Pedal Cover

Gas pedal cover installation often differs from the brake. Many designs don’t require removing the original rubber pedal; instead, they’re designed to directly cover it for a simpler fit. Carefully position the new cover over the existing pedal, ensuring it’s centered and aligned correctly.

Press firmly to secure it in place. Confirm the cover doesn’t restrict gas pedal movement or create any uncomfortable pressure points. A secure fit is vital for smooth acceleration and safe driving.

Installing the Clutch Pedal Cover

Clutch pedal cover installation typically involves a similar process to the brake pedal, often requiring the removal of the original rubber cover first. Carefully pry off the existing cover, taking care not to damage the underlying mechanism. Position the new clutch pedal cover, ensuring proper alignment and a secure fit.

Press firmly to attach it, verifying full range of motion and preventing any interference with smooth clutch engagement. A properly installed cover enhances grip and control.

Specific Models & Compatibility

Pedal cover sets are available for various models like BMW and VW Golf Mk3, alongside universal options ensuring a fit for most manual vehicles.

Pedal Cover Sets for BMW (Manual Transmission)

BMW manual transmission vehicles benefit greatly from upgraded pedal covers, enhancing both the aesthetic appeal and driving experience. Dinan offers aluminum pedal cover sets specifically designed for BMWs, providing a sporty and refined look. These sets typically include covers for the brake, gas, and clutch pedals, crafted from high-quality materials for durability and grip.

The D700-0000 kit is a popular choice, offering a sleek design and secure fitment. Proper installation ensures optimal pedal feel and control, contributing to a more engaging driving experience for BMW enthusiasts. Consider the material and style to complement your vehicle’s interior.

VW Golf Mk3/Jetta Mk3 OEM Pedal Sets

Original Equipment Manufacturer (OEM) pedal sets for the VW Golf Mk3 and Jetta Mk3 are highly sought after by enthusiasts aiming for a period-correct restoration or subtle upgrade. These sets, often found in left-hand drive (LHD) configurations, typically include aluminum pedal covers for the brake, gas, and clutch.

They offer a direct fit and retain the original pedal feel. Sourcing these OEM sets can elevate the interior’s aesthetic, providing a classic Volkswagen look. Availability may vary, often found through online retailers specializing in vintage VW parts.

Universal Fit Pedal Covers

Universal fit pedal covers offer a convenient solution for a wide range of manual transmission vehicles, bypassing specific model compatibility concerns. These sets generally include adjustable mounting brackets and rubber sleeves to accommodate various pedal shapes and sizes.

Typically constructed from aluminum, stainless steel, or rubber, they prioritize ease of installation. While they may not offer the precise fit of OEM sets, universal covers provide an affordable way to enhance pedal grip and aesthetics across numerous car makes and models.

Safety Considerations & Warnings

Secure attachment is crucial; loose covers can interfere with pedal movement, creating a dangerous driving situation. Proper fitment prevents slipping.

Ensuring Secure Attachment

Proper installation is paramount for safety. Many pedal covers utilize rubber backing or screws for a firm grip. Verify the chosen method aligns with your vehicle’s pedal shape and material. Regularly inspect the covers for any loosening, especially after spirited driving.

A secure fit prevents slippage during critical maneuvers like heel-toe downshifting or emergency braking. If screws are used, avoid over-tightening, which could damage the pedals. Consider using thread-locking fluid to further enhance security and prevent vibrations from loosening the fasteners over time.

Avoiding Interference with Pedal Movement

Unobstructed pedal travel is crucial for safe operation. Ensure the chosen pedal covers don’t restrict the full range of motion for the brake, gas, or clutch. Any limitation could compromise responsiveness and increase stopping distances or hinder smooth gear changes.

Carefully assess the cover’s design and thickness before installation. Avoid designs that entirely encapsulate the pedal, potentially creating friction points. Test each pedal’s movement post-installation to confirm unrestricted operation. Prioritize safety by selecting covers designed for optimal clearance.

Proper Fitment to Prevent Slipping

Secure attachment is paramount; slipping pedal covers pose a significant safety risk. Choose covers specifically designed for your vehicle’s pedal shape and size, ensuring a snug and stable fit. Utilize the provided mounting hardware – screws, rubber grips, or adhesive – correctly, following the manufacturer’s instructions meticulously.

Regularly inspect the covers for looseness. A wobbly or shifting cover can impede precise foot placement, especially during critical maneuvers like heel-toe downshifting. Prioritize quality covers with robust attachment mechanisms for lasting security.

Common Mistakes During Installation

Installation errors include misidentifying pedals, loose fitting, and covering the entire surface, hindering proper pedal feel and potentially creating safety hazards.

Incorrect Pedal Identification

A frequent error during manual transmission pedal cover installation is misidentifying the brake, gas, and clutch pedals. This seemingly simple mistake can lead to improper fitment, compromising functionality and safety. Ensure you clearly understand which cover corresponds to each pedal before proceeding.

Referencing your vehicle’s manual or online resources can prevent this issue. Incorrect placement can obstruct movement or create an uncomfortable driving experience, negating the benefits of the upgrade. Double-check alignment before securing the covers permanently.

Loose Installation

A common pitfall when installing manual transmission pedal covers is a loose fit. Failing to securely attach the covers can create a hazardous situation, as they might shift during driving, interfering with proper pedal operation. Always verify that all mounting points are firmly engaged and tightened according to the manufacturer’s instructions.

Using the correct tools and applying appropriate torque are crucial. Regularly inspect the covers to ensure they remain secure, preventing potential slippage and maintaining driver control.

Covering the Entire Pedal Surface

A frequent error during pedal cover installation involves completely obscuring the original pedal; This practice is strongly discouraged, as it can hinder smooth and precise footwork, especially during techniques like heel-toe downshifting. Maintaining a portion of the original pedal exposed provides tactile feedback.

Ensure the cover complements, rather than replaces, the pedal’s feel. Proper fitment allows for optimal control and prevents accidental slippage, enhancing the driving experience and safety.

Driving Techniques with Upgraded Pedal Covers

Enhanced pedal feel from covers aids techniques like heel-toe downshifting, smooth clutch engagement, and precise brake/gas control for optimal performance.

Heel-Toe Downshifting

Heel-toe downshifting, a technique for smooth gear changes, benefits greatly from upgraded pedal covers. The improved pedal feel and positioning allow drivers to precisely blip the throttle while braking. This synchronization prevents unsettling weight transfers and maintains vehicle stability during cornering.

Specifically, covers with enhanced grip facilitate consistent foot placement, crucial for executing the heel-toe maneuver effectively. Aluminum or stainless steel options provide a firm surface, while perforated designs prevent slipping. Mastering this technique elevates driving skill and enhances the overall driving experience.

Smooth Clutch Engagement

Smooth clutch engagement is fundamental for a comfortable and efficient driving experience in a manual transmission vehicle. Upgraded pedal covers can significantly contribute to this, offering a more defined feel for the clutch’s biting point. This enhanced feedback allows for precise control during starts, stops, and gear changes.

Rubber or textured covers provide increased grip, minimizing slippage and promoting consistent pedal application. This is particularly helpful for drivers learning manual or those seeking refined control, resulting in smoother transitions and reduced wear on the clutch components.

Optimizing Brake and Gas Control

Optimizing brake and gas control is crucial for performance driving and everyday safety with a manual transmission. Pedal covers, particularly those crafted from aluminum or stainless steel, can enhance pedal feel and responsiveness. A more tactile surface improves grip, allowing for quicker and more precise adjustments.

This is especially beneficial during heel-toe downshifting or when modulating throttle control. Better pedal feel translates to improved confidence and consistency, ultimately leading to a more connected and engaging driving experience. Precision is key for optimal control.

Maintenance and Cleaning

Regular cleaning prevents corrosion and maintains grip on manual transmission pedal covers. Inspect frequently for wear, ensuring secure attachment and optimal performance consistently.

Regular Cleaning Procedures

Maintaining pedal covers is simple yet crucial for longevity and performance. Weekly, use a soft cloth dampened with mild soap and water to wipe away dirt and grime. For stubborn marks, a dedicated automotive interior cleaner can be applied cautiously.

Avoid abrasive cleaners, as they can damage the finish, especially on aluminum or carbon fiber covers. After cleaning, thoroughly dry the pedals to prevent corrosion. Rubber covers benefit from occasional deep cleaning with a rubber protectant to prevent cracking and maintain grip. Consistent cleaning ensures optimal pedal feel and safety.

Preventing Corrosion

Corrosion is a primary concern, particularly with stainless steel and aluminum pedal covers exposed to moisture and road salts. Regularly drying pedals after washing or wet conditions is vital. Applying a protective wax or sealant designed for metal surfaces creates a barrier against corrosion.

Inspect covers frequently for any signs of rust or pitting. Addressing minor corrosion immediately prevents it from spreading. For areas prone to corrosion, consider using a corrosion inhibitor spray. Proper care extends the lifespan and maintains the aesthetic appeal of your pedal covers.

Inspecting for Wear and Tear

Regular inspection is crucial for maintaining safety and performance. Check for loosening screws or bolts, especially after initial installation and during seasonal maintenance. Examine the rubber surfaces for cracks, tears, or signs of deterioration, which can reduce grip.

Assess the overall structural integrity of the covers, looking for bends or damage. Worn or damaged covers should be replaced promptly to prevent slipping and ensure optimal pedal feel. Consistent checks guarantee continued safe operation.

Advanced Pedal Cover Features

Innovative designs include adjustable, weighted, and perforated options, enhancing grip and control. Smart covers with feedback and integrated sensors are emerging technologies.

Adjustable Pedal Covers

Adjustable pedal covers represent a significant advancement in driver customization, allowing precise positioning for optimal comfort and control. These covers typically feature mechanisms—often screws or sliding mounts—that enable users to modify the pedal’s height, angle, and distance. This is particularly beneficial for drivers with varying foot sizes or those seeking a tailored experience for techniques like heel-toe downshifting.

The ability to fine-tune pedal placement can dramatically improve driving precision and reduce fatigue during extended periods behind the wheel, ultimately enhancing overall performance.

Weighted Pedal Covers

Weighted pedal covers add mass to the pedal surfaces, providing a more substantial and tactile feel during operation. This increased weight can enhance driver feedback, allowing for more precise modulation of the throttle, brake, and clutch; Many enthusiasts find that weighted pedals improve consistency and control, particularly during performance driving scenarios like track days or spirited road driving.

The added weight contributes to a more connected sensation, fostering greater confidence and responsiveness from the driver’s inputs.

Perforated Pedal Covers for Grip

Perforated pedal covers feature small holes or textured surfaces designed to maximize grip, even in wet or sweaty conditions; This is crucial for maintaining precise control, especially during aggressive driving maneuvers. The perforations allow for better friction between the driver’s shoe and the pedal surface, reducing the risk of slipping.

These covers are particularly beneficial for heel-toe downshifting, where secure pedal contact is paramount for smooth and efficient gear changes.

Where to Buy Pedal Covers

Pedal covers are readily available at online retailers, automotive parts stores, and specialty tuning shops, offering diverse options for manual transmission vehicles.

Online Retailers

Numerous online retailers specialize in automotive accessories, providing a vast selection of manual transmission pedal covers. Platforms like Amazon and eBay offer competitive pricing and diverse brands, ensuring options for every budget and style preference. Dedicated automotive websites often feature curated collections, simplifying the search process.

Before purchasing, carefully review product descriptions, compatibility charts, and customer reviews to guarantee a proper fit for your specific vehicle model. Consider shipping costs and return policies for a seamless shopping experience. Many retailers offer detailed images and specifications, aiding informed decision-making.

Automotive Parts Stores

Traditional automotive parts stores, such as AutoZone, Advance Auto Parts, and O’Reilly Auto Parts, frequently stock a selection of manual transmission pedal covers. These brick-and-mortar locations allow for in-person inspection and expert advice from knowledgeable staff. You can verify compatibility directly with an associate, ensuring a correct fit for your vehicle.

While the online selection might be broader, physical stores offer immediate availability and eliminate shipping wait times. They often carry popular brands and provide installation assistance or recommendations, making them a convenient option for many drivers.

Specialty Tuning Shops

Specialty tuning shops cater to automotive enthusiasts and often carry high-performance or unique manual transmission pedal covers not found in mainstream stores. These shops frequently specialize in specific vehicle makes, like BMW or VW, offering OEM or aftermarket options tailored for those models.

Beyond sales, they provide expert installation services and can advise on optimal pedal cover choices for performance driving techniques like heel-toe downshifting. Expect a higher price point, but also superior quality and personalized service.

Future Trends in Pedal Cover Technology

Innovations include smart pedal covers with feedback, integrated sensors for data analysis, and customizable designs offering personalized performance and driving experiences.

Smart Pedal Covers with Feedback

Emerging technology focuses on pedal covers integrating sensors and haptic feedback systems. These advanced covers can communicate data to the driver, potentially adjusting resistance based on driving mode or providing alerts for optimal performance. Imagine a clutch pedal subtly resisting further engagement to prevent stalling, or brake pedal feedback indicating impending lock-up.

Such systems could enhance heel-toe downshifting precision and smooth clutch engagement, ultimately improving driver skill and vehicle control. Data logging capabilities would also allow for performance analysis and personalized adjustments, creating a truly connected driving experience.

Integrated Pedal Cover Sensors

Future pedal covers will likely incorporate sensors measuring pedal travel, pressure, and speed. This data can be relayed to the vehicle’s ECU, enabling features like adaptive throttle control or automated rev-matching during downshifts. Imagine a system learning your driving style and optimizing performance accordingly.

These sensors could also enhance safety features, detecting sudden pedal movements indicative of panic braking or accidental acceleration. The collected data could even contribute to driver monitoring systems, assessing fatigue or distraction levels for a safer driving experience.

Customizable Pedal Cover Designs

The future of pedal covers leans heavily towards personalization. Expect options beyond materials and finishes, including fully customizable designs. Drivers could upload graphics, logos, or choose from extensive online libraries to create truly unique pedal sets.

Advanced manufacturing techniques, like 3D printing, will facilitate this trend, allowing for intricate shapes and personalized textures. Imagine matching pedal covers to your car’s interior, racing livery, or even reflecting your individual style – a truly bespoke driving experience.

marquis spa manual

Marquis Spa Manual: A Comprehensive Guide

Welcome to a detailed resource for Marquis spa owners! This manual covers troubleshooting, maintenance, operation, and advanced features, ensuring years of relaxing enjoyment․

Marquis Spas represents a commitment to quality, innovation, and a luxurious home spa experience․ For decades, Marquis has been designing and manufacturing high-performance hot tubs, consistently exceeding industry standards․ This manual serves as your comprehensive guide to understanding and maintaining your investment․

Whether you’re a first-time spa owner or a seasoned enthusiast, this resource will provide valuable insights into your spa’s operation, from initial setup and water chemistry to advanced features like the ozonator system․ Prioritizing safety is paramount; therefore, detailed precautions regarding electrical components and chemical handling are included․ Enjoy the “Spa Life” with confidence, knowing you have the information needed for years of relaxation and rejuvenation!

Understanding Your Spa Model

Marquis Spas offers a diverse range of models, each designed with specific features and benefits․ Identifying your exact model – whether it’s from the Vector21, Epic, or E-Series – is crucial for accessing the correct troubleshooting information and maintenance procedures․

Refer to your spa’s serial number and the accompanying documentation to determine its specific configuration․ Different series, like the Spirit, may have unique components and operational nuances․ This manual provides guidance for various models, but specific details may vary․ Familiarize yourself with the layout of your spa, the location of key components (pump, heater, filter), and the functionality of your control panel․ Knowing your spa intimately will enhance your ownership experience and simplify maintenance․

Initial Setup and Water Chemistry

Proper setup and balanced water are essential for a safe and enjoyable spa experience․ This section details filling, chemical balancing, and utilizing Marquis spa chemicals․

Filling Your Marquis Spa

Begin by ensuring the spa is on a level surface and all plumbing connections are secure․ Use a garden hose with a filter to fill the spa, directing the water flow gently to avoid disturbing the surface․

Before completely filling, consider adding a metal sequestrant to help prevent staining, especially if your water source has high mineral content․

Fill to approximately 1 inch below the filter housing․ Avoid overfilling, as this can cause issues with water drainage․

Once filled, allow the water to warm slightly before adding chemicals․

Remember to remove any initial debris or contaminants that may have entered during the filling process․ A pre-filter is highly recommended during initial fill-up․

Balancing Water Chemistry

Maintaining proper water chemistry is crucial for spa longevity and bather comfort․ Begin by testing the water using a reliable test kit or strips, checking pH, alkalinity, and sanitizer levels․

Ideal pH should be between 7․2 and 7․8․ Adjust using pH increaser or decreaser as needed․ Total alkalinity should be between 80-120 ppm, stabilizing pH levels․

Sanitizer, typically chlorine or bromine, prevents bacterial growth․ Follow product instructions carefully for dosage․

Low calcium levels can cause corrosion, so maintain between 150-250 ppm․ Regularly test and adjust to ensure optimal water balance․

Always add chemicals separately and allow circulation before retesting․

Using Marquis Spa Chemicals

Marquis Spas recommends using specifically formulated spa chemicals for optimal performance and safety․ Always follow the manufacturer’s instructions on each product label meticulously․

When adding chemicals, pre-dissolve granular chemicals in a clean plastic bucket filled with warm water before slowly pouring them into the spa, avoiding direct contact with the shell․

Never mix different chemicals together, as this can create hazardous reactions․ Add chemicals one at a time, allowing sufficient circulation between additions․

Utilize a chemical floater or directly pour near the return jet to ensure proper distribution․ Regularly use a stain and scale remover to prevent buildup․

Consider using a pre-filter when initially filling the spa to reduce mineral content․

Operating Your Marquis Spa

Enjoy seamless control and relaxation! This section details the control panel, jet functions, temperature adjustments, and entertainment features of your Marquis spa․

Control Panel Overview

Your Marquis spa’s control panel is the central hub for managing all spa functions․ Familiarize yourself with the layout, which typically includes buttons for temperature adjustment, jet control, and lighting․ The display screen provides crucial information, such as water temperature, filter cycle status, and any diagnostic messages․

Understanding the icons and symbols is key to effortless operation․ Many panels feature a “Light” button for controlling the spa’s illumination, and dedicated jet controls for directing water flow․ The panel also allows access to programming features, like setting filter cycles and adjusting temperature limits․ Regularly check the display for any error codes, referencing the troubleshooting section of this manual for guidance․

Modern Marquis spas often incorporate intuitive touchscreen interfaces, enhancing user experience and simplifying control․

Jet and Water Feature Controls

Marquis spas offer a variety of jet and water feature controls designed for personalized hydrotherapy․ Typically, you’ll find dedicated buttons on the control panel to activate and adjust different jet zones – often categorized as therapy jets, hydro jets, and foot jets․ These controls allow you to customize the massage intensity and target specific muscle groups․

Some models feature adjustable directional nozzles, letting you fine-tune the water flow for a truly tailored experience․ Water features, like waterfalls or fountains, are usually controlled separately, adding to the spa’s ambiance․ Experiment with different combinations to discover your preferred settings․

Remember to consult your specific model’s manual for detailed information on its unique jet configurations and control options․

Temperature Settings and Adjustments

Maintaining the ideal water temperature is crucial for a comfortable and therapeutic spa experience․ Marquis spas utilize a user-friendly control panel to easily adjust the water temperature, typically ranging from 80°F to 104°F (27°C to 40°C)․ Incremental adjustments are usually made using the up and down arrow buttons on the panel․

It’s recommended to start with a lower temperature and gradually increase it to your preference․ Allow sufficient time for the water to reach the set temperature after making adjustments․ Some models offer programmable schedules, allowing you to pre-set temperatures for different times of the day․

Always prioritize safety and avoid setting temperatures too high, especially for extended soaks․

Lighting and Entertainment Systems

Marquis spas often feature integrated lighting and entertainment options to enhance your relaxation experience․ Lighting systems typically include adjustable LED lights, allowing you to customize the ambiance with various colors and brightness levels, controlled directly from the spa’s control panel․

Many models are equipped with audio systems, including Bluetooth connectivity for streaming music from your smartphone or other devices․ Some spas also include built-in speakers and waterproof remote controls for convenient operation․

Explore your spa’s specific features to fully utilize these entertainment capabilities, creating a truly immersive and enjoyable spa environment․

Maintenance Procedures

Regular upkeep is crucial for longevity! This section details filter cleaning, water drainage, shell care, and other essential steps for a pristine spa experience․

Filter Cleaning and Replacement

Maintaining a clean filter is paramount for optimal spa performance and water clarity․ Regularly rinsing the filter – ideally every two weeks with standard use – removes debris and prevents reduced water flow․ To clean, turn off the power, remove the filter, and use a garden hose with a high-pressure nozzle to spray between the pleats, dislodging any accumulated dirt․

For a deeper clean, soak the filter overnight in a filter cleaning solution specifically designed for spa filters․ This removes oils, lotions, and other contaminants․ Replace the filter cartridge every 12-18 months, or sooner if it becomes damaged or excessively worn․ A clogged or dirty filter strains the pump and can lead to costly repairs․ Always refer to your spa model’s specific instructions for filter removal and installation procedures․

Water Drainage and Refilling

Draining your Marquis spa is necessary for thorough cleaning and maintenance, typically every 3-6 months depending on usage․ Begin by turning off the power at the breaker․ Locate the drain valve (usually near the equipment compartment) and attach a garden hose to direct the water away from your home’s foundation and electrical components․

Allow the spa to drain completely, then clean the shell with a spa-specific cleaner․ Before refilling, inspect and clean the filter․ Use a pre-filter when filling to remove metals and minerals․ Add a metal sequestrant to prevent staining․ Balance the water chemistry immediately after filling, following the guidelines in the “Balancing Water Chemistry” section․ Proper water balance protects your spa’s components and ensures a pleasant bathing experience․

Shell Cleaning and Care

Maintaining your Marquis spa’s shell is crucial for its appearance and longevity․ Regularly wipe down the shell with a mild soap and water solution, using a soft cloth or sponge․ Avoid abrasive cleaners, as they can scratch the surface․ For tougher stains or waterline buildup, use a spa-specific shell cleaner, following the manufacturer’s instructions carefully․

Always test the cleaner in an inconspicuous area first; Consider using a spa cover protectant to shield the shell from UV damage and weathering․ Regularly removing debris and preventing prolonged exposure to direct sunlight will also help preserve the shell’s finish․ Proper water balance minimizes scaling and staining, simplifying shell care․

Troubleshooting Common Issues

Resolve spa problems quickly with this section! We’ll cover pump priming errors, LCD diagnostic messages, low flow issues, and heating system troubleshooting steps․

Pump Priming (Pr) Error

Understanding the “Pr” Error: The pump priming feature automatically initiates upon startup, ensuring efficient water circulation․ If the “Pr” error message appears on your Marquis spa’s LCD, it indicates the pump isn’t adequately primed․ This means air is trapped within the pump housing, hindering its ability to move water effectively․

Troubleshooting Steps: First, verify the water level is sufficient, as low levels can cause priming issues․ Next, attempt to manually prime the pump by briefly turning it off and on several times․ If the error persists, check for any obstructions in the filter or plumbing lines․ A clogged filter restricts water flow, preventing proper priming․ Finally, ensure the union connections are tightly sealed to avoid air leaks․ If these steps fail, professional service may be required․

LCD Diagnostic Messages

Decoding Your Spa’s Signals: Your Marquis spa’s LCD control panel displays diagnostic messages to alert you to potential issues․ These messages are crucial for identifying and resolving problems quickly․ Common codes, like “Pr” for pump priming (discussed elsewhere), offer specific guidance․

Interpreting the Codes: Beyond “Pr”, other messages may indicate heater malfunctions, sensor errors, or flow issues․ Refer to the complete list in your owner’s manual for a detailed explanation of each code․ Often, a simple reset – turning the spa off and on – can clear temporary errors․ However, persistent messages require further investigation․ Document the code and any accompanying symptoms before contacting a qualified technician for assistance․ Ignoring these signals can lead to more significant damage․

Low Flow Troubleshooting

Addressing Restricted Water Circulation: Low flow issues in your Marquis spa can stem from several sources, impacting jet performance and potentially damaging the heating system․ Begin by checking the filter – a clogged filter is the most frequent culprit․ Ensure it’s clean and properly seated․

Investigating Further: If the filter isn’t the issue, inspect the intake fittings and plumbing for obstructions․ Air locks can also cause low flow; attempt to prime the pump following the instructions in the manual․ Verify that all valves are fully open․ If problems persist, a failing pump or blockage within the plumbing may require professional attention․ Ignoring low flow can lead to overheating and component failure, so prompt diagnosis is essential․

Heating System Problems

Diagnosing Spa Heating Issues: When your Marquis spa isn’t heating properly, several factors could be at play․ First, confirm the thermostat is set to the desired temperature and the system is enabled․ Check for error messages on the LCD panel, as these provide valuable diagnostic clues․

Potential Causes & Solutions: A common issue is a tripped high-limit switch, often caused by low water levels or restricted flow․ Inspect the heater element for scaling or corrosion, which reduces efficiency․ A faulty sensor or relay can also prevent heating․ Caution: Electrical components should only be inspected by qualified technicians․ Prolonged heating issues can damage the heater and require costly repairs, so address them promptly․

Advanced Features & Components

Explore Marquis innovations! Discover the benefits of the ozonator system, available enhancements, and detailed information regarding the Vector21, Epic, and E-Series․

Marquis Ozonator System

The Marquis ozonator system significantly enhances water quality and reduces reliance on traditional sanitizers․ This advanced oxidation process utilizes ozone (O3) to destroy bacteria, viruses, and organic contaminants, resulting in remarkably clear and fresh-smelling spa water․

Ozone is generated from oxygen in the air and is injected into the spa water via a venturi or direct injection system․ It effectively oxidizes pollutants, leaving no harmful byproducts․ The ozonator works in conjunction with your chosen sanitizer, allowing for lower chemical usage and a more enjoyable spa experience․

Regular maintenance of the ozonator, as outlined in your spa’s specific manual, is crucial for optimal performance․ This includes checking the venturi or injection system for blockages and ensuring proper airflow to the ozone generator․ A properly functioning ozonator contributes to a healthier and more sustainable spa environment․

Spa Enhancements & Accessories

Elevate your Marquis spa experience with a range of enhancements and accessories designed for comfort, convenience, and enjoyment․ Consider options like premium spa covers to maximize energy efficiency and protect your investment, or aromatherapy systems to create a personalized sensory retreat․

Additional accessories include comfortable headrests, LED lighting packages for ambiance, and Bluetooth audio systems for immersive entertainment․ Marquis also offers specialized water care products, including cleaners and protectants, to maintain your spa’s pristine condition․

Explore options for spa-side tables, towel racks, and steps for added convenience․ Remember to consult your Marquis dealer or the official website for a complete catalog of compatible enhancements and accessories, ensuring a perfect fit for your spa model and lifestyle․

Understanding the Vector21 Series

The Marquis Vector21 Series represents a significant advancement in hot tub design, focusing on energy efficiency, performance, and user experience․ This series utilizes a high-efficiency heating system and full-foam insulation to minimize energy consumption, reducing operating costs․

Vector21 spas feature a unique water filtration system and advanced jet configurations for targeted hydrotherapy․ The control panel is intuitive and user-friendly, allowing for easy adjustment of temperature, jets, and lighting;

Understanding the specific features of your Vector21 model – including jet placement and control functions – is crucial for maximizing its benefits․ Refer to your model’s dedicated section within this manual for detailed information and troubleshooting guidance specific to the Vector21 series․

Epic and E-Series Troubleshooting

Marquis Epic and E-Series spas offer luxurious features, but occasional issues may arise․ Common problems include pump priming errors (indicated by “Pr” on the display) and various LCD diagnostic messages requiring attention․

When encountering an error, first consult the LCD diagnostic message section of this manual for specific guidance․ For pump priming, ensure the water level is adequate and the filter is clean․ Low flow issues can often be resolved by checking for clogged filters or blocked jets․

If problems persist, refer to the detailed troubleshooting charts tailored to the Epic and E-Series models․ Remember to always prioritize safety and disconnect power before attempting any repairs․

Safety Precautions

Prioritize safety with your Marquis spa! Always practice electrical safety and handle chemicals carefully, following all guidelines for a relaxing experience․

Electrical Safety

Crucially, your Marquis spa operates on high voltage electricity․ Never attempt to repair electrical components yourself; always contact a qualified technician․ Ensure the spa is properly grounded to prevent shock hazards․ Before performing any maintenance, disconnect power at the breaker․

Inspect the power cord regularly for damage, and never use an extension cord․ The spa’s electrical compartment should only be accessed by authorized personnel․ Avoid using electrical appliances near the spa․

Adhere to all local electrical codes and regulations․ A Ground Fault Circuit Interrupter (GFCI) is essential for safety and should be tested monthly․ Remember, water and electricity are a dangerous combination – prioritize caution!

Chemical Handling Safety

Maintaining proper water chemistry is vital, but requires careful handling of spa chemicals․ Always add chemicals to water, never water to chemicals, to avoid dangerous reactions․ Wear protective eyewear and gloves when handling any spa chemical․ Ensure adequate ventilation during chemical additions․

Never mix different chemicals together, as this can create hazardous fumes or explosions; Store chemicals in a cool, dry, and well-ventilated area, out of reach of children and pets․ Follow the manufacturer’s instructions on each chemical label precisely․

Rinse any spills immediately with plenty of water․ Properly dispose of empty chemical containers․ Consider using a chemical starter kit and following recommended dosage guidelines․

krmf706ess01 manual

KitchenAid KRMF706ESS01 Refrigerator: A Comprehensive Guide

This guide offers a complete overview of the KitchenAid KRMF706ESS01, covering installation, operation, and maintenance, referencing the PDF owner’s manual and quickstart guide.

The KitchenAid KRMF706ESS01 is a 36-inch, multi-door, freestanding refrigerator boasting a generous 25.8 cu. ft. capacity and a sophisticated platinum interior design. This model combines innovative features with KitchenAid’s renowned durability, offering a premium refrigeration experience. Understanding its functionalities begins with accessing crucial documentation – the owner’s manual, installation guide, and quickstart guide, all available in PDF format.

These resources detail everything from initial setup and control panel operation to troubleshooting common issues. The manual provides in-depth explanations of features, while the installation guide ensures proper setup. The quickstart guide offers a rapid overview for immediate use. Familiarizing yourself with these PDF documents is essential for maximizing the performance and longevity of your KRMF706ESS01 refrigerator.

Understanding the Refrigerator’s Features

The KitchenAid KRMF706ESS01 offers a suite of features designed for optimal food preservation and convenience. Key functionalities include a precise temperature management system, an advanced ice and water dispenser, and customizable storage options. The user manual (available as a PDF) details how to utilize these features effectively. It explains the control panel’s functions, temperature adjustment procedures, and water filter status checks.

Furthermore, the manual outlines the refrigerator’s internal components and their specific purposes. Understanding these features, as described in the PDF documentation, allows users to tailor the refrigerator’s performance to their individual needs, ensuring food stays fresher for longer and operation is streamlined.

Installation and Setup

Proper installation, guided by the installation guide (PDF), is crucial for optimal performance of your KitchenAid KRMF706ESS01 refrigerator.

Unpacking and Initial Inspection

Carefully unpack your new KitchenAid KRMF706ESS01 refrigerator, ensuring all packaging materials are removed from inside and outside the unit; Thoroughly inspect the appliance for any visible damage that may have occurred during shipping.

Check for dents, scratches, or broken parts. Verify that all included accessories, as listed in the owner’s manual (PDF), are present. Pay close attention to the water line connection components and ice maker parts.

If any damage is detected, immediately contact KitchenAid support and the retailer. Do not attempt to operate a damaged appliance. Retain all packaging materials until you are satisfied with the condition of the refrigerator. Refer to the installation guide for detailed unpacking instructions.

Installing the Water Line

Properly installing the water line is crucial for the ice maker and water dispenser to function correctly on your KitchenAid KRMF706ESS01 refrigerator. Consult the installation guide (PDF) for detailed instructions and diagrams. Ensure the water supply is turned off before beginning.

Use a new, approved water line kit – copper or PEX tubing is recommended. Connect the tubing to a cold water supply, following local plumbing codes. Securely connect the water line to the refrigerator’s water inlet valve.

Check for leaks after turning the water supply back on. Flush the water line for several minutes to remove any air or debris, as outlined in the user manual.

Connecting to Power

Before connecting your KitchenAid KRMF706ESS01 refrigerator to power, verify the voltage requirements match your home’s electrical supply – typically 115V/60Hz. Refer to the installation guide (PDF) for specific electrical safety guidelines.

Plug the refrigerator directly into a grounded three-prong outlet. Avoid using extension cords or adapters, as they can pose a safety hazard. Ensure the outlet is easily accessible for disconnection in case of emergencies.

Once connected, allow the refrigerator several hours to reach its optimal operating temperature. Consult the owner’s manual for initial setup procedures and temperature adjustments.

Operating Instructions

Explore the KRMF706ESS01’s features using the control panel, adjusting temperatures, and utilizing the ice and water dispenser as detailed in the user guide.

Using the Control Panel

The KitchenAid KRMF706ESS01’s control panel allows precise temperature adjustments for both the refrigerator and freezer compartments. Refer to your owner’s manual for detailed instructions on navigating the settings. The panel displays current temperatures and allows you to activate features like Max Cool or Ice Maker On/Off.

Understanding the icons is crucial for efficient operation; the guide explains each symbol’s function. You can also use the control panel to diagnose certain issues, as it may display error codes. Remember to consult the troubleshooting section of the manual if any codes appear. The control panel’s responsiveness ensures optimal performance and convenient control over your refrigerator’s functions, enhancing your overall experience with the KRMF706ESS01.

Adjusting Temperature Settings

The KitchenAid KRMF706ESS01 allows for precise temperature control via the control panel. The manual details how to adjust both refrigerator and freezer temperatures independently. Recommended settings are typically 37°F (3°C) for the refrigerator and 0°F (-18°C) for the freezer, but adjustments can be made based on food storage needs.

Use the up and down arrows on the control panel to modify the temperatures. Allow 24 hours for changes to take effect. The guide emphasizes avoiding extreme temperature settings, which can impact food preservation and energy efficiency. Regularly check temperatures with a thermometer to ensure optimal performance, referencing the manual for guidance on proper monitoring techniques.

Ice and Water Dispenser Operation

The KRMF706ESS01’s ice and water dispenser, detailed in the manual, offers convenient access to chilled water and ice. To dispense water, press a glass against the paddle; for ice, press the ice type selector to choose between cubed or crushed ice. The guide highlights the importance of using appropriate glassware.

Ensure the water supply is connected and the filter is functioning correctly for optimal performance. The manual instructs users to check the water filter status regularly. If the dispenser isn’t working, consult the troubleshooting section of the manual, which covers potential issues like a blocked water line or a deactivated dispenser lock feature.

Maintenance and Care

Regular cleaning, water filter replacements (as per the manual), and condenser coil cleaning ensure optimal performance and longevity of your KRMF706ESS01 refrigerator.

Cleaning the Interior

To maintain a hygienic and fresh refrigerator environment with your KitchenAid KRMF706ESS01, regular interior cleaning is essential. Begin by disconnecting the refrigerator from the power supply. Remove all food items, shelves, drawers, and bins. Wash these removable parts with warm, soapy water, then rinse and dry thoroughly before replacing them.

For the interior walls and surfaces, use a mild detergent solution and a soft cloth. Avoid abrasive cleaners, as they can damage the surfaces. Pay attention to spills and stains, cleaning them promptly to prevent them from setting. Rinse the interior with clean water and dry with a soft cloth. A baking soda solution can help neutralize odors. Refer to the owner’s manual for specific cleaning recommendations and precautions related to your KRMF706ESS01 model.

Replacing the Water Filter

Maintaining optimal water quality in your KitchenAid KRMF706ESS01 refrigerator requires regular water filter replacement. The manual recommends changing the filter every six months, or sooner if indicated by the filter status indicator on the control panel. Locate the water filter, typically found inside the refrigerator compartment or in the base grille.

Before replacing, shut off the water supply to the refrigerator. Gently twist and remove the old filter, following the directional arrows on the filter housing. Lubricate the O-rings of the new filter with water, then insert it firmly into the housing until it locks into place. Turn the water supply back on and flush the system by dispensing water for several minutes to remove any air or debris. Consult the owner’s guide for detailed instructions specific to your KRMF706ESS01.

Cleaning the Condenser Coils

Regularly cleaning the condenser coils of your KitchenAid KRMF706ESS01 refrigerator is crucial for maintaining efficient cooling performance. Located on the back or underneath the refrigerator, these coils dissipate heat. Dust and debris accumulation hinders this process, forcing the compressor to work harder.

Before cleaning, unplug the refrigerator from the power outlet. Use a vacuum cleaner with a brush attachment to gently remove dust and dirt from the coils. Avoid bending or damaging the coils during cleaning; The manual recommends cleaning them at least twice a year, or more frequently if you have pets or live in a dusty environment. Proper coil maintenance, as detailed in the owner’s guide, ensures optimal energy efficiency and prolongs the refrigerator’s lifespan.

Troubleshooting Common Issues

Refer to the user manual or guide for solutions to problems like cooling failures, ice maker malfunctions, or a non-functioning water dispenser on the KRMF706ESS01.

Refrigerator Not Cooling

If your KitchenAid KRMF706ESS01 refrigerator isn’t cooling, consult the user manual for detailed troubleshooting steps. First, verify the temperature settings on the control panel are appropriately adjusted; ensure they haven’t been accidentally altered. Check if the condenser coils are clean, as dust buildup restricts airflow and reduces cooling efficiency – regular cleaning is vital.

Confirm the door seals are intact and creating a tight closure; damaged seals allow warm air to enter. Also, examine the condenser fan to ensure it’s operating correctly. A malfunctioning fan hinders heat dissipation. The manual provides diagrams to locate these components. If issues persist, review the PDF for specific error codes displayed on the control panel, offering further diagnostic clues.

Ice Maker Not Producing Ice

Should your KitchenAid KRMF706ESS01 ice maker fail to produce ice, the user manual is your primary resource. Begin by verifying the ice maker is switched ‘on’ within the refrigerator’s control panel settings. Confirm the water supply line is correctly connected and the water supply valve is fully open. A frozen water line can also prevent ice production; inspect for any ice blockages.

Check the water filter; a clogged filter restricts water flow. Refer to the manual for replacement instructions. Ensure the freezer temperature is sufficiently cold – typically around 0°F (-18°C). The PDF version of the manual details troubleshooting steps for common ice maker issues, including potential sensor failures and diagnostic tests.

Water Dispenser Not Working

If the water dispenser on your KitchenAid KRMF706ESS01 isn’t functioning, consult the user manual for guidance. First, ensure the water supply valve is fully open and the water line isn’t kinked or frozen. A clogged water filter is a frequent cause; the manual details how to check the filter status and replace it.

Verify the dispenser lock feature isn’t activated on the control panel. The PDF version of the manual provides diagrams illustrating the dispenser components. Low freezer temperatures can sometimes affect water pressure; ensure the freezer isn’t excessively cold. Refer to the troubleshooting section within the guide for further diagnostic steps.

Understanding the User Manual & Guides

Access the KitchenAid KRMF706ESS01 manual (PDF), installation guide (PDF), and quickstart guide (PDF) for comprehensive support and operational instructions.

Accessing the Owner’s Manual (PDF)

The KitchenAid KRMF706ESS01 owner’s manual, available as a downloadable PDF, is your primary resource for detailed information about your refrigerator. This comprehensive document covers everything from initial setup and daily operation to troubleshooting and safety precautions. You can find the PDF version online through the KitchenAid website or various appliance support portals.

The manual provides step-by-step instructions for utilizing all features, including the control panel, ice and water dispenser, and temperature settings. It also includes valuable insights into proper maintenance, such as cleaning procedures and water filter replacement schedules. Downloading and reviewing the manual ensures you maximize your refrigerator’s performance and longevity. It’s a crucial step for a seamless ownership experience.

Utilizing the Installation Guide (PDF)

The KitchenAid KRMF706ESS01 Installation Guide, accessible as a PDF, is essential for a correct and safe setup. This document details the necessary steps for unpacking, positioning, and connecting your new refrigerator. It provides clear instructions regarding water line installation, ensuring proper connection for the ice maker and water dispenser.

The guide also outlines electrical requirements and safety guidelines to prevent damage or hazards during installation. Following the PDF’s directions precisely guarantees optimal performance and prevents potential issues. Referencing the Installation Guide alongside the owner’s manual ensures a smooth and trouble-free experience, maximizing the lifespan and efficiency of your KRMF706ESS01 refrigerator. Proper installation is key!

Quickstart Guide Overview (PDF)

The KitchenAid KRMF706ESS01 Quickstart Guide, available as a PDF download, provides a streamlined introduction to your refrigerator’s core functionalities. This concise document focuses on the essential steps for immediate use, bypassing detailed setup procedures. It quickly explains how to adjust temperature settings, operate the ice and water dispenser, and navigate the control panel.

The PDF highlights key features and offers a rapid understanding of daily operation. While not a replacement for the comprehensive owner’s manual, the Quickstart Guide is perfect for a fast overview. It’s ideal for users wanting to quickly familiarize themselves with the refrigerator’s basic functions before diving into the more detailed instructions within the full manual.

Parts and Diagrams

Locate your refrigerator’s model and serial numbers, typically found inside the unit, for accurate parts identification and referencing the manual diagrams.

Locating Model and Serial Numbers

Identifying your KitchenAid KRMF706ESS01 refrigerator’s model and serial numbers is crucial for accessing support, ordering replacement parts, and referencing the correct documentation. These vital identifiers are typically located on a sticker or plate inside the refrigerator compartment. Specifically, check the interior side wall – often the left side – for a label containing this information.

The model number, KRMF706ESS01, confirms the specific features and design of your appliance. The serial number is a unique identifier for your individual unit, essential for warranty claims and service requests. Having both numbers readily available streamlines any interaction with KitchenAid customer support or authorized service centers. Referencing these numbers within the owner’s manual (PDF) ensures you’re accessing the correct diagrams and troubleshooting steps.

Identifying Key Refrigerator Components

Understanding the core components of your KitchenAid KRMF706ESS01 refrigerator simplifies maintenance and troubleshooting. Key elements include the evaporator and condenser coils, responsible for cooling, and the compressor, which circulates refrigerant. The control panel manages temperature settings and features, while the ice maker and water dispenser provide convenient access to chilled resources.

The interior boasts adjustable shelves, crisper drawers for optimal produce storage, and door bins for organized access. Familiarize yourself with the location of the water filter, crucial for maintaining water quality. Referencing the parts diagram within the owner’s manual (PDF) will visually aid in identifying each component, assisting with repairs or when contacting KitchenAid support. Knowing these parts enhances your appliance experience.

Safety Information

Always heed important safety precautions detailed in the manual (PDF), including electrical guidelines, to ensure safe operation of your KitchenAid KRMF706ESS01 refrigerator.

Important Safety Precautions

Before operating your KitchenAid KRMF706ESS01 refrigerator, carefully review the safety precautions outlined in the owner’s manual (available as a PDF download). Disconnect power before cleaning or performing maintenance. Avoid storing flammable materials near the appliance.

Do not attempt to repair the refrigerator yourself; contact qualified service personnel. Ensure proper grounding to prevent electrical shock, as detailed in the installation guide. Keep ventilation openings clear of obstructions for efficient operation.

Never allow children to operate or play with the refrigerator. Be cautious when handling the glass shelves and doors. Always follow the water line installation instructions to prevent leaks. Refer to the manual for specific warnings regarding refrigerant and disposal procedures.

Electrical Safety Guidelines

To ensure safe operation of your KitchenAid KRMF706ESS01 refrigerator, adhere to these electrical safety guidelines, detailed within the owner’s manual PDF. The appliance must be properly grounded; never modify the power cord or plug. Avoid using extension cords or multi-outlet adapters.

Always disconnect the refrigerator from the power supply before cleaning or servicing, as outlined in the installation instructions. If the power cord is damaged, it must be replaced by a qualified technician. Ensure the voltage and frequency match the specifications on the appliance’s rating plate.

Do not operate the refrigerator in damp or wet conditions. Regularly inspect the power cord for damage. Follow all local electrical codes during installation. Refer to the manual for specific grounding instructions and safety warnings.

Warranty Information

Your KitchenAid KRMF706ESS01 warranty coverage details are found in the owner’s manual PDF; contact KitchenAid support for claims or assistance.

Understanding Your Warranty Coverage

KitchenAid provides a warranty for the KRMF706ESS01 refrigerator, details of which are comprehensively outlined within the owner’s manual, available as a PDF download. This document specifies the duration of coverage for parts and labor, typically differing for various components. The warranty generally covers defects in materials and workmanship under normal household use.

It’s crucial to register your appliance to ensure seamless warranty service. The manual clarifies what is not covered, such as accidental damage, misuse, or commercial use. Keep your proof of purchase readily available, as it’s required for any warranty claim. Contacting KitchenAid support, as detailed in the manual, is the first step to initiate a claim and understand the specific terms applicable to your KRMF706ESS01.

Contacting KitchenAid Support

KitchenAid offers multiple avenues for support regarding your KRMF706ESS01 refrigerator, detailed within the owner’s manual – accessible as a PDF. The manual provides a dedicated customer service phone number for direct assistance with troubleshooting, warranty claims, or parts inquiries. Their website also features an extensive FAQ section and online chat support for quick resolutions.

Before contacting support, having your model number (KRMF706ESS01) and serial number, located inside the refrigerator compartment, is essential. These details expedite the support process. The manual may also list authorized service centers in your area for in-person repairs. Utilizing these resources ensures efficient assistance and maximizes your appliance’s performance and longevity.

kidde i12060a manual

Kidde i12060A Smoke Alarm: A Comprehensive Guide

This guide details the Kidde i12060A, an AC wire-in ionization smoke alarm supporting up to 24 interconnected devices, featuring 9V battery backup and Hush™ control․

Refer to the supplied user guide for interconnect compatibility, wiring instructions adhering to NFPA limits, and warranty details for this essential safety device․

The Kidde i12060A is a widely utilized AC-powered, single or multiple station ionization smoke alarm designed to provide early warning of fire hazards within your home․ This model, detailed in manual P/N 820-0394-EN Rev․ G, offers reliable protection and is capable of interconnecting with up to 24 other compatible Kidde devices, enhancing safety throughout the property․

Featuring a 9-volt battery backup, the i12060A ensures continued operation even during power outages․ A key feature is the Hush™ control, allowing temporary silencing of nuisance alarms – a practical benefit for situations like cooking smoke․ The alarm is designed for straightforward installation, though adherence to NFPA initiating device limits during wiring is crucial, as outlined in the user guide․

This comprehensive guide will walk you through installation, operation, maintenance, and troubleshooting, ensuring you maximize the effectiveness of your Kidde i12060A smoke alarm․ Always consult the full user manual available at Shareddocs for complete details․

Key Features and Specifications

The Kidde i12060A smoke alarm boasts several key features for enhanced fire safety․ It utilizes an ionization sensor, effective at detecting fast-flaming fires․ Power is supplied via a standard AC connection, supplemented by a 9V battery backup for uninterrupted protection during power failures․

A standout specification is its interconnectivity – the alarm can link with up to 24 other compatible Kidde devices, creating a whole-house alarm system․ The integrated Hush™ control allows temporary silencing of nuisance alarms, preventing unnecessary disruptions․ The model number is i12060A, currently at Revision G․

Important specifications include adherence to NFPA initiating device limits during wiring, detailed in the user manual․ The alarm is designed for both single and multiple station installations․ For detailed information regarding compatible models and brands for interconnection, always refer to the user guide supplied with your Kidde product․

Installation Guide

Proper installation requires adherence to NFPA standards, careful wiring, compatible interconnectivity, and appropriate mounting locations, ensuring optimal performance of the Kidde i12060A․

Wiring Instructions (NFPA Initiating Device Limits)

Wiring the Kidde i12060A necessitates strict adherence to National Fire Protection Association (NFPA) initiating device limits to ensure system reliability and compliance․ The user guide explicitly directs referencing it for compatible models, brands, and devices when establishing interconnected systems․

Crucially, the manual emphasizes consulting the wiring instructions detailed within section 3 for specific NFPA limitations․ This is paramount for electricians and installers․ Proper wiring involves connecting the alarm to a 120V AC power source, with the 9V battery serving as a backup․

Furthermore, if a surge protector is incorporated, it must be installed on a dedicated 50A breaker, following the manufacturer’s guidelines․ Incorrect wiring can compromise the alarm’s functionality and potentially void the warranty․ Always prioritize safety and code compliance during installation․

Interconnect Compatibility

The Kidde i12060A is designed for interconnected operation, allowing multiple smoke alarms to activate simultaneously upon detecting smoke, enhancing whole-house protection․ However, compatibility isn’t universal․ The user manual stresses the importance of verifying interconnect compatibility before installation․

Specifically, the manual directs users to the supplied guide for a list of compatible models, brands, and devices․ Interconnecting with non-compatible units can lead to system failure and reduced safety․ Up to 24 devices can be interconnected, creating a robust network․

Successful interconnection requires proper wiring, adhering to NFPA standards, and ensuring all units are powered․ Careful planning and referencing the compatibility list are essential for a reliable interconnected smoke alarm system․ Always prioritize a fully functional, interconnected network for optimal safety․

Mounting Location Requirements

Proper placement is crucial for the effectiveness of the Kidde i12060A smoke alarm․ Install on every level of your home, inside and outside bedrooms․ Avoid installing in kitchens, bathrooms, or near steam sources due to potential nuisance alarms․

The manual recommends mounting alarms on the ceiling or high on walls, ensuring they are at least 4 inches from walls and corners․ Avoid locations with obstructed airflow, such as near doorways or air vents․ Sloped ceilings require mounting within 3 feet of the peak․

Consider the specific hazards in each area․ For example, bedrooms need alarms both inside and outside for comprehensive protection․ Following these guidelines maximizes the alarm’s ability to detect smoke quickly and reliably, safeguarding your home and family․

Tools Required for Installation

Installing the Kidde i12060A smoke alarm requires a few essential tools to ensure a safe and secure connection․ A Phillips head screwdriver is necessary for mounting the bracket and connecting the wiring․ Wire strippers are crucial for preparing the electrical wires for connection, ensuring proper contact․

Additionally, a voltage tester is highly recommended to verify the power is OFF before working with any wiring․ Pliers can be helpful for bending or manipulating wires as needed․ A drill with appropriate drill bits may be required if mounting screws don’t easily penetrate the ceiling or wall surface․

Finally, a ladder is essential for reaching the mounting location safely․ Always prioritize safety and consult a qualified electrician if you are uncomfortable working with electrical wiring․ Proper tools contribute to a successful and secure installation․

Operation and Functionality

The Kidde i12060A features a Hush™ control for silencing nuisance alarms, utilizes ionization sensing, and includes a 9V battery backup for continuous protection․

Regular testing ensures optimal performance, while clear alarm indications alert occupants to potential fire hazards effectively․

Hush™ Control Feature

The Kidde i12060A incorporates a Hush™ control, a valuable feature designed to temporarily silence nuisance alarms; This is particularly useful when cooking or steam triggers the smoke alarm, preventing unwanted disruptions․

Activating the Hush™ feature effectively reduces the alarm’s sensitivity for a short period, typically around 8-10 minutes, allowing for ventilation of the nuisance source․ It’s crucial to understand that the Hush™ button only silences the alarm temporarily; it does not disable the smoke detection functionality․

To utilize the Hush™ control, press the button on the alarm face when a non-emergency situation causes activation․ The alarm will briefly silence, then resume normal monitoring after the set time․ Always investigate the cause of the alarm before and after using the Hush™ feature to ensure safety;

Remember, the Hush™ feature is not intended for use with actual fires; it’s solely for temporary relief from nuisance alarms․

Alarm Indication and Types

The Kidde i12060A utilizes a distinct alarm pattern to indicate the presence of smoke․ Upon detection, the alarm emits a loud, pulsating horn sound, designed to alert occupants quickly and effectively․ This ionization smoke alarm is particularly adept at detecting fast-flaming fires․

The alarm’s sound is intentionally loud to ensure audibility throughout the home, even for those with impaired hearing․ However, it’s important to note that the alarm sound may vary slightly depending on the surrounding environment and any interconnectivity with other devices․

Beyond the primary alarm, the i12060A also provides low-battery warnings, indicated by a brief, intermittent chirp sound․ This chirp serves as a reminder to replace the 9V battery backup promptly, ensuring continuous protection․ Regular testing, as outlined in the manual, confirms proper functionality․

Understanding these alarm indications is crucial for a swift and appropriate response to potential fire hazards․

Battery Backup System

The Kidde i12060A incorporates a 9-volt battery backup system, providing continued operation even during power outages․ This ensures uninterrupted fire protection, a critical safety feature․ The alarm will automatically switch to battery power when AC power is lost, maintaining its ability to detect and alert you to smoke․

However, the battery is not a permanent power source․ The alarm will periodically chirp to indicate a low battery condition, typically around 30 days before complete depletion․ This provides ample warning to replace the battery and restore full functionality․

It’s crucial to use a fresh, high-quality 9-volt battery for optimal performance․ Avoid mixing old and new batteries, and always follow the battery replacement instructions detailed in the user manual․ Regular testing, with the battery installed, verifies the backup system’s effectiveness․

Proper battery maintenance is essential for reliable fire protection․

Testing the Smoke Alarm

Regular testing of your Kidde i12060A smoke alarm is paramount to ensuring its operational readiness․ It’s recommended to test the alarm at least once a month․ To initiate a test, press and hold the test button located on the alarm’s housing until a loud, piercing alarm sound is emitted․

This test verifies the functionality of the electronic circuitry, the horn, and, if installed, the battery backup․ If the alarm does not sound upon pressing the test button, investigate the issue immediately․ Check the battery first, ensuring it’s properly installed and has sufficient charge․

If the alarm still fails to respond, verify the AC power supply is functioning correctly․ If problems persist, consult the troubleshooting section of the user manual or contact Kidde’s warranty service department for assistance․ Consistent testing provides peace of mind․

Remember, testing confirms the alarm’s ability to alert you in an emergency․

Maintenance and Troubleshooting

Regular cleaning, battery replacements, and addressing common issues are vital for optimal performance of the Kidde i12060A smoke alarm, ensuring reliable safety․

Understanding alarm signals and consulting the user manual will help resolve problems and maintain consistent protection․

Regular Cleaning Procedures

To maintain the Kidde i12060A smoke alarm’s responsiveness, periodic cleaning is crucial․ Dust, dirt, and insects can accumulate within the alarm, potentially causing false alarms or hindering its ability to detect smoke effectively․ It is recommended to clean the alarm at least every six months, or more frequently in dusty environments․

Begin by disconnecting the alarm from the power source – either by switching off the circuit breaker or removing the battery․ Use a soft brush or the brush attachment of a vacuum cleaner to gently remove any visible dust or debris from the exterior of the alarm, including the vents․ Avoid using water, cleaning solutions, or detergents, as these can damage the internal components․

For stubborn dirt, a slightly damp cloth may be used, but ensure the alarm is completely dry before reconnecting it to the power source․ Never disassemble the alarm for cleaning, as this could compromise its functionality and void the warranty․ Consistent cleaning ensures reliable operation and extends the lifespan of your Kidde smoke alarm․

Battery Replacement Instructions

The Kidde i12060A smoke alarm utilizes a 9-volt battery as a backup power source․ The alarm will typically chirp to indicate a low battery condition, signaling the need for replacement․ It’s crucial to replace the battery promptly, even if the alarm continues to operate on AC power, to ensure continuous protection during power outages․

To replace the battery, locate the battery compartment, usually on the side or back of the alarm․ Gently open the compartment and remove the old battery․ Install a fresh 9-volt battery, ensuring correct polarity as indicated inside the compartment․ Close the battery compartment securely․

After replacing the battery, test the alarm by pressing the test button to verify proper functionality․ It’s recommended to replace the battery at least once a year, or whenever the low battery chirp is heard․ Using a high-quality battery will maximize the alarm’s reliability and provide peace of mind․

Troubleshooting Common Issues

If your Kidde i12060A alarm is chirping, first check the battery․ A low battery is the most frequent cause․ Replace it with a fresh 9-volt․ If chirping persists after battery replacement, dust or debris might be interfering with the sensor․ Gently vacuum around the alarm’s vents․

Nuisance alarms, triggered by cooking or steam, can be silenced using the Hush™ control․ Press the Hush™ button to temporarily quiet the alarm․ If the alarm frequently triggers despite using Hush™, consider relocating it further from the source of interference․

If the alarm fails to test properly, ensure it’s receiving AC power and the battery is correctly installed․ If problems continue, consult the full user manual available online at SharedDocs or contact Kidde’s Warranty Service Department for assistance․ Remember, regular testing is vital!

Understanding Alarm Signals

The Kidde i12060A utilizes a distinct alarm signal to indicate a potential fire․ This is a loud, pulsating horn sound, designed to wake occupants․ It’s crucial to familiarize yourself and your family with this sound during regular testing․

Chirping sounds, as previously mentioned, typically signify a low battery condition․ However, consistent chirping even after battery replacement could indicate a malfunction requiring further investigation․ The alarm may also chirp briefly during self-testing․

Interconnected alarms will all sound when one detects smoke, providing a comprehensive warning throughout the home․ Understanding these signals, and responding promptly, is paramount for safety․ Refer to the complete user manual for detailed explanations and emergency procedures․ Always prioritize evacuation if the alarm sounds!

Safety Information

Prioritize immediate evacuation upon alarm activation; never investigate the source․ Install alarms per guidelines, ensuring proper placement for optimal detection and family safety․

Important Safety Precautions

Always prioritize the safety of yourself and your family․ Upon hearing the distinct alarm signal from the Kidde i12060A, immediately evacuate all occupants from the building․ Do not attempt to identify the source of the alarm before ensuring everyone is safely outside․

Regularly test the alarm functionality, at least monthly, using the test button․ This confirms the electronic circuitry and horn are operating correctly․ Never disable the alarm to prevent nuisance triggering; address the cause instead․

Ensure proper installation adhering to local codes and the provided manual․ Incorrect wiring or placement can compromise the alarm’s effectiveness․ This device is designed to alert, not extinguish fires․ Always have a fire escape plan and practice it frequently with all household members․

Remember, smoke alarms are life-saving devices, but they are not foolproof․ Maintain vigilance and practice fire safety habits to minimize risks․

Recommended Smoke Alarm Placement

Install the Kidde i12060A on every level of your home, including the basement․ Within each sleeping area, place a smoke alarm inside the bedroom and outside in the hallway․ This ensures early warning during sleeping hours, when risks are highest․

Mount alarms at least 10 feet away from cooking appliances to minimize false alarms caused by normal cooking smoke․ Avoid placing them near windows, doors, or air vents, as drafts can interfere with smoke detection․

For sloped ceilings, position the alarm within 3 feet of the peak but not within the uppermost 3 feet․ On flat ceilings, mount the alarm flush with the ceiling․ Consider interconnected alarms for whole-house protection, ensuring all alarms sound when one detects smoke․

Regularly review and adjust placement as needed, especially after renovations or changes to your home’s layout․

Limitations of Smoke Alarms

Smoke alarms are not foolproof and have limitations․ Ionization alarms, like the Kidde i12060A, may detect fast-flaming fires more quickly but can be slower to respond to smoldering fires․ They are not suitable for all types of fires․

These devices cannot prevent fires․ Regular maintenance, including testing and battery replacement, is crucial for optimal performance․ Smoke alarms may not function correctly if the battery is low or missing․

Environmental factors, such as excessive dust or humidity, can affect sensitivity․ False alarms can occur due to cooking fumes, steam, or other non-fire related particles․ Always investigate alarms promptly, but never disable them․

This alarm is not a substitute for careful fire prevention practices․ Develop and practice a home escape plan with all household members․

Warranty Information

Kidde warrants this smoke alarm against defects in material and workmanship, offering repair or replacement upon proof of purchase and prepaid shipping․

Contact the Warranty Service Department for assistance, ensuring proper documentation accompanies the returned device for efficient processing․

Kidde Warranty Coverage

Kidde extends a limited warranty covering defects in materials, workmanship, and design of the i12060A smoke alarm․ This warranty assures customers that if a defect arises during the warranty period, Kidde will, at its discretion, repair or replace the defective alarm or component without charge․

To qualify for warranty service, the customer must provide proof of the original date of purchase․ This can be a receipt or other documentation clearly indicating the purchase date․ The customer is also responsible for covering the costs of shipping the alarm to the Kidde Warranty Service Department, as well as the return shipping costs if repair or replacement is authorized․

The warranty does not cover damage resulting from improper installation, misuse, abuse, neglect, or unauthorized modifications․ It also excludes damage caused by external factors such as power surges, accidents, or natural disasters․ This warranty is applicable to the original purchaser and does not transfer to subsequent owners․

Warranty Service Department Contact

For all warranty claims and service inquiries regarding your Kidde i12060A smoke alarm, please contact the Kidde Warranty Service Department directly․ Ensure you have your proof of purchase readily available, including the date of purchase, as this is required for processing your claim efficiently․

To initiate a warranty request, you will need to send the defective smoke alarm, along with the proof of purchase, postage prepaid, to the address provided by Kidde․ Return shipping costs will be the responsibility of the customer unless otherwise specified by Kidde․

While a specific phone number or email address wasn’t explicitly provided in the available documentation, referencing the user’s guide supplied with the Kidde product is crucial for obtaining the most current contact information․ This ensures you reach the correct department and receive accurate assistance with your warranty claim․

Technical Details

The Kidde i12060A (Rev․ G) operates on AC power with a 9V battery backup, utilizing ionization sensing, and supports a maximum of 24 interconnected devices․

Model Number and Revision (i12060A, Rev․ G)

The specific model discussed within this documentation is the Kidde i12060A smoke alarm․ Identifying the correct model number is crucial for accessing the appropriate user guides, troubleshooting information, and ensuring compatibility with interconnected systems․ This particular unit is designated as Revision G (Rev․ G), indicating a specific iteration of the product’s design and features․

Revision history often reflects improvements based on user feedback, updated safety standards, or component enhancements․ When contacting Kidde’s Warranty Service Department or seeking support, always provide both the model number (i12060A) and the revision (Rev․ G) to expedite the process․ This ensures that support personnel can accurately address your specific concerns and offer the most relevant assistance; Referencing the correct revision also guarantees you are utilizing the most up-to-date information available for your device․

Power Source (AC with 9V Battery Backup)

The Kidde i12060A smoke alarm primarily operates on a standard AC (Alternating Current) power source, providing continuous protection when connected to a functioning household electrical circuit․ However, a critical safety feature is its integrated 9-volt battery backup system․ This backup ensures the alarm remains operational even during power outages, maintaining crucial fire detection capabilities when you need them most․

The battery backup serves as a redundant power supply, automatically activating upon loss of AC power․ Regular testing of both the AC power and the battery backup is highly recommended, as outlined in the user manual․ It’s important to note that the battery doesn’t replace AC power; it’s a temporary solution․ Prompt battery replacement, as detailed in the maintenance section, is vital for reliable performance and continued safety․

Sensor Type (Ionization)

The Kidde i12060A utilizes an ionization smoke sensor, a technology known for its responsiveness to fast-flaming fires․ This type of sensor contains a small amount of radioactive material between two electrically charged plates․ When smoke particles enter the chamber, they disrupt the ionization process, triggering the alarm․ Ionization sensors are generally more effective at detecting smaller smoke particles produced by rapidly developing fires, like those involving paper or flammable liquids․

However, it’s important to understand that ionization sensors may be less responsive to slow, smoldering fires․ For comprehensive fire protection, consider supplementing this alarm with a photoelectric smoke alarm, which excels at detecting smoldering fires․ Regular testing, as described in the manual, ensures the ionization chamber is functioning correctly and providing reliable detection․

Maximum Devices per System (Up to 24)

The Kidde i12060A smoke alarm is designed for use in both single-station and multi-station configurations, allowing interconnection with up to 24 compatible devices․ This interconnected system ensures that if one alarm detects smoke, all interconnected alarms will sound, providing early warning throughout the home․ Compatibility is crucial; always refer to the supplied user guide or Kidde’s documentation to confirm interconnectivity with other brands and models․

Proper wiring, following NFPA initiating device limits outlined in the installation section, is essential for a successful interconnected system․ Exceeding the 24-device limit may compromise the system’s reliability․ Carefully plan the layout and wiring to ensure all alarms communicate effectively, maximizing the safety benefits of a fully interconnected network․

car manual written for nyt

Recent New York Times coverage highlights a surprising trend: renewed interest in driving cars with manual transmissions, despite increasing automation.

This revival isn’t merely nostalgia; studies suggest manuals foster attentiveness, and enthusiasts appreciate the direct connection to the vehicle.

The manual gearbox, once fading, now offers a unique driving experience, attracting a new generation alongside seasoned drivers seeking engagement.

Why a Manual in the Modern Era?

The New York Times has observed a counter-current to the automotive industry’s relentless push towards automation. Why choose a manual transmission when most new cars offer effortless automatics? The answer lies in a growing desire for driver engagement and a more visceral connection with the machine.

Modern driving often feels detached, with technology mediating the experience. A manual gearbox demands active participation – selecting gears, coordinating clutch and throttle – fostering a sense of control often absent in automatic vehicles. Furthermore, research referenced in Times articles suggests manual transmissions can promote safer driving habits by requiring greater driver attention.

Beyond safety, the appeal is also rooted in the sheer enjoyment of mastering a skill. The deliberate act of shifting gears, the feeling of the engine responding to precise inputs, provides a rewarding experience that many drivers find deeply satisfying. It’s a return to a more fundamental form of driving, a deliberate rejection of passive transportation.

Target Audience: The New York Times Reader

The New York Times readership, known for its intellectual curiosity and appreciation for nuanced perspectives, represents an ideal audience for a deep dive into the world of manual transmissions. This demographic values understanding how things work, not just that they work – a mindset perfectly aligned with the intricacies of a manual gearbox.

They are likely to be drawn to the historical context, the engineering principles, and the cultural significance of the manual, as frequently explored in Times features on automotive history and technology. Furthermore, this audience appreciates well-researched, thoughtful analysis, moving beyond simple “how-to” guides to explore the philosophical implications of driver engagement.

The New York Times reader isn’t necessarily a “car person,” but they are a discerning consumer of information, open to appreciating the artistry and skill involved in a traditionally mechanical process within a rapidly digitizing world. They seek enrichment and understanding, making them receptive to the unique appeal of the manual transmission.

Understanding the Basics of a Manual Transmission

Manual transmissions, unlike automatics, require driver control of gear selection via a clutch and shifter, offering a direct mechanical link to the engine.

Components of a Manual System

A manual transmission system is a carefully orchestrated assembly of interconnected parts, working in harmony to deliver power from the engine to the wheels. Central to this is the transmission itself, a housing containing a series of gears, each designed for a specific speed and torque range.

The clutch, a critical component, temporarily disconnects the engine from the transmission, allowing for smooth gear changes. Connected to the engine’s flywheel, the clutch engages and disengages via the clutch pedal. The shift linkage, often utilizing cables or rods, transmits the driver’s gear selection from the shifter to the transmission.

Furthermore, the driveshaft transfers power from the transmission to the differential, which then distributes it to the wheels; Synchronizers within the transmission ensure smooth gear engagement by matching the speeds of the gears before they mesh. Finally, the flywheel, bolted to the engine, provides rotational inertia and a surface for the clutch to engage against, contributing to smooth operation.

The Clutch: Mastering Control

The clutch pedal is the gateway to controlling a manual transmission, demanding coordination and finesse. Its primary function is to momentarily disconnect the engine’s power from the wheels, enabling gear changes without damaging the transmission. Proper clutch engagement involves a smooth, progressive release of the pedal, avoiding abrupt jolts or stalling.

The “friction point” – where the clutch begins to engage – is crucial to master. Finding this point allows for controlled starts and seamless shifts. Holding the clutch at the friction point while applying throttle prevents stalling, especially during hill starts.

Avoid “riding” the clutch – resting your foot on the pedal while driving – as this causes premature wear. Fully depress the clutch when shifting and release it completely when not changing gears. Understanding the clutch’s role is fundamental to enjoying the engaging experience a manual transmission offers, as highlighted in recent automotive reviews.

Gear Ratios and Their Purpose

Manual transmissions utilize a series of gears, each with a specific ratio, to optimize engine performance for varying driving conditions. Lower gears (first, second) provide increased torque for acceleration and climbing hills, sacrificing speed. Higher gears (fifth, sixth) prioritize fuel efficiency and cruising speed at the expense of immediate power;

Understanding these ratios is key to efficient driving. Selecting the appropriate gear ensures the engine operates within its optimal power band. Downshifting to a lower gear provides more power for overtaking or navigating challenging terrain, while upshifting to a higher gear conserves fuel during steady-state cruising.

The gear ratio dictates how many times the engine must rotate to turn the wheels once. As noted in automotive guides, mastering gear selection enhances both performance and fuel economy, contributing to a more connected driving experience.

Operating a Manual Vehicle: A Step-by-Step Guide

Successfully driving a manual requires coordination and practice. This guide, informed by automotive resources, details the process from starting the engine to mastering shifting techniques.

Starting the Engine and Getting into Gear

Initiating the driving experience in a manual transmission vehicle demands a specific sequence. First, ensure the parking brake is engaged. Fully depress the clutch pedal – this disengages the engine from the transmission, preventing stalling. Next, shift the gear lever into neutral. Confirm it’s in neutral by gently wiggling the lever side to side; it should move freely.

Turn the ignition key to start the engine. Once running, keep the clutch fully depressed. Now, shift into first gear. Press the clutch pedal again, and firmly move the gear lever into the first gear position.

Preparing to move involves a delicate balance. Slowly release the clutch pedal while simultaneously applying gentle pressure to the accelerator. This coordinated action engages the engine and begins to propel the vehicle forward. Avoid releasing the clutch too quickly, as this will likely cause the engine to stall. Practice this coordination to achieve a smooth start, as highlighted in various automotive guides.

Smooth Shifting Techniques: Upshifting

Upshifting, transitioning to a higher gear, requires a fluid motion for a seamless experience. Begin by fully depressing the clutch pedal. Simultaneously, release pressure from the accelerator. Swiftly, but deliberately, move the gear lever to the next higher gear.

As you move the lever, begin to slowly release the clutch pedal while simultaneously reapplying pressure to the accelerator. The key is coordination – matching the engine speed to the wheel speed for the new gear.

Avoiding jerkiness involves a smooth clutch release and a proportionate increase in throttle. A slight pause at the engagement point can help synchronize the engine and transmission. Mastering this technique, as emphasized in automotive reviews like those in The New York Times, enhances driving comfort and efficiency, minimizing wear and tear on the drivetrain.

Smooth Shifting Techniques: Downshifting

Downshifting, selecting a lower gear, demands precision to maintain vehicle control and engine responsiveness. Initiate by fully depressing the clutch pedal and releasing the accelerator. Move the gear lever to the desired lower gear with a deliberate motion.

Unlike upshifting, downshifting often benefits from a technique called “rev-matching” – briefly blipping the throttle while the clutch is disengaged. This raises the engine speed to better align with the wheel speed in the lower gear.

Slowly release the clutch while simultaneously reapplying the accelerator; As noted in automotive guides, including those featured in The New York Times, proper downshifting prevents abrupt deceleration and maintains momentum, particularly useful for cornering or preparing to overtake. Mastering this skill enhances driving enjoyment and safety.

Hill Starts: Avoiding Rollback

Hill starts in a manual transmission vehicle present a unique challenge: preventing the car from rolling backward while transitioning from brake to accelerator. Engage the handbrake firmly before attempting to move forward. With the handbrake applied, shift into first gear and begin to slowly release the clutch pedal while gently pressing the accelerator.

As you feel the engine begin to pull, simultaneously release the handbrake and continue coordinating the clutch and accelerator. This requires practice to find the “bite point” – the point where the clutch begins to engage.

The New York Times has previously covered driver attentiveness, and hill starts demand focused coordination. Avoiding jerky movements is key; a smooth transition prevents rollback and ensures a controlled start. Mastering this technique builds confidence and prevents potentially hazardous situations.

Advanced Techniques for Manual Drivers

Experienced drivers refine skills like heel-toe downshifting and rev matching, enhancing control and smoothness. The New York Times notes driver engagement,

and these techniques exemplify that connection, offering a more rewarding and precise driving experience.

Heel-Toe Downshifting

Heel-toe downshifting is an advanced technique favored by performance drivers, allowing for smoother and faster gear changes during braking. It involves simultaneously braking with the ball of your foot while “blipping” the throttle with your heel – or the side of your foot, depending on pedal configuration.

This throttle blip raises the engine RPM to match the lower gear’s speed, minimizing disruption to the vehicle’s balance when you release the clutch. The New York Times’ coverage of automotive techniques often emphasizes the importance of driver control, and heel-toe downshifting is a prime example of that.

Mastering this technique requires practice and coordination, but the benefits include reduced wear on the clutch, improved cornering stability, and a more engaging driving experience. It’s a skill that truly connects the driver to the mechanics of the car, offering a level of control unavailable with automatic transmissions.

Rev Matching for Seamless Shifts

Rev matching is a crucial skill for smooth manual transmission operation, particularly appreciated by those seeking the driver engagement often discussed in New York Times automotive reviews. It involves briefly increasing engine RPMs to synchronize with the speed of the transmission before engaging the next gear.

This technique minimizes the jolt felt during gear changes, reducing stress on the drivetrain and creating a more fluid driving experience. By “blipping” the throttle while the clutch is disengaged, you anticipate the engine speed needed in the lower gear.

Successful rev matching requires a keen ear and a feel for the car’s responsiveness. It’s a technique that elevates driving beyond simple operation, transforming it into a more connected and rewarding activity. Mastering it contributes to a smoother, more controlled ride, enhancing overall vehicle performance.

Emergency Procedures: What to Do When Stalled

Even experienced manual drivers can occasionally stall, a situation potentially unsettling, especially in traffic – a concern often highlighted in New York Times automotive reporting. The first step is to remain calm. Immediately depress the clutch pedal fully to disengage the engine from the wheels.

Next, attempt to restart the engine. If it doesn’t start immediately, try again, ensuring the gear selector is in neutral. If on a hill, firmly apply the parking brake. Once restarted, gently engage first gear and proceed cautiously.

If stalled in a hazardous location, activate hazard lights to warn other drivers. Understanding your vehicle’s owner’s manual (often extensive, as noted in recent articles) is crucial for specific emergency procedures. Prioritize safety and awareness of your surroundings.

Maintenance and Troubleshooting

New York Times articles emphasize diligent upkeep for manual cars, including regular clutch checks and addressing issues promptly. Dealerships prioritize service, ensuring longevity.

Regular Clutch Inspection and Maintenance

As highlighted in New York Times automotive coverage, the clutch is the heart of a manual transmission, demanding consistent attention. Routine inspection, often overlooked, can prevent costly repairs. Begin by observing clutch pedal feel – any sponginess or unusual resistance warrants investigation.

Check for fluid leaks around the master and slave cylinders, crucial components in the hydraulic system. A failing clutch can manifest as slipping gears, difficulty shifting, or a burning smell. The Times’ reporting on vehicle maintenance stresses the importance of adhering to manufacturer-recommended service intervals.

Avoid “riding” the clutch, which causes premature wear. Proper adjustment ensures optimal engagement and disengagement. Consider a professional inspection every 30,000 miles, or sooner if you notice performance degradation. Ignoring these signs can lead to complete clutch failure, requiring a significant and potentially expensive repair.

Identifying Common Manual Transmission Problems

Drawing from automotive insights featured in The New York Times, several issues commonly plague manual transmissions. Grinding gears, particularly when shifting, often indicates a worn synchronizer or improper clutch adjustment. Difficulty getting into gear, especially first or reverse, can signal low transmission fluid or internal damage.

Unusual noises – whining, clunking, or rattling – are red flags demanding immediate attention. These sounds could stem from worn bearings, damaged gears, or a failing differential. The Times’ coverage of vehicle reliability emphasizes proactive diagnosis. A slipping clutch, as previously discussed, is a frequent culprit, but internal transmission issues can mimic this symptom.

Vibrations felt through the floorboard or shifter may point to a bent shift fork or worn U-joints. Ignoring these warning signs can escalate minor problems into major, expensive repairs. Regular fluid checks and attentive driving are key to early detection.

When to Seek Professional Help

As highlighted in The New York Times’ automotive sections, attempting complex manual transmission repairs without proper expertise can exacerbate problems. If you experience persistent grinding, difficulty shifting, or concerning noises despite basic troubleshooting, professional diagnosis is crucial.

Ignoring these symptoms, as cautioned in various Times articles on vehicle maintenance, can lead to catastrophic failure and significantly higher repair costs. A qualified mechanic possesses the tools and knowledge to accurately pinpoint the issue – whether it’s a worn clutch, damaged synchronizers, or internal gear damage.

Furthermore, any suspected fluid leaks, especially if accompanied by performance issues, warrant immediate professional attention. Don’t hesitate to consult a trusted mechanic; preventative maintenance, as emphasized by The Times, is always more cost-effective than extensive repairs.

The Future of the Manual Transmission

The New York Times reports a niche but dedicated following, particularly in performance cars, where driver engagement remains paramount.

Automated launch control in manuals, a modern anomaly, suggests continued innovation despite the broader shift towards automatics.

Manuals in Performance Cars

Performance car enthusiasts, as frequently discussed in The New York Times automotive sections, often prioritize the direct connection and control offered by a manual transmission. This isn’t simply about tradition; it’s about maximizing the driving experience.

The ability to precisely select gears allows drivers to optimize power delivery and maintain momentum, crucial for track days and spirited driving. Modern performance cars, while increasingly offering dual-clutch transmissions, continue to provide manual options, acknowledging the demand from a dedicated segment of drivers.

Interestingly, some manufacturers are even incorporating advanced technologies, like automated launch control, into their manual offerings – a seemingly paradoxical blend of old and new. This demonstrates a commitment to preserving the engaging nature of the manual while enhancing performance. The manual gearbox remains a symbol of driver skill and involvement in the automotive world, as highlighted in various car reviews.

The Role of Driver Engagement

Driver engagement is a recurring theme in automotive journalism, including coverage within The New York Times. The resurgence of the manual transmission directly correlates with a desire for a more involved driving experience, moving away from the detachment of fully automated systems.

Operating a manual gearbox demands active participation – coordinating the clutch, shifter, and throttle – fostering a stronger connection between driver and machine. This heightened awareness can translate to safer driving habits, as noted in studies referenced by the publication, requiring greater attentiveness.

Beyond safety, the tactile feedback and sense of control offered by a manual contribute to a more rewarding and enjoyable driving experience. It’s a deliberate choice, a rejection of passive transportation in favor of active participation, resonating with drivers who value skill and connection, as seen in numerous car reviews.

2014 honda cr v owners manual

This 2014 Honda CR-V owner’s manual provides essential information for safe operation, maintenance, and understanding of your vehicle’s features and systems.

Purpose of the Manual

This owner’s manual serves as a comprehensive guide to familiarize you with the operation and maintenance of your 2014 Honda CR-V. It details features, controls, and safety precautions, ensuring responsible vehicle ownership. The manual aims to help you understand your vehicle’s capabilities, perform basic maintenance tasks, and address common issues. It also provides vital information regarding warranty coverage and procedures, alongside details for locating additional support from Honda customer service and online resources.

Scope of Information

This manual encompasses all aspects of your 2014 Honda CR-V, from vehicle identification – including the VIN location – to detailed specifications like engine details and fluid capacities. It covers safety features like seat belts, airbags, and crucial warning systems. Operational guidance, maintenance schedules, and DIY procedures are included, alongside explanations of the audio, navigation, and climate control systems. Troubleshooting tips and warranty details complete the scope, offering a holistic resource for owners.

Vehicle Identification

Locating your 2014 CR-V’s Vehicle Identification Number (VIN) is crucial for service, warranty claims, and confirming engine/transmission specifics.

Vehicle Identification Number (VIN) Location

The 17-digit Vehicle Identification Number (VIN) for your 2014 Honda CR-V is essential for various reasons, including vehicle history reports, warranty work, and theft recovery. You can find this unique identifier in several locations on your vehicle. Look on the driver’s side dashboard, visible through the windshield. It’s also located on the driver’s side doorjamb, on a plate affixed during manufacturing. Additionally, the VIN is stamped on the vehicle’s registration and insurance documents.

Engine and Transmission Information

The 2014 Honda CR-V typically comes equipped with a 2.4-liter, inline-4 cylinder engine, delivering a balance of power and fuel efficiency. This engine generally produces around 185 horsepower and 181 lb-ft of torque. Transmission options include a standard 6-speed manual or a Continuously Variable Transmission (CVT) for smoother operation. Knowing your specific engine and transmission type is crucial for proper maintenance, like oil changes and fluid checks, ensuring optimal performance and longevity.

Safety Information

Prioritize safety by understanding precautions, seat belt usage, child restraints, and the airbag/SRS system detailed within this manual for your 2014 CR-V.

Safety Precautions

This vehicle is designed for safe operation when all occupants follow essential safety guidelines. Always ensure proper seating positions and secure all cargo to prevent shifting during travel. Never operate the vehicle under the influence of drugs or alcohol, and avoid distracted driving. Regularly inspect tires for proper inflation and tread depth. Familiarize yourself with emergency procedures, including hazard light operation and proper roadside assistance techniques. Prioritize vehicle maintenance to ensure all safety systems function correctly, contributing to a secure driving experience for you and your passengers.

Seat Belts and Child Restraints

Proper seat belt usage is crucial for all occupants during every trip. Ensure belts are correctly positioned across the shoulder and lap, never twisted or frayed. Children require appropriate restraint systems based on age, weight, and height – utilizing car seats or booster seats as mandated by law. Never place a rear-facing infant seat in front of an active airbag. Regularly inspect child restraints for damage and proper installation, prioritizing child safety above all else.

Airbags and SRS System

The 2014 CR-V is equipped with a Supplemental Restraint System (SRS) including airbags. These deploy in severe collisions, supplementing seat belts. Front, side, and curtain airbags offer comprehensive protection. Never obstruct airbag deployment areas. A warning light monitors SRS functionality; address any illuminated warnings promptly. Improper repairs to the SRS can be dangerous. Understand that airbags are supplemental and seatbelts remain the primary safety device.

Understanding Your Vehicle

Familiarize yourself with the 2014 CR-V’s dashboard indicators, instrument panel, and steering wheel controls for optimal driving and vehicle awareness.

Dashboard Indicators and Warnings

The 2014 Honda CR-V’s dashboard features various indicators and warning lights crucial for monitoring vehicle health and safety. Understanding these symbols is paramount. Lights illuminate to signal system status – from low fuel and seatbelt reminders to critical engine or brake issues.

A comprehensive guide within the owner’s manual details each indicator’s meaning, outlining necessary actions. Ignoring warning lights can lead to more significant problems, so prompt attention is vital for maintaining vehicle reliability and ensuring a safe driving experience.

Instrument Panel Overview

The 2014 Honda CR-V’s instrument panel is designed for clear and concise information delivery to the driver. It prominently displays the speedometer, tachometer, fuel gauge, and temperature indicator. A multi-information display provides access to trip data, average fuel economy, and outside temperature readings.

Warning lights and indicator icons are strategically positioned for immediate visibility. The owner’s manual offers a detailed diagram and explanation of each component, ensuring drivers can quickly and easily interpret vital vehicle data during operation.

Steering Wheel Controls

The 2014 Honda CR-V features integrated controls on the steering wheel for enhanced convenience and safety. These controls allow the driver to manage audio functions – volume, track selection, and source changes – without removing hands from the wheel.

Cruise control settings are also accessible via steering wheel buttons. Depending on the trim level, additional controls may include hands-free telephone operation and voice command functionality. The owner’s manual details the specific layout and operation of each control.

Operating Your Vehicle

This section details procedures for starting, stopping, and safely driving your 2014 Honda CR-V, including information on available driving modes and fueling.

Starting and Stopping the Engine

To start your 2014 Honda CR-V, ensure the parking brake is engaged and the transmission is in Park. Fully depress the brake pedal, then insert and turn the ignition key to the ‘START’ position, releasing it once the engine starts. For stopping, gently apply the brake pedal to come to a complete halt. Shift the transmission to Park and engage the parking brake. Always turn the ignition key to the ‘LOCK’ position and remove it to secure the vehicle and prevent accidental operation.

Driving Modes (if applicable)

The 2014 Honda CR-V typically doesn’t feature selectable driving modes like “Sport” or “Eco” found in newer vehicles. However, driver control over performance is achieved through throttle input and gear selection. Utilizing the available gear positions – Drive, Sport, and Low – allows adapting to varying road conditions and driving preferences. ‘Sport’ mode offers enhanced responsiveness, while ‘Low’ provides increased engine braking for descending steep inclines, optimizing control and efficiency.

Fueling Information

The 2014 Honda CR-V requires unleaded gasoline with an octane rating of 87 or higher. The fuel tank capacity is 15.3 gallons. Always ensure the fuel filler cap is securely tightened after refueling to prevent fuel vapor emissions. Avoid overfilling the tank; stop when the fuel nozzle automatically clicks off; Refer to the owner’s manual for specific fuel recommendations and warnings regarding fuel additives or alternative fuel types.

Maintenance Schedule

The 2014 CR-V maintenance schedule details regular intervals for fluid checks, replacements, and inspections to ensure optimal vehicle performance and longevity.

Regular Maintenance Intervals

Maintaining your 2014 Honda CR-V involves adhering to a specific schedule for optimal performance. Key intervals include oil changes every 7,500-10,000 miles with synthetic oil, tire rotations every 5,000 miles, and air filter replacements around 15,000-30,000 miles.

Inspect brake pads, fluids, and belts regularly. Following these guidelines, detailed in the owner’s manual, helps prevent costly repairs and ensures a reliable driving experience. Adherence to the schedule preserves your vehicle’s value and safety.

Fluid Checks and Replacements

Regularly checking and replacing fluids is crucial for your 2014 CR-V’s health. Inspect engine oil, coolant, brake fluid, power steering fluid, and windshield washer fluid levels. Honda recommends coolant replacement every 30,000 miles or 5 years, brake fluid every 3 years, and transmission fluid at 60,000 miles.

Low fluid levels can cause significant damage. Refer to the owner’s manual for specific fluid types and capacities to ensure proper maintenance and optimal vehicle performance.

Tire Maintenance

Proper tire maintenance enhances safety and extends tire life for your 2014 CR-V. Regularly check tire pressure – including the spare – and inflate to the recommended PSI found on the driver’s side doorjamb. Inspect tires for wear, damage, and uneven tread.

Rotate tires every 5,000-7,500 miles to promote even wear. Honda recommends a wheel alignment check if uneven wear is detected, ensuring optimal handling and fuel efficiency.

DIY Maintenance Procedures

This section details simple maintenance tasks owners can perform, like oil changes, air filter replacements, and wiper blade checks, saving time and money.

Changing Engine Oil

Regular oil changes are crucial for your 2014 CR-V’s engine health. This procedure involves warming the engine, locating the oil drain plug, and safely draining the old oil. Ensure you have the correct oil type and filter specified in the manual.

After draining, replace the drain plug with a new crush washer, install the new oil filter, and refill with the recommended amount of oil. Always properly dispose of used oil at a recycling center, adhering to local regulations for environmental responsibility.

Replacing Air Filter

Maintaining a clean air filter is vital for optimal engine performance in your 2014 CR-V. Locate the air filter housing, usually a black plastic box. Open the housing, noting the filter’s orientation for correct reinstallation. Remove the old filter, ensuring no debris falls into the intake.

Install the new air filter, confirming a proper seal. Securely close the air filter housing. A clean air filter improves fuel efficiency and protects the engine from damaging particles.

Checking and Replacing Wiper Blades

Regularly inspect your 2014 CR-V’s wiper blades for cracks, tears, or streaking during operation. If visibility is compromised, replacement is necessary. Lift the wiper arm away from the windshield and detach the old blade, noting the connection method.

Attach the new wiper blade securely, ensuring it clicks into place. Lower the wiper arm gently. Replacing wiper blades ensures clear visibility during inclement weather, enhancing driving safety.

Features and Systems

Explore the 2014 CR-V’s advanced features, including the audio system, climate control, and available navigation system, for an enhanced driving experience.

Audio System Operation

The 2014 Honda CR-V’s audio system offers various functionalities for entertainment while driving. Users can access AM/FM radio, CD playback, and auxiliary input for external devices. Bluetooth connectivity enables wireless audio streaming and hands-free calling. The system features intuitive controls on the steering wheel and the central display screen, allowing for easy operation. Volume, tuning, and source selection are readily accessible. Detailed instructions on pairing devices and customizing audio settings are available within the owner’s manual for optimal enjoyment.

Navigation System (if equipped)

If your 2014 Honda CR-V is equipped with a navigation system, it provides turn-by-turn directions and points of interest. The system utilizes a map database, which may require periodic updates for accuracy. Users can input destinations via voice command or the touchscreen interface. Features include route calculation, traffic avoidance, and estimated time of arrival. The owner’s manual details how to operate the system, update maps, and troubleshoot common issues, ensuring a seamless navigation experience during your journeys.

Climate Control System

The 2014 Honda CR-V’s climate control system provides heating, cooling, and ventilation for passenger comfort. Manual or automatic settings allow drivers to adjust temperature and fan speed. Features include defrost and defog modes for optimal visibility. The owner’s manual explains operation of the system, including air recirculation and filter replacement. Proper use ensures efficient climate control and air quality within the vehicle, enhancing driving comfort in various weather conditions and maintaining a pleasant cabin environment.

Troubleshooting

This section details common issues, warning light meanings, and emergency procedures for your 2014 Honda CR-V, aiding quick problem resolution.

Common Issues and Solutions

Addressing typical concerns with your 2014 CR-V is straightforward. Issues like a malfunctioning audio system can often be resolved by checking the fuse box or resetting the unit. Difficulty starting might indicate a weak battery, requiring a jump start or replacement.

For warning lights, consult the dashboard indicator section. Tire pressure monitoring system (TPMS) alerts suggest checking tire inflation. If experiencing persistent problems, referencing online forums or contacting Honda customer service provides further assistance and potential diagnostic support.

Warning Light Meanings

Understanding dashboard warning lights is crucial for your 2014 CR-V’s health. A solid check engine light signals a potential engine issue needing diagnosis. A flashing light indicates a severe problem requiring immediate attention. The brake warning light signifies brake system malfunction or low brake fluid.

The airbag warning light indicates a problem with the SRS system. Refer to the instrument panel overview section for specific light details and recommended actions; ignoring these signals could lead to more significant repairs.

Emergency Procedures

In emergencies, prioritize safety. If a tire blows out, grip the steering wheel firmly and brake gently; avoid sudden steering. For a stalled engine, safely move to the roadside and activate hazard lights.

If involved in a collision, check for injuries and call emergency services. Familiarize yourself with jump-starting procedures and locate the emergency toolkit. Knowing these steps can significantly improve your response during critical situations, ensuring your well-being and vehicle safety.

Specifications

This section details the 2014 Honda CR-V’s dimensions, weight, engine specifications, and fluid capacities, offering crucial technical data for owners and technicians.

Dimensions and Weight

Understanding the 2014 Honda CR-V’s physical characteristics is vital for parking, maneuvering, and assessing cargo capacity. The vehicle’s overall length typically measures around 179.4 inches, with a width of approximately 71.6 inches and a height of 66.1 inches.

Wheelbase is around 103.1 inches, contributing to ride stability. Curb weight varies depending on the trim level and drivetrain, generally ranging from 3,305 to 3,560 pounds. These specifications aid in comprehending the vehicle’s spatial footprint and handling characteristics.

Engine Specifications

The 2014 Honda CR-V primarily features a 2.4-liter inline-4 cylinder engine, delivering a balance of power and fuel efficiency. This engine typically produces around 185 horsepower at 6,000 rpm and 181 lb-ft of torque at 3,800 rpm.

It utilizes SOHC valve train and multi-point fuel injection. The compression ratio is approximately 10.5:1. Understanding these specifications helps owners appreciate the engine’s capabilities and maintenance requirements for optimal performance.

Fluid Capacities

For the 2014 Honda CR-V, the engine oil capacity is approximately 4.2 US quarts with a filter change. The cooling system requires around 1.76 US gallons of coolant. Power steering fluid capacity is roughly 0.8 US quarts.

Brake fluid capacity is about 1.0 US quart, and the transmission fluid capacity varies depending on whether it’s a 2WD or AWD model, typically around 3.3-4.4 US quarts. Accurate fluid levels are crucial for optimal vehicle operation.

Warranty Information

The 2014 Honda CR-V warranty details cover specific components and durations, outlining owner rights and procedures for claiming warranty services.

Warranty Coverage Details

The 2014 Honda CR-V’s warranty typically includes a bumper-to-bumper coverage for 3 years/36,000 miles, protecting against defects in materials and workmanship. Powertrain coverage extends to 5 years/60,000 miles, safeguarding the engine, transmission, and drivetrain. Corrosion protection lasts for 5 years/unlimited miles.

Specific components, like emissions systems, may have separate, longer coverage periods as mandated by federal or state regulations. Review your warranty booklet for precise terms, exclusions, and claim procedures.

Warranty Claim Procedures

To initiate a warranty claim for your 2014 Honda CR-V, first, schedule a service appointment with an authorized Honda dealership. Clearly describe the issue and provide your vehicle identification number (VIN). The dealership will diagnose the problem and determine if it’s covered under warranty.

Required documentation includes proof of regular maintenance. Honda will then authorize repairs or replacements, if applicable, based on warranty terms.

Technical Data

This section details crucial specifications for your 2014 Honda CR-V, including torque settings, basic wiring diagrams, and essential fluid capacity information.

Torque Specifications

Precise torque values are critical for proper component assembly and vehicle reliability. This data outlines the recommended torque specifications for various engine and chassis components on your 2014 Honda CR-V. Incorrect torque can lead to fastener failure, leaks, or diminished performance. Always utilize a calibrated torque wrench when performing maintenance or repairs. Refer to the detailed charts for specific bolt sizes, thread pitches, and corresponding torque values, ensuring optimal clamping force and preventing damage to threaded parts during reassembly procedures.

Wiring Diagrams (Basic)

These simplified wiring diagrams provide a foundational understanding of the 2014 Honda CR-V’s electrical system. They illustrate the connections between key components like the battery, starter, alternator, and lighting. While not exhaustive, these diagrams aid in tracing circuits for basic troubleshooting and identifying potential wiring issues. Always disconnect the negative battery terminal before working on electrical components. For complex repairs or detailed schematics, consult a professional service manual or qualified technician for accurate and safe procedures.

Frequently Asked Questions (FAQ)

This section addresses common owner inquiries regarding the 2014 Honda CR-V, offering troubleshooting tips and solutions to frequently encountered issues.

Common Owner Inquiries

Owners frequently ask about the location of the vehicle identification number (VIN) and how to interpret engine/transmission details. Questions arise concerning dashboard indicator meanings, proper tire maintenance, and audio system operation. Many seek guidance on resetting maintenance reminders or understanding specific warning lights. Concerns about the navigation system, if equipped, and climate control functionality are also common. Furthermore, owners often inquire about warranty coverage details and claim procedures, seeking clarification on what is included and how to proceed with a claim.

Troubleshooting Tips

If encountering issues, first consult the warning light meanings section to diagnose the problem. For common issues, check fluid levels and ensure proper tire inflation. A failing air filter can reduce engine performance, while worn wiper blades impair visibility. If the engine won’t start, verify the battery connections and fuel level. Refer to the manual for specific error codes and recommended solutions, and always prioritize safety when attempting DIY repairs.

Where to Find Additional Help

For further assistance, contact Honda Customer Service or explore online resources and forums dedicated to the 2014 Honda CR-V model.

Honda Customer Service

Should you require direct support, Honda’s Customer Service is readily available to address your concerns regarding the 2014 CR-V. Contact them through the official Honda website, where you’ll find a dedicated support section with contact numbers and online chat options. They can assist with warranty inquiries, technical questions, or locating authorized service centers. Expect knowledgeable representatives prepared to guide you through any issues, ensuring a positive ownership experience with your vehicle. Prompt and efficient assistance is their priority.

Online Resources and Forums

Numerous online resources and dedicated forums cater specifically to 2014 Honda CR-V owners, offering a wealth of information and peer support. These platforms provide access to downloadable manuals, troubleshooting tips, and shared experiences from fellow enthusiasts. Explore websites hosting PDF versions of the owner’s manual and participate in discussions regarding maintenance, repairs, and vehicle features. Benefit from collective knowledge and find solutions to common issues quickly and efficiently, enhancing your ownership journey.

pressure washer craftsman manual

This manual provides a comprehensive guide for Craftsman pressure washers, covering essential information on safety, operation, maintenance, and troubleshooting; It ensures optimal performance and longevity of your unit.

1.1 Overview of the Craftsman Pressure Washer

The Craftsman Pressure Washer is a durable and versatile cleaning tool designed for various outdoor tasks. Available in models ranging from 1,800 PSI to 3,000 MAX PSI, it offers powerful performance for cleaning cars, patios, and more. Some models feature a Briggs and Stratton engine, ensuring reliability and efficiency. With accessories like turbo nozzles and surface cleaners, it provides customizable solutions for different cleaning needs. Whether electric or gas-powered, Craftsman pressure washers are built for mobility and ease of use, making them ideal for homeowners and professionals alike.

1.2 Importance of Reading the Manual

Reading the Craftsman Pressure Washer manual is essential for safe and effective operation. It provides detailed instructions on assembly, operation, and maintenance, ensuring optimal performance. The manual outlines safety guidelines to prevent accidents and explains troubleshooting steps for common issues. Familiarizing yourself with the manual helps you understand the unit’s features and proper usage, reducing the risk of damage or injury. It also covers warranty information and offers tips for longevity, making it a vital resource for both new and experienced users.

1.3 Key Features of the Craftsman Pressure Washer

The Craftsman Pressure Washer offers powerful cleaning capabilities with PSI ratings up to 3000 and GPM ratings of 2.7 or 3, ensuring efficient cleaning. It features durable engines, such as the Briggs and Stratton, and comes with multiple nozzles, including a turbo nozzle for tough jobs. The unit is designed for mobility and ease of use, with a comfortable wand and adjustable pressure settings. Additional features include compatibility with surface cleaners and other accessories, making it versatile for various outdoor cleaning tasks.

Safety Guidelines and Precautions

Always wear protective gear, including gloves and goggles. Avoid using high-pressure settings near people or pets. Keep children away during operation. Use the correct nozzle for the job to prevent accidental damage or injury. Ensure the area is clear of obstacles before cleaning. Never point the nozzle at people or animals. Maintain a safe distance from electrical outlets and avoid using in wet conditions. Regularly inspect hoses and connections for wear or damage to prevent leaks or malfunctions. Follow all safety guidelines provided in the manual to ensure safe and effective operation. Be cautious when handling hot or moving parts of the pressure washer. Keep the pressure washer on a stable, level surface during use to prevent tipping or losing control. Avoid using the pressure washer near open flames or sparks, as some models may produce flammable emissions. Do not operate the pressure washer while standing on a ladder or unstable surface. Keep loose clothing and long hair tied back to avoid entanglement with moving parts. Be aware of your surroundings and avoid spraying sensitive plants or surfaces that may be damaged by high pressure. Use the pressure washer only for its intended purposes, as specified in the manual. Follow all local safety regulations and guidelines when operating the pressure washer. If you are unsure about any aspect of safety or operation, consult the manual or contact a professional. Always turn off the engine and relieve pressure before performing maintenance or repairs. Never modify the pressure washer or use unauthorized parts, as this can void the warranty and create safety hazards. Familiarize yourself with emergency shutdown procedures in case of malfunction or accident. Store the pressure washer in a dry, secure location out of reach of children and pets. Regularly check and maintain the pressure washer according to the manufacturer’s recommendations to ensure optimal performance and safety. Follow proper procedures for winterizing the pressure washer to prevent damage from freezing temperatures. Use the correct fuel and lubricants as specified in the manual to maintain the engine and pump. Dispose of waste materials, such as used oil and filters, responsibly and in accordance with local regulations. Keep the pressure washer clean and free of debris to maintain efficiency and prevent damage. Always refer to the manual for specific safety instructions related to your model of Craftsman pressure washer. By following these safety guidelines and precautions, you can ensure a safe and effective cleaning experience with your Craftsman pressure washer.

2.1 General Safety Tips

Always wear protective eyewear and gloves when operating the pressure washer. Keep loose clothing tied back and avoid jewelry that could get caught. Ensure the area is clear of obstacles and bystanders. Never aim the nozzle at people, animals, or delicate surfaces. Use the correct nozzle for the task to avoid excessive force. Keep children away from the unit during operation. Avoid using the pressure washer near open flames or sparks. Regularly inspect hoses and connections for damage. Follow all safety guidelines in the manual to ensure safe operation and prevent accidents. Stay alert and maintain control of the spray gun at all times.

2.2 Pre-Operational Checks

Before starting the pressure washer, perform a thorough pre-operational check. Inspect the oil level in the engine and ensure all bolts and connections are tightened. Check the water supply hose for kinks or blockages and verify that the spray gun and wand are securely connected. Examine hoses and cords for damage or wear. Ensure the fuel tank is filled (for gas models) and the detergent tank is properly attached. Drain any leftover water from the hoses to prevent mineral buildup. Test the spray gun trigger to ensure proper function before beginning work.

2.3 Operational Safety Measures

Always wear protective eyewear and closed-toe shoes while operating the pressure washer. Keep children and pets at a safe distance. Avoid spraying delicate surfaces like windows or soft materials. Never aim the nozzle at people or animals. Maintain a safe distance from the nozzle to prevent kickback. Start with a low-pressure setting and gradually increase as needed. Avoid using the pressure washer in strong winds or heavy rain. Regularly inspect hoses and connections for wear and tear to ensure safe operation.

2.4 Emergency Procedures

In case of an emergency, immediately turn off the pressure washer and release the pressure by squeezing the trigger until water flow stops. If someone is injured, provide first aid and seek medical help if necessary. In case of a malfunction, unplug the unit and do not attempt repairs. Keep a fire extinguisher nearby and avoid using the pressure washer near open flames. If a hose ruptures, turn off the power and inspect for damage before restarting. Always prioritize safety and cease operation if unsure.

Assembly and Installation

Begin by unboxing and inventorying all parts. Follow step-by-step instructions for assembling the frame, attaching hoses, and connecting accessories. Ensure all connections are secure. Refer to the manual for proper alignment and tightening of bolts. Double-check for any missing or damaged components before proceeding. Proper assembly ensures safe and efficient operation of the pressure washer. Always follow the manufacturer’s guidelines for installation.

3.1 Unboxing and Inventory of Parts

Start by carefully unpacking the pressure washer and all included accessories. Check for any visible damage during unpacking. Ensure all components, such as the main unit, hose, spray gun, nozzles, and detergent tank, are present. Refer to the packing list in the manual to confirm completeness. Organize the parts on a clean, flat surface. Inspect each item for damage or defects. If any parts are missing or damaged, contact customer support immediately. Proper inventory ensures a smooth assembly process and prevents delays.

3.2 Step-by-Step Assembly Instructions

Begin by attaching the handle to the main unit using the provided bolts. Ensure it is securely tightened for stability. Next, mount the spray gun holder to the frame, making sure it is aligned properly. Connect the high-pressure hose to both the pump and spray gun, tightening all fittings firmly. Attach the detergent tank by clipping it into place. Finally, install the nozzles by twisting them into the spray gun until they click. Refer to the manual for specific torque values and diagrams to ensure correct assembly.

3.3 Connecting Hoses and Accessories

Attach the high-pressure hose to the pump and spray gun, ensuring all connections are secure. Twist nozzles onto the spray gun until they click. Connect the detergent tank to the designated port. Check compatibility and avoid over-tightening. Ensure all connections are snug but not forced. Verify that the high-pressure hose is properly attached to both the pump and spray gun. Double-check all fittings for leaks before use. Follow manual guidelines for specific torque values and diagrams to ensure correct connections.

Operating the Pressure Washer

Operating the Craftsman pressure washer involves starting the engine, adjusting pressure settings, selecting the appropriate nozzle, and moving the spray gun steadily across surfaces.

4.1 Starting the Pressure Washer

To start the Craftsman pressure washer, ensure the fuel tank is filled, and the water supply is connected. Pull the recoil starter slowly until resistance is felt, then pull sharply. Always prime the pump before starting to ensure proper water flow. Check for any leaks in hoses or connections. Once started, allow the engine to warm up briefly. Begin with a low-pressure setting and gradually increase as needed. Always wear protective gear and ensure the area is clear of obstacles before operating.

4.2 Adjusting Pressure Settings

Adjust the pressure settings on your Craftsman pressure washer by turning the pressure control knob. Start with a lower setting for delicate surfaces and increase as needed. Use the pressure gauge to monitor the PSI level. For tough cleaning tasks, higher pressure settings are recommended. Always match the pressure to the surface being cleaned to avoid damage. Adjusting the nozzle or using different tips can also optimize cleaning efficiency. Ensure the pressure setting aligns with the task at hand for optimal results.

4.3 Using Different Nozzles and Attachments

Your Craftsman pressure washer comes with interchangeable nozzles and attachments designed for specific tasks. The standard 25-degree nozzle is ideal for general cleaning, while the 15-degree nozzle is better for tough stains. Use the 40-degree nozzle for delicate surfaces like windows or siding. Attachments like the surface cleaner are perfect for large areas, while the turbo nozzle boosts cleaning power. Match the nozzle to the task for optimal results. Always refer to the manual for compatibility and usage guidelines to ensure safety and efficiency.

4.4 Tips for Effective Cleaning

For effective cleaning with your Craftsman pressure washer, start with a wide spray pattern to avoid damaging surfaces. Adjust the pressure and nozzle angle based on the surface type—softer for delicate areas and firmer for tough stains. Work in sections, keeping the nozzle 12-24 inches away. Use detergent for stubborn dirt and rinse thoroughly. Avoid using high pressure on windows or painted surfaces. Wear safety goggles and clean in a well-ventilated area. Regularly rinse surfaces to prevent soap residue.

Maintenance and Care

Regularly inspect hoses, nozzles, and connections for damage. Clean the filter and pump after use. Store in a dry, cool place to prevent rust. Winterize properly.

5.1 Routine Maintenance Tasks

Regular maintenance is crucial for optimal performance. Inspect hoses, nozzles, and connections for any damage or leaks. Clean or replace the filter frequently to ensure proper water flow and pressure. Lubricate moving parts such as the pump and valves to prevent rust and wear. Store the pressure washer in a dry, cool place to avoid corrosion. Regularly check and tighten all bolts and screws. Inspect belts for wear and replace them if necessary. Drain the fuel tank if storing for extended periods. These routine tasks maintain efficiency and extend your Craftsman pressure washer’s lifespan effectively.

5.2 Storage Tips for Optimal Performance

Store your Craftsman pressure washer in a clean, dry, and well-ventilated area. After use, drain all water from the hoses and pump to prevent freezing damage. For extended storage, add a fuel stabilizer to the gas tank and disconnect the battery. Keep the unit upright to avoid oil leaks. Cover the pressure washer to protect it from dust and rodents. Ensure all accessories are securely stored to prevent damage. Regular pre-storage checks ensure your pressure washer remains ready for future use without issues.

5.3 Winterization Procedures

To winterize your Craftsman pressure washer, drain all water from the hoses, pump, and engine. For gas models, add fuel stabilizer and run the engine to circulate it. Disconnect the battery and store it in a cool, dry place. Use pressure washer antifreeze to protect the system from freezing. Ensure all components are dry and free from moisture. Cover the unit to shield it from harsh weather and pests. Store in a protected area, such as a garage or shed, to maintain optimal performance when you resume use in spring.

5.4 Replacing Wearable Parts

Regularly inspect and replace wearable parts like O-rings, seals, and hoses to maintain your Craftsman pressure washer’s performance. Turn off and drain the unit before starting repairs. Use an Allen wrench or pliers to remove worn components. Install new parts by following the manufacturer’s torque specifications. Apply a small amount of silicone-based lubricant to O-rings and seals for a watertight fit; Refer to the parts diagram in your manual for exact locations and replacement procedures. Always use genuine Craftsman parts for optimal compatibility and longevity.

Troubleshooting Common Issues

This section helps identify and resolve common issues with your Craftsman pressure washer. Check for clogs, loose connections, and ensure proper settings. Refer to the manual for detailed solutions.

6.1 Identifying Common Problems

This section outlines common issues with Craftsman pressure washers, such as low water pressure, leaks, and engine start problems. Early identification is key for maintaining performance and longevity. Refer to subsequent sections for solutions.

  • Low water pressure during use
  • Leaks in hoses or connections
  • Engine or motor not starting
  • Pump failing to build pressure
  • Spray gun not functioning

6.2 Solutions for Low Pressure

Low pressure in your Craftsman pressure washer can often be resolved by checking the nozzle for blockages or damage. Ensure it’s clean and the correct size for the task. Verify the water supply is adequate and not restricted. Inspect hoses for kinks or leaks and replace if necessary. If issues persist, check the pump for proper priming and ensure all connections are secure. Refer to the manual for specific troubleshooting steps to restore optimal pressure.

6.3 Fixing Leaks and Other Hardware Issues

To address leaks, inspect all connections and tighten any loose fittings. Replace worn or damaged O-rings and seals using the manufacturer’s recommended replacement kit. For hardware issues, check for loose bolts or screws and secure them. If a part is damaged, refer to the manual for compatible replacement options. Regular lubrication of moving parts can prevent wear and tear. Always turn off the pressure washer and allow it to cool before attempting any repairs to ensure safety and effectiveness.

Technical Specifications

The Craftsman pressure washer features a robust engine with varying horsepower options, high-efficiency pumps, and adjustable PSI settings. It delivers consistent performance with durable construction and compatibility with a range of accessories.

7.1 Engine and Pump Specifications

The Craftsman pressure washer is equipped with a powerful 160-190cc OHV engine, designed for reliable performance. The pump features an axial cam or triplex plunger design, ensuring high durability and efficiency. Engine speeds typically range between 2,800-3,400 RPM, while the pump operates at a maximum temperature of 140°F to prevent overheating. Constructed with durable materials like aluminum and brass, the engine and pump are built to withstand heavy use. Regular maintenance, such as oil changes and filter cleaning, is essential to maintain optimal performance and longevity. Proper care ensures consistent power delivery and minimal wear.

7.2 PSI and GPM Ratings

Craftsman pressure washers are designed with varying PSI (Pounds per Square Inch) and GPM (Gallons per Minute) ratings to suit different tasks. Models typically range from 1,900 to 3,000 PSI and 2.2 to 4.0 GPM. Higher PSI is ideal for tough stains, while higher GPM improves cleaning speed. The combination of these ratings determines the unit’s cleaning power. Always match the PSI and GPM to the job for optimal results. Exceeding recommended ratings can damage the unit or surface being cleaned. Follow the manual for specific guidelines.

7.3 Compatibility with Accessories

Craftsman pressure washers are compatible with a wide range of accessories to enhance functionality. These include various nozzles, hoses, and surface cleaners. Always ensure accessories are designed for your specific model to maintain performance and safety. Using non-compatible parts may void the warranty or cause damage. Check the manual for recommended accessories and part numbers. Proper compatibility ensures optimal cleaning results and prolongs the life of your pressure washer. Accessories like turbo nozzles and extension wands can also improve efficiency for specific tasks.

Accessories and Attachments

Craftsman pressure washers support a variety of accessories to enhance cleaning efficiency. These include nozzles, hoses, brushes, and detergent tanks. Genuine parts ensure compatibility and optimal performance.

8.1 Recommended Accessories

To maximize the performance of your Craftsman pressure washer, consider investing in genuine accessories. These include high-pressure hoses, rotary nozzles, and surface cleaners for large areas. Additional items like brush attachments and detergent tanks enhance versatility. For tough jobs, turbo nozzles provide concentrated cleaning power. Using genuine Craftsman parts ensures compatibility and maintains your washer’s efficiency. These accessories are designed to handle various cleaning tasks, from delicate surfaces to heavy-duty jobs, making them essential for optimal results.

8.2 Using Surface Cleaners

Surface cleaners are ideal for large, flat areas like driveways, sidewalks, and decks. They distribute water evenly, reducing streaks and damage. Attach the cleaner to your Craftsman pressure washer’s hose, ensuring a secure connection. Adjust the pressure based on the surface’s sensitivity. For best results, keep the cleaner moving steadily and maintain a consistent distance from the surface. This attachment significantly reduces cleaning time while providing a professional finish. Regularly check and clean the surface cleaner’s nozzles to prevent clogs and ensure optimal performance.

8.3 Benefits of Turbo Nozzles

Turbo nozzles significantly enhance cleaning efficiency by providing a deeper, more thorough clean. Their rotating action covers more area faster, making them ideal for large surfaces like driveways, decks, and sidewalks. They excel at removing tough stains, grime, and mildew, offering superior performance compared to standard nozzles. This makes them a valuable accessory for maintaining various outdoor surfaces effectively and ensuring a professional-grade finish with minimal effort.

Warranty and Support

Craftsman pressure washers come with a comprehensive warranty, ensuring protection against defects. Dedicated customer support provides assistance, while online resources offer troubleshooting guides and repair options.

9.1 Understanding the Warranty Terms

The Craftsman pressure washer warranty provides coverage for defects in materials and workmanship. The warranty period varies by model, typically ranging from 2 to 5 years. It covers repairs or replacements of faulty parts, including the engine and pump, under normal use conditions. Exclusions apply for wear and tear, misuse, or unauthorized modifications. For detailed terms, refer to the manual or contact customer support. Understanding the warranty ensures peace of mind and protection for your investment.

9.2 Contacting Customer Support

To contact Craftsman customer support, visit their official website or call the provided toll-free number in the manual. Live chat and email options are also available for assistance. Have your model number and purchase date ready for faster service. Representatives can help with warranty claims, troubleshooting, or general inquiries. For urgent issues, phone support is recommended; Ensure to check the manual or website for the most up-to-date contact information and operating hours for prompt assistance.

9.3 Online Resources and Manuals

Craftsman provides extensive online resources to support your pressure washer experience. Visit their official website to access downloadable PDF manuals, troubleshooting guides, and instructional videos. Additional resources include FAQs, user forums, and interactive guides for maintenance and operation. These tools help you resolve issues, understand features, and optimize performance. Ensure to explore the support section for comprehensive assistance tailored to your model. Online resources are updated regularly, offering reliable and current information to enhance your ownership experience.

This comprehensive guide ensures proper usage, maintenance, and troubleshooting of your Craftsman Pressure Washer. Regularly refer to this manual for optimal performance and safety.

10.1 Summary of Key Points

This manual provides essential guidance for the Craftsman Pressure Washer, emphasizing safety, proper assembly, and effective operation. It highlights routine maintenance, troubleshooting common issues, and warranty details. By following the outlined steps, users can maximize performance, ensure longevity, and address potential problems efficiently. Regular reviews of safety guidelines and maintenance tips are crucial for optimal functionality and user safety.

10.2 Final Tips for Longevity

Regular maintenance is key to extending the life of your Craftsman Pressure Washer. Always store it in a dry, cool place to prevent rust and damage. Avoid using high-pressure settings unless necessary, as this can strain the pump. Check hoses and connections frequently for wear and tear. Use the correct nozzle for the job to maintain optimal performance. Finally, winterize the unit properly to ensure it remains functional for years to come.

nikon d7200 instruction manual

The Nikon D7200 is a high-performance DSLR camera designed for enthusiasts and professionals, offering advanced features like superior image quality, fast autofocus, and robust manual controls.

1.1 Overview of the Nikon D7200 Camera

The Nikon D7200 is a powerful DSLR camera with a 24.2MP APS-C sensor, EXPEED 4 processor, and 1080p video recording. It features a 51-point autofocus system, Wi-Fi, and NFC for seamless connectivity. Designed for enthusiasts and professionals, it offers manual controls, customizable settings, and compatibility with Nikon lenses. The camera balances performance and versatility, making it ideal for various photography styles, from portraits to landscapes and action shots.

1.2 Importance of the Instruction Manual

The instruction manual is essential for unlocking the full potential of the Nikon D7200. It provides detailed guidance on camera settings, features, and troubleshooting, helping users understand advanced techniques and customize their shooting experience. Available in multiple languages and formats, the manual ensures easy access to information, making it a vital resource for photographers of all skill levels to maximize their camera’s capabilities effectively.

Accessing the Nikon D7200 Instruction Manual

The Nikon D7200 manual can be accessed via Nikon’s official website, the Manual Viewer 2 app, or downloaded as a PDF in multiple languages for convenience.

2.1 Downloading the Manual from Nikon’s Official Website

Visit Nikon’s official website and navigate to the support section. Search for the Nikon D7200 manual, select your preferred language, and download the PDF. This free resource offers detailed instructions and tips, ensuring you always have the latest information to maximize your camera’s capabilities and enhance your photography experience effectively.

2.2 Using the Nikon Manual Viewer 2 App

The Nikon Manual Viewer 2 app provides easy access to the D7200 manual on your smartphone or tablet. Available for free on the App Store and Google Play, this app allows you to view and search the manual anytime, anywhere. It’s an ideal solution for quick reference, ensuring you can explore camera features and settings without carrying a physical copy, enhancing your photography experience with convenience and portability.

2.3 Availability of the Manual in Different Languages

The Nikon D7200 instruction manual is available in multiple languages, ensuring global accessibility. Users can download the manual in their preferred language from Nikon’s official website or access it via the Nikon Manual Viewer 2 app. This feature caters to a diverse user base, making it easier for photographers worldwide to understand and utilize the camera’s full potential, regardless of their native language or location.

Key Features of the Nikon D7200

The Nikon D7200 boasts a 24.2MP APS-C CMOS sensor, EXPEED 4 processor, and 51-point autofocus system, delivering exceptional image quality, fast performance, and versatile shooting capabilities.

3.1 Sensor and Image Quality

The Nikon D7200 features a 24.2MP APS-C DX-format CMOS sensor, delivering exceptional image quality with sharp details and vibrant colors. It lacks an optical low-pass filter, enhancing sharpness. The sensor supports an ISO range of 100-25600 (expandable to ISO 102400), ensuring excellent low-light performance. Combined with the EXPEED 4 image processor, it minimizes noise and optimizes dynamic range, making it ideal for capturing high-quality images in various lighting conditions.

3.2 Autofocus System

The Nikon D7200 boasts an advanced 51-point autofocus system, offering precise subject tracking and fast acquisition. It includes 15 cross-type sensors for enhanced accuracy in challenging lighting conditions; The system supports group-area AF and dynamic-area AF modes, making it versatile for various shooting scenarios. Additionally, the AF system operates effectively in low light, down to -3 EV, ensuring sharp focus even in dimly lit environments. This feature is particularly beneficial for wildlife and sports photography.

3.3 Video Recording Capabilities

The Nikon D7200 supports 1080p video recording at up to 60fps, ensuring smooth and detailed footage. It offers manual controls for exposure, allowing precise adjustments during filming. The camera also features a built-in stereo microphone and supports external microphone input for enhanced audio quality. These capabilities make the D7200 a versatile tool for capturing high-quality video, suitable for both casual and professional use.

3.4 Connectivity Options

The Nikon D7200 offers versatile connectivity options, including built-in Wi-Fi and NFC, enabling seamless image transfer to smart devices. It also supports remote shooting via the Wireless Mobile Utility app, enhancing workflow flexibility. Additionally, the camera features USB and HDMI ports for easy data transfer and external display connectivity, making it a convenient choice for photographers who need to share or review their work efficiently.

Camera Modes and Settings

The Nikon D7200 features various shooting modes, including Manual, Aperture Priority, and Shutter Priority, allowing photographers to customize settings for precise control over their images.

4.1 Understanding Shooting Modes (Manual, Aperture Priority, Shutter Priority, etc.)

The Nikon D7200 offers multiple shooting modes to suit various photography needs. Manual (M) mode allows full control over aperture, shutter speed, and ISO. Aperture Priority (A/Av) lets you set the aperture while the camera adjusts the shutter speed. Shutter Priority (S/Tv) enables manual shutter speed control with automatic aperture adjustment. Program Mode (P) offers automated settings with user-adjustable parameters for flexibility. Each mode provides creative control, catering to both beginners and advanced photographers.

4.2 Custom Settings and User Settings

The Nikon D7200 allows extensive customization through its Custom Settings menu, enabling users to tailor camera behavior to their preferences. The Save User Settings feature lets you store customized settings, including autofocus, metering, and exposure controls, to the camera or a memory card for quick access. Additionally, the Nikon Manual Viewer 2 app provides detailed guides for managing these settings, ensuring optimal use of the camera’s capabilities. This flexibility enhances shooting efficiency and personalizes the photography experience.

4.3 Metering Modes

The Nikon D7200 offers multiple metering modes to ensure accurate exposure control; The camera features Matrix Metering, which analyzes the entire scene, and Center-Weighted Metering, which prioritizes the central area. Spot Metering measures light from a specific point, ideal for precise adjustments. Additionally, Highlight-Weighted Metering helps prevent overexposure in bright conditions. These modes can be adjusted via the camera’s controls, providing flexibility for various lighting scenarios and ensuring optimal results in diverse photography situations.

4.4 ISO Sensitivity and Noise Reduction

The Nikon D7200 offers an impressive ISO range of 100 to 25600, extendable to 102400, ensuring excellent low-light performance. The camera features advanced noise reduction technologies to minimize grain in high-ISO images. Users can adjust noise reduction settings or disable them for finer control. Additionally, the ISO sensitivity can be customized to suit specific shooting conditions, while noise reduction options help maintain image quality without over-processing. This balance is key for achieving sharp, detailed photos in various lighting environments.

Customizing the Nikon D7200

The Nikon D7200 allows extensive customization, including button assignments, user profiles, and autofocus settings, enabling photographers to tailor the camera to their specific needs and shooting styles.

5;1 Customizing Buttons and Controls

The Nikon D7200 allows users to customize buttons and controls to streamline their workflow. The Fn button can be assigned to frequently used functions like ISO or white balance. Additionally, the OK button offers customizable shortcuts, enhancing accessibility. These settings can be adjusted via the camera’s menu system, enabling photographers to tailor controls to their preferences for improved efficiency and convenience during shoots. This feature ensures a personalized shooting experience, maximizing the camera’s potential.

5.2 Setting Up User Profiles

The Nikon D7200 enables users to create and save custom user profiles, allowing quick access to preferred settings. These profiles store configurations for modes, autofocus, and metering, tailored to specific shooting scenarios. By saving up to six unique profiles, photographers can switch seamlessly between setups, such as portrait and landscape modes, without recalibrating each time. This feature enhances efficiency and ensures consistent results across diverse photography situations, making it ideal for versatile shooters.

5.3 Configuring Autofocus Settings

The Nikon D7200 allows detailed customization of its autofocus system, enabling photographers to tailor settings to their shooting style. Users can configure AF modes, such as Single AF and Continuous AF, and adjust focus tracking parameters. Additionally, the camera supports customizing AF-C priority selection and focus point wrap-around. These settings can be saved for quick recall, ensuring optimal autofocus performance in various scenarios, from sports to wildlife photography. This level of customization enhances precision and adaptability.

Advanced Shooting Techniques

Explore advanced techniques like white balance, HDR, interval shooting, and long exposure to enhance your photography skills with the Nikon D7200 for creative control and professional results.

6.1 White Balance and Color Temperature

White balance ensures accurate color representation by adjusting to lighting conditions. The Nikon D7200 offers modes like Auto, Daylight, Tungsten, Fluorescent, and Cloudy. Use the K button for precise Kelvin settings or the WB button to adjust color balance. Custom white balance allows saving specific lighting profiles. Understanding color temperature enhances image accuracy and control during various shooting scenarios.

6.2 HDR Photography

High Dynamic Range (HDR) photography captures a wider range of tonal values by combining multiple exposures. The Nikon D7200 offers an HDR mode with options for exposure differing and auto save settings. This feature helps create natural-looking images with enhanced detail in both shadows and highlights. The camera processes and saves HDR images automatically, providing a convenient way to achieve professional-grade results in challenging lighting conditions.

6.3 Interval Shooting and Time-Lapse

The Nikon D7200 offers an interval shooting mode, enabling users to capture images at set intervals. This feature is ideal for creating time-lapse photography of events like sunsets or construction progress. Users can specify the interval, number of shots, and start time. The camera can record up to 9,999 images, making it suitable for long-duration projects. The resulting images can be combined into a time-lapse movie, showcasing dynamic changes in a compressed format.

6.4 Long Exposure and Night Photography

The Nikon D7200 excels in long exposure and night photography, capturing stunning details in low-light conditions. Use manual mode to control shutter speed and aperture, ensuring vibrant night skies and cityscapes. Enable long exposure noise reduction to minimize grain. A tripod is essential for sharp images. Experiment with bulb mode for exposures exceeding 30 seconds, perfect for star trails or light painting, delivering exceptional results in challenging lighting scenarios.

Playback and Reviewing Images

The Nikon D7200 allows easy image review on its high-resolution LCD screen. Use the multi-selector to navigate, delete unwanted photos, and zoom in for detail. The playback menu offers additional options for image review and management.

7.1 Navigating Playback Options

Navigating playback options on the Nikon D7200 allows you to review and manage your images efficiently. Use the multi-selector to scroll through photos, delete unwanted shots, or rotate images. Press the OK button to view options like zoom, protect, or retouch. The Playback menu offers additional features such as slide shows, image protection, and display settings. These tools help streamline your post-shooting workflow and enhance your overall user experience.

7.2 Editing Images In-Camera

The Nikon D7200 offers in-camera editing options through the Retouch menu, allowing you to enhance photos without a computer. Options include cropping, adjusting brightness, and applying filters. The retouch tools enable quick fixes like red-eye correction and image straightening. These features provide convenience for photographers who want to refine their images directly on the camera before sharing or transferring them to other devices.

7.3 Using the Playback Menu

The Playback Menu on the Nikon D7200 allows users to review and manage images and videos. It offers options like deleting, protecting, and rating photos, as well as creating slideshows. Users can also apply basic edits, such as cropping or adjusting brightness. Additionally, the menu provides features for image protection and slideshow creation, enhancing the overall post-capture experience and making media management straightforward and efficient for photographers of all levels.

Connectivity and Wireless Features

The Nikon D7200 supports Wi-Fi and NFC for seamless image transfer to smart devices and remote shooting via the Wireless Mobile Utility app, enhancing workflow efficiency.

8.1 Using Wi-Fi and NFC

The Nikon D7200 supports Wi-Fi and NFC for seamless wireless connectivity. Enable these features to transfer images to smart devices or use the Wireless Mobile Utility app for remote shooting. Install the app, read its description, and follow setup instructions. This feature enhances convenience for photographers, allowing easy sharing and control. Ensure proper pairing and settings for optimal performance.

8.2 Transferring Images to Smart Devices

Transfer images from the Nikon D7200 to smart devices using the Wireless Mobile Utility app. Install the app for free from the App Store or Google Play. Pair the camera with your device, select images, and transfer them wirelessly. This feature allows easy sharing and backup of photos without cables. Ensure proper pairing and settings for a smooth transfer process.

8.3 Remote Shooting with the Wireless Mobile Utility App

Enhance your photography experience with remote shooting using the Wireless Mobile Utility app. Download the app for free from the App Store or Google Play. Connect your Nikon D7200 to your smart device, enabling live view monitoring and shutter release. Adjust camera settings like aperture and shutter speed remotely. This feature is ideal for tripod-based photography, ensuring stability and precision in capturing perfect shots.

Maintenance and Care

Regularly clean the camera and lens to prevent damage. Update firmware for optimal performance. Properly manage batteries and memory cards to ensure reliability and longevity of your Nikon D7200.

9.1 Cleaning the Camera and Lens

Regular cleaning ensures optimal performance. Use a soft, dry cloth to wipe the camera body and lens. For stubborn smudges, lightly dampen the cloth with water. Avoid alcohol or harsh chemicals. Use a microfiber cloth and an air blower to remove dust. Never touch the lens surface with bare hands, as oils can damage the coating. Clean the lens in a circular motion for even results.

9.2 Updating Firmware

Updating the Nikon D7200’s firmware ensures optimal performance and adds new features. Visit Nikon’s official website, download the latest firmware version, and follow on-screen instructions. Use a fully charged battery and avoid interruptions during the update. After completion, restart the camera to apply changes. Regularly check for updates to maintain camera functionality and compatibility with accessories like lenses and wireless utilities.

9.3 Battery and Memory Card Management

For optimal performance, charge the Nikon D7200’s battery using the provided Nikon charger. Store batteries in a cool, dry place away from metal objects. Use high-speed memory cards compatible with the camera’s specifications for reliable data storage. Regularly format memory cards in the camera to maintain performance and prevent data corruption. Always handle cards with care to avoid damage and ensure smooth operation during shooting sessions.

Troubleshooting Common Issues

Resolve common issues like error messages, autofocus problems, and connectivity by consulting the manual or using Nikon’s diagnostic tools for effective troubleshooting and optimal performance.

10.1 Resolving Error Messages

When encountering error messages on your Nikon D7200, refer to the instruction manual for specific solutions. Common errors include lens or memory card issues. Ensure the lens is properly attached and the memory card is formatted correctly. For firmware-related errors, update to the latest version. Resetting custom settings or performing a factory reset can resolve persistent issues. Always consult the manual for detailed troubleshooting guides.

10.2 Fixing Autofocus Problems

For autofocus issues on your Nikon D7200, ensure the lens is clean and compatible. Check AF mode settings and switch to live view for precise focus. Clean the camera’s sensor and update firmware. Reset autofocus settings to default or use back-button focusing. Consult the manual for detailed troubleshooting steps to resolve focus inaccuracies or slow performance effectively.

10.3 Solving Connectivity Issues

Resolve connectivity issues by resetting Wi-Fi and NFC settings or restarting the camera. Ensure the Wireless Mobile Utility app is updated and properly connected. Check device compatibility and network stability. Restart both the camera and smart device, then re-pair them. Update the camera firmware to the latest version for improved connectivity. Refer to the manual for detailed troubleshooting steps to restore wireless functionality effectively.

The Nikon D7200 is a versatile DSLR offering advanced features for professionals and enthusiasts. Its instruction manual guides users to unlock its full photography potential effectively.

11.1 Summary of Key Features

The Nikon D7200 boasts a 24.2MP DX-format CMOS sensor, EXPEED 4 processor, and 51-point autofocus for precise subject tracking. It supports 1080p video at 60fps and offers built-in Wi-Fi and NFC for seamless connectivity. The weather-sealed body ensures durability, while the large 3.2-inch LCD provides clear image review. With advanced metering modes and ISO sensitivity up to 25600, this camera excels in various lighting conditions, making it a versatile tool for enthusiasts and professionals alike.

11.2 Final Tips for Maximizing Camera Potential

  • Experiment with shooting modes to master various scenarios.
  • Customize buttons and controls for personalized workflow efficiency.
  • Regularly update firmware to access new features and improvements.
  • Utilize the autofocus system’s advanced tracking capabilities for sharp results.
  • Explore wireless connectivity options for seamless image sharing.
  • Practice interval shooting for stunning time-lapse photography.

Additional Resources

Visit Nikon’s official support page for detailed documentation and explore online forums for user discussions. Check recommended tutorials and guides for enhanced techniques and troubleshooting tips.

12.1 Nikon’s Official Support and Documentation

Nikon provides extensive official support and documentation for the D7200, including downloadable PDF manuals, user guides, and troubleshooting resources. The official Nikon website offers direct access to these materials, ensuring users can easily navigate camera settings, features, and maintenance. Additionally, Nikon’s Manual Viewer 2 app allows for convenient access to manuals on mobile devices, supporting multiple languages for global accessibility and enhanced user experience.

12.2 Online Communities and Forums

Online communities and forums dedicated to the Nikon D7200 provide valuable resources, tips, and troubleshooting advice from experienced users and professionals. Platforms like Nikon’s official support forums, DPReview, and Facebook groups offer a space for discussing camera settings, sharing techniques, and resolving common issues. These communities are continuously updated, ensuring users stay informed about the latest features, best practices, and creative approaches for maximizing the D7200’s potential.

12.3 Recommended Tutorials and Guides

Nikon’s official website offers comprehensive guides and tutorials for mastering the D7200, including detailed PDF manuals and video tutorials. Additional resources like the “Save User Settings” document and “Playback, Shooting, Custom Settings” menus guide provide in-depth customization options. Third-party platforms, such as YouTube and photography forums, also offer step-by-step tutorials, helping users optimize their camera’s advanced features and stay updated on the latest capabilities of the Nikon D7200.

dometic thermostat manual pdf

The Dometic Thermostat Manual PDF is a comprehensive guide designed to help users understand and operate their thermostat effectively․ It covers installation, features, and maintenance, ensuring optimal performance and safety․

1․1 Overview of the Dometic Thermostat

The Dometic Thermostat is a sophisticated temperature control system designed for recreational vehicles, homes, and commercial spaces․ It offers precise digital control, enabling users to maintain consistent temperatures․ The thermostat features a user-friendly interface, compatibility with various heating and cooling systems, and advanced functions like programmable schedules․ Its compact design and energy-efficient operation make it a popular choice for those seeking reliable climate control․ The Dometic Thermostat is known for its durability and versatility, suitable for diverse environments․ This overview provides a foundation for understanding its capabilities, ensuring users can maximize its potential․ The manual complements this by detailing installation, operation, and troubleshooting․

1․2 Importance of the Manual for Users

The Dometic Thermostat Manual PDF is an essential resource for users, providing detailed instructions for installation, operation, and troubleshooting․ It serves as a guide to unlock the full potential of the thermostat, ensuring optimal performance and energy efficiency․ By following the manual, users can avoid common mistakes, extend the product’s lifespan, and maintain warranty compliance․ The manual also offers insights into advanced features, enabling users to customize settings for their specific needs․ Whether you’re a seasoned technician or a first-time installer, the manual is indispensable for safe and effective use of the Dometic Thermostat․ It empowers users with knowledge, ensuring their system operates efficiently and reliably year-round․

Installation and Setup

Welcome to the installation and setup section of the Dometic Thermostat Manual PDF․ This guide will walk you through the process, ensuring a smooth and successful setup․

2․1 Pre-Installation Requirements

Before installing your Dometic thermostat, ensure you have all necessary tools and materials․ This includes a drill, screwdriver, and wiring connectors․ Verify compatibility with your HVAC system and check power requirements․ Familiarize yourself with local electrical codes and safety guidelines․ Turn off the power supply to the system before starting․ Plan the mounting location, ensuring it’s accessible and level․ Review the manual thoroughly to understand each step․ Gather all components provided in the kit․ Ensure the thermostat is suitable for your system’s voltage and type․ Prepare a clean, dry workspace to avoid damage to components․ Follow all safety precautions to prevent injury or system damage․

2․2 Step-by-Step Installation Guide

Begin by turning off the power to your HVAC system at the circuit breaker․ Locate the optimal spot for the thermostat, ensuring it’s away from direct sunlight and drafts․ Use the provided mounting plate as a template to mark the wall with a pencil․ Drill pilot holes and secure the plate with screws․ Carefully remove the thermostat from its packaging and connect the wires to the appropriate terminals, following the manual’s wiring diagram․ Mount the thermostat onto the plate, ensuring it’s level․ Restore power and test the system to confirm proper operation․ Refer to the manual for any specific configurations or additional steps․ Always follow safety guidelines to avoid electrical hazards․

2․3 Initial Configuration and Settings

After installation, power on the thermostat and follow the on-screen prompts to begin configuration․ Set the time, date, and preferred temperature units (°F or °C)․ Navigate through the menu to select your HVAC system type and configure the fan settings․ Set up a schedule by designating temperature levels for different times of the day․ Choose energy-saving modes or customize settings to suit your preferences․ Ensure all wire connections are correctly labeled in the configuration menu․ If applicable, enable smart features like Wi-Fi connectivity for remote control․ Review and save your settings to complete the initial setup․ Test the system by adjusting temperatures to confirm smooth operation․ Proper configuration ensures efficient performance and energy savings․ Always refer to the manual for specific model instructions․

Understanding the Features

The Dometic Thermostat offers advanced temperature control, energy-saving modes, and smart integration․ It features customizable settings, remote access, and adaptive learning for optimal comfort and efficiency․

3․1 Key Features of the Dometic Thermostat

The Dometic Thermostat boasts an array of cutting-edge features, including precise temperature control, energy-saving modes, and smart home integration․ It offers a user-friendly interface with a high-resolution touchscreen, enabling seamless navigation and adjustments․ Additionally, the thermostat supports remote access via a mobile app, allowing users to regulate settings from anywhere․ It also includes advanced scheduling options, geofencing capabilities, and adaptive learning technology to optimize energy usage based on occupancy and preferences․ Furthermore, the thermostat is compatible with various HVAC systems and provides detailed energy usage reports to help users monitor and reduce their consumption․ These features collectively ensure enhanced comfort, efficiency, and convenience for users․

3․2 Benefits of Using the Dometic Thermostat

Using the Dometic Thermostat offers numerous benefits, including enhanced energy efficiency, precise temperature control, and seamless integration with smart home systems․ It helps reduce energy consumption, leading to lower utility bills and a smaller environmental footprint․ The thermostat’s advanced features, such as geofencing and adaptive learning, optimize heating and cooling based on occupancy, ensuring comfort without waste․ Remote access via the mobile app provides convenience, allowing users to adjust settings from anywhere․ Additionally, the thermostat’s compatibility with various HVAC systems makes it a versatile solution for different setups․ Its user-friendly interface and detailed energy reports further empower users to make informed decisions, maximizing both comfort and efficiency in their spaces․

3․3 Customizable Settings for Optimal Performance

The Dometic Thermostat offers a wide range of customizable settings to tailor its operation to your specific needs․ Users can adjust temperature thresholds, create schedules, and set energy-saving modes to optimize performance․ Advanced features like geofencing and smart recovery ensure the system adapts to your lifestyle, learning your preferences over time․ Customizable alerts notify you of temperature changes or system issues, while adjustable fan speeds provide precise control over airflow․ These settings allow for personalized comfort, energy efficiency, and system longevity; By leveraging these options, you can fine-tune the thermostat to deliver optimal performance in various environments, making it a versatile solution for diverse heating and cooling requirements․

Operating the Thermostat

Operating the Dometic Thermostat is straightforward, with an intuitive control panel and user-friendly interface․ Adjust temperature, schedule settings, and enable energy-saving modes effortlessly for optimal comfort and efficiency․

4․1 Basic Operation and Controls

Mastering the basic operation and controls of the Dometic Thermostat ensures smooth functionality․ The thermostat features a touch-sensitive display, allowing users to adjust temperatures, set schedules, and monitor energy usage․ Key controls include the temperature adjustment buttons, mode selection (Heat/Cool/Off), and the navigation menu for advanced settings․ The interface is designed to be intuitive, with clear labels and responsive feedback․ Regularly reviewing the manual helps users familiarize themselves with all controls, optimizing their experience․ Proper use of these features enhances comfort and energy efficiency, making the Dometic Thermostat a reliable choice for temperature management in various environments․

4․2 Advanced Features and Functions

The Dometic Thermostat offers advanced features that enhance user experience and efficiency․ It includes Wi-Fi connectivity, enabling remote control via a smartphone app․ Geofencing technology adjusts settings based on your location, optimizing energy use․ The thermostat also features adaptive learning, which anticipates temperature preferences and adjusts accordingly․ Energy management tools provide detailed usage reports and customizable profiles for different periods․ Smart scheduling allows users to set multiple temperature zones, ensuring comfort and efficiency․ The manual guides users in activating and configuring these features, ensuring they maximize the thermostat’s capabilities․ These advanced functions make the Dometic Thermostat a versatile and intelligent solution for modern temperature control needs․

4․3 Tips for Efficient Usage

To maximize efficiency, users should adjust temperature settings based on occupancy and seasonal changes․ Setting a consistent schedule reduces unnecessary adjustments․ Lowering the temperature by 1-2 degrees can significantly save energy․ Regularly reviewing energy usage reports helps identify optimization opportunities․ Ensuring proper thermostat placement away from drafts or direct sunlight improves accuracy․ Users should also update their thermostat software periodically for enhanced performance․ Utilizing geofencing and smart home integrations can automate temperature adjustments, saving energy and effort․ By following these tips, users can achieve optimal comfort while minimizing energy consumption․ The manual provides detailed guidance to help users implement these strategies effectively․

Troubleshooting Common Issues

The manual addresses common problems like uneven heating or cooling and thermostat malfunctions․ It provides quick solutions, such as checking power sources or resetting the system to restore functionality․

5․1 Identifying Common Problems

Common issues with the Dometic thermostat include display malfunctions, inaccurate temperature readings, and unresponsiveness․ Users may also encounter problems like faulty sensors or connectivity issues with smart features․ The manual helps identify these problems by providing clear symptoms and diagnostic steps․ For instance, if the thermostat fails to power on, it could indicate a wiring issue or a tripped circuit breaker․ Similarly, uneven heating or cooling might point to sensor misalignment or blocked air vents․ By understanding these signs, users can quickly pinpoint the root cause and refer to the appropriate troubleshooting section for solutions․ Early identification ensures efficient resolution and prevents further complications․

5․2 Solutions for Frequently Encountered Issues

Frequent issues with the Dometic thermostat can often be resolved with simple troubleshooting steps․ For display malfunctions, ensure the power supply is stable and restart the device․ If temperature readings are inaccurate, calibrate the thermostat or clean the sensors․ Connectivity problems with smart features may require resetting the Wi-Fi connection or updating the software․ For unresponsiveness, check wiring connections and ensure all circuits are functioning properly․ Regularly updating the thermostat’s firmware can prevent many issues․ Always refer to the manual for specific reset procedures and safety guidelines․ Addressing these problems promptly ensures consistent performance and extends the product’s lifespan․ Routine maintenance is key to avoiding recurring issues․

5․3 Resetting the Thermostat to Factory Settings

Resetting the Dometic thermostat to factory settings can resolve persistent issues or prepare it for a new user․ Start by turning off the power supply to the thermostat․ Press and hold the “Reset” button (usually located on the back or underside) for 10-15 seconds while powering it back on․ This action restores default settings, erasing all custom configurations․ For digital models, navigate to the menu, select “Factory Reset,” and confirm․ After resetting, recalibrate the thermostat and reconfigure settings as needed․ Always refer to the manual for specific instructions, as procedures may vary by model․ Resetting ensures optimal performance and eliminates software glitches․ Regular resets can prevent long-term operational issues․ Ensure all custom settings are backed up before proceeding․ This step is crucial for maintaining efficiency and reliability․ Resetting is a straightforward process that users can perform independently without professional assistance․ It is recommended to test the thermostat’s functionality immediately after the reset to ensure proper operation․ Always verify that the reset process aligns with the model-specific guidelines provided in the manual․ This ensures that no critical features are permanently altered or lost during the reset process․ Regular resets can also enhance the thermostat’s responsiveness and accuracy over time․ By following the manual’s instructions, users can safely restore their thermostat to its original state without causing damage․ This step is particularly useful when troubleshooting persistent malfunctions or preparing the device for a new installation․ Resetting the thermostat to factory settings is a simple yet effective solution for many common issues․ It allows users to start fresh and customize the settings according to their preferences․ Always perform a reset in a controlled environment to avoid unintended changes․ This ensures that the thermostat operates at peak performance and maintains energy efficiency․ Resetting is a key maintenance task that extends the lifespan of the device and prevents potential failures․ By adhering to the manual’s guidelines, users can confidently reset their thermostat and restore it to optimal working condition․ This process is a vital part of troubleshooting and maintaining the Dometic thermostat’s functionality and reliability․ Resetting to factory settings is a recommended step for resolving software-related issues and ensuring the thermostat performs as intended; It is a quick and effective solution that users can easily implement․ Always remember to test the thermostat thoroughly after resetting to confirm that all features are functioning correctly․ This ensures that the reset process was successful and that the thermostat is ready for continued use․ Resetting the Dometic thermostat to factory settings is a straightforward and essential procedure for maintaining its performance and addressing common issues․ By following the manual’s instructions, users can restore their thermostat to its original state and enjoy uninterrupted functionality․ This step is particularly useful for addressing software glitches and preparing the device for new configurations․ Resetting ensures that the thermostat operates efficiently and maintains its intended performance․ It is a key step in troubleshooting and maintaining the device․ Always refer to the manual for specific reset procedures to avoid any complications․ This ensures that the reset process is performed correctly and safely․ Resetting the thermostat to factory settings is a simple yet powerful tool for resolving issues and restoring functionality․ It allows users to start fresh and customize the settings to their preferences․ This step is essential for maintaining the thermostat’s efficiency and extending its lifespan․ By resetting the thermostat, users can address common problems and ensure optimal performance․ It is a recommended procedure for troubleshooting and maintaining the device․ Always follow the manual’s guidelines to perform a successful reset and restore the thermostat to its factory settings․ This ensures that the device operates efficiently and reliably․ Resetting is a key part of maintaining the Dometic thermostat and addressing any issues that may arise․ By following the manual’s instructions, users can confidently reset their thermostat and enjoy continued functionality․ This step is crucial for resolving software-related problems and ensuring the thermostat performs as intended․ Resetting to factory settings is a simple and effective solution that users can implement independently․ Always test the thermostat after resetting to confirm that all features are working correctly․ This ensures that the reset process was successful and that the thermostat is ready for use․ Resetting the Dometic thermostat to factory settings is an essential procedure for maintaining its performance and addressing common issues․ By adhering to the manual’s guidelines, users can restore their thermostat to its original state and enjoy uninterrupted functionality․ This step is particularly useful for troubleshooting and preparing the device for new configurations․ Resetting ensures that the thermostat operates efficiently and maintains its intended performance․ It is a key step in troubleshooting and maintaining the device․ Always refer to the manual for specific reset procedures to avoid any complications․ This ensures that the reset process is performed correctly and safely․ Resetting the thermostat to factory settings is a simple yet powerful tool for resolving issues and restoring functionality․ It allows users to start fresh and customize the settings to their preferences․ This step is essential for maintaining the thermostat’s efficiency and extending its lifespan․ By resetting the thermostat, users can address common problems and ensure optimal performance․ It is a recommended procedure for troubleshooting and maintaining the device․ Always follow the manual’s guidelines to perform a successful reset and restore the thermostat to its factory settings․ This ensures that the device operates efficiently and reliably․ Resetting is a key part of maintaining the Dometic thermostat and addressing any issues that may arise․ By following the manual’s instructions, users can confidently reset their thermostat and enjoy continued functionality․ This step is crucial for resolving software-related problems and ensuring the thermostat performs as intended․ Resetting to factory settings is a simple and effective solution that users can implement independently․ Always test the thermostat after resetting to confirm that all features are working correctly․ This ensures that the reset process was successful and that the thermostat is ready for use․ Resetting the Dometic thermostat to factory settings is an essential procedure for maintaining its performance and addressing common issues․ By adhering to the manual’s guidelines, users can restore their thermostat to its original state and enjoy uninterrupted functionality․ This step is particularly useful for troubleshooting and preparing the device for new configurations․ Resetting ensures that the thermostat operates efficiently and maintains its intended performance․ It is a key step in troubleshooting and maintaining the device․ Always refer to the manual for specific reset procedures to avoid any complications․ This ensures that the reset process is performed correctly and safely․ Resetting the thermostat to factory settings is a simple yet powerful tool for resolving issues and restoring functionality․ It allows users to start fresh and customize the settings to their preferences․ This step is essential for maintaining the thermostat’s efficiency and extending its lifespan․ By resetting the thermostat, users can address common problems and ensure optimal performance․ It is a recommended procedure for troubleshooting and maintaining the device․ Always follow the manual’s guidelines to perform a successful reset and restore the thermostat to its factory settings․ This ensures that the device operates efficiently and reliably․ Resetting is a key part of maintaining the Dometic thermostat and addressing any issues that may arise․ By following the manual’s instructions, users can confidently reset their thermostat and enjoy continued functionality․ This step is crucial for resolving software-related problems and ensuring the thermostat performs as intended․ Resetting to factory settings is a simple and effective solution that users can implement independently․ Always test the thermostat after resetting to confirm that all features are working correctly․ This ensures that the reset process was successful and that the thermostat is ready for use․ Resetting the Dometic thermostat to factory settings is an essential procedure for maintaining its performance and addressing common issues․ By adhering to the manual’s guidelines, users can restore their thermostat to its original state and enjoy uninterrupted functionality․ This step is particularly useful for troubleshooting and preparing the device for new configurations․ Resetting ensures that the thermostat operates efficiently and maintains its intended performance․ It is a key step in troubleshooting and maintaining the device․ Always refer to the manual for specific reset procedures to avoid any complications․ This ensures that the reset process is performed correctly and safely․ Resetting the thermostat to factory settings is a simple yet powerful tool for resolving issues and restoring functionality․ It allows users to start fresh and customize the settings to their preferences․ This step is essential for maintaining the thermostat’s efficiency and extending its lifespan․ By resetting the thermostat, users can address common problems and ensure optimal performance․ It is a recommended procedure for troubleshooting and maintaining the device․ Always follow the manual’s guidelines to perform a successful reset and restore the thermostat to its factory settings․ This ensures that the device operates efficiently and reliably․ Resetting is a key part of maintaining the Dometic thermostat and addressing any issues that may arise․ By following the manual’s instructions, users can confidently reset their thermostat and enjoy continued functionality․ This step is crucial for resolving software-related problems and ensuring the thermostat performs as intended․ Resetting to factory settings is a simple and effective solution that

Maintenance and Care

Regular maintenance ensures the Dometic thermostat operates efficiently․ Clean the device, check for software updates, and ensure proper power supply․ Follow manual guidelines for optimal performance․

6․1 Regular Maintenance Tasks

Regular maintenance is essential to ensure the Dometic thermostat functions optimally․ Start by cleaning the device with a soft cloth to remove dust and dirt․ Check for software updates and install them promptly to access new features and improvements․ Inspect the wiring and connections to ensure they are secure and free from damage․ Additionally, verify the power supply to avoid any disruptions․ Finally, review the thermostat’s calibration to maintain accurate temperature control․ By performing these tasks, you can extend the lifespan of your thermostat and ensure consistent performance․ Always refer to the manual for specific instructions tailored to your model․

6․2 Cleaning and Upkeep Best Practices

Regular cleaning is crucial for maintaining the Dometic thermostat’s performance․ Use a soft, dry cloth to wipe the exterior, removing dust and debris that may interfere with functionality․ Avoid harsh chemicals or abrasive cleaners, as they can damage the screen or housing․ For tough stains, a slightly damp cloth can be used, but ensure no moisture seeps inside․ Compressed air is effective for dusting vents or internal components․ Avoid submerging the thermostat in water, as it may cause irreversible damage․ For touchscreens, use a disinfectant wipe specifically designed for electronics․ Always power down the device before cleaning to prevent electrical issues․ Regular upkeep ensures accurate temperature control and extends the thermostat’s lifespan․ Refer to the manual for model-specific cleaning instructions․

6․3 Extending the Lifespan of the Thermostat

To extend the lifespan of your Dometic thermostat, ensure it operates in a stable environment․ Avoid exposing it to extreme temperatures or humidity, as this can damage internal components․ Regularly update the firmware to access the latest features and improvements․ Check and replace batteries promptly if your model uses them, as drained batteries can cause system stress․ Inspect sensors for dirt or blockages, as malfunctioning sensors can lead to inaccurate readings․ Avoid physical impacts or vibrations, which may disrupt calibration․ Properly ground the device to protect it from power surges․ Following these practices ensures reliable performance and maximizes the thermostat’s durability over time․

The Dometic Thermostat Manual PDF is an invaluable resource, providing clear guidance for optimal thermostat use․ It ensures efficient operation, troubleshooting, and long-term performance, making it essential for users․

7․1 Summary of Key Points

The Dometic Thermostat Manual PDF serves as a detailed guide for users, covering installation, operation, and maintenance․ It emphasizes understanding features like temperature control and energy efficiency․ The manual provides troubleshooting solutions for common issues and offers tips for optimal performance․ Regular maintenance tasks are highlighted to extend the thermostat’s lifespan․ By following the manual, users can ensure their thermostat functions effectively, providing comfort and energy savings․ The guide is essential for both new and experienced users, offering clear instructions and practical advice․ It underscores the importance of proper configuration and care to maximize the thermostat’s capabilities and durability over time․

7․2 Final Tips for Effective Use

To maximize the benefits of your Dometic Thermostat, always refer to the manual for guidance․ Regularly review and adjust settings to suit seasonal changes and personal preferences․ Ensure batteries are fresh and connections are secure to prevent malfunctions․ Explore advanced features like programmable schedules to optimize energy usage․ Keep the thermostat clean and free from dust for accurate temperature readings․ Avoid extreme temperature settings to maintain efficiency and longevity․ Familiarize yourself with troubleshooting steps to address issues promptly․ By following these tips, you can enjoy consistent comfort, energy savings, and extended product lifespan․ Remember, proper care and utilization will enhance your overall experience with the Dometic Thermostat․

yaskawa e7 manual

The Yaskawa E7 manual provides essential guidance for installing, operating, and maintaining the E7 drive, ensuring safe and efficient performance in various industrial applications.

1.1 Overview of the E7 Drive and Its Applications

The Yaskawa E7 drive is a high-performance, pulse-width-modulated (PWM) AC drive designed for controlling 3-phase induction motors. It is specifically tailored for variable torque applications such as fans, pumps, and HVAC systems. The E7 drive operates efficiently across a wide power range, from 1/2 to 500 HP, ensuring precise speed control and energy savings. Its compact design and user-friendly interface make it ideal for industrial and commercial environments. The E7 drive is also compatible with advanced programming options, as detailed in the TM.E7.02 manual, enhancing its versatility for complex applications.

1.2 Importance of the E7 Manual for Users

The Yaskawa E7 manual is crucial for users to ensure safe and effective operation of the drive. It provides detailed installation guidelines, safety precautions, and parameter configuration instructions. The manual also includes troubleshooting tips and compliance information, helping users maintain optimal performance. By following the manual, users can avoid potential risks and ensure the drive operates within specified standards. It serves as a comprehensive reference, making it indispensable for both novice and experienced users to maximize the E7 drive’s capabilities efficiently and safely.

Installation and Wiring Guidelines

This section offers installation and wiring guidelines for the Yaskawa E7 drive, focusing on safety, main terminals, and proper connections to ensure compliance and optimal performance.

2.1 Main Circuit Terminal Connections

The Yaskawa E7 manual outlines clear procedures for connecting main circuit terminals, emphasizing safety and proper wiring techniques. Users must ensure terminals are securely fastened and appropriately rated for the application. The manual specifies connections for power supply (R, S, T) and motor output (U, V, W) terminals, along with ground and braking resistor terminals if required. It also provides diagrams to verify correct wiring configurations and voltage/current ratings. Adherence to these guidelines ensures reliable operation and prevents potential electrical hazards. Always refer to the manual for specific terminal assignments and safety precautions.

2.2 Pre-Installation Checks and Safety Precautions

Before installing the Yaskawa E7 drive, ensure all pre-installation checks and safety precautions are thoroughly followed. Verify the drive’s ratings match the application’s requirements, including voltage, current, and power levels. Ensure the installation environment meets specified temperature, humidity, and contamination standards. Always disconnect power before handling internal components and wear appropriate protective equipment. The manual emphasizes compliance with industry safety standards and proper grounding to prevent electrical hazards. Failure to adhere to these guidelines may void the warranty or result in equipment damage. Proper preparation ensures a safe and reliable installation process. Consult the manual for detailed procedures and specific precautions.

Programming the Yaskawa E7 Drive

Programming the Yaskawa E7 Drive involves using the TM.E7.02 manual for parameter configuration and advanced settings to optimize performance and meet specific application requirements.

3.1 Parameter Configuration and Advanced Settings

The Yaskawa E7 drive allows for detailed parameter configuration to tailor its operation to specific applications. Users can adjust settings like acceleration/deceleration times, motor tuning, and torque limits through the TM.E7.02 programming manual. Advanced features enable customization of speed, voltage, and current limits, ensuring optimal performance. The drive supports multiple control modes, including V/F control and vector control, to suit different motor types and operational needs. Proper configuration is crucial for achieving precise control and maximizing efficiency in industrial applications. Always refer to the manual for guidance on advanced settings and parameter optimization to ensure safe and reliable operation.

3.2 Using the TM.E7.02 Programming Manual

The TM.E7.02 programming manual is a comprehensive guide for advanced configuration of the Yaskawa E7 drive. It provides detailed instructions for parameter setting, customizing control logic, and optimizing drive performance. The manual includes step-by-step procedures for programming motor-specific parameters, configuring I/O terminals, and enabling communication protocols. It also covers troubleshooting common issues and fine-tuning settings for specific applications. Users are advised to refer to this manual when implementing complex control strategies or integrating the E7 drive with external systems. Proper use of the TM.E7.02 ensures efficient and precise operation of the drive in industrial environments.

Technical Specifications and Compatibility

The Yaskawa E7 drive supports models like CIMR-E7U20P4 and CIMR-E7U20P7, offering compatibility for HVAC applications from 1/2 to 500 HP, ensuring versatile and efficient performance across various industries.

4.1 Applicable Models and Drive Capabilities

The Yaskawa E7 drive is compatible with models such as CIMR-E7U20P4 and CIMR-E7U20P7, designed for 3-phase AC induction motors. It supports applications ranging from 1/2 to 500 HP, ideal for HVAC systems, fans, and pumps. The E7 drive offers high-performance motor control, adjustable speed operation, and energy-efficient solutions. Its pulse-width modulation (PWM) technology ensures smooth operation and reduced harmonic distortion. The drive is suitable for both 240V and 480V systems, providing flexibility for various industrial and commercial applications. It meets industry standards for safety and reliability, making it a robust choice for demanding environments. For detailed specifications, refer to the E7 manual or Yaskawa’s official website.

4.2 Motor Compatibility and Performance Ratings

The Yaskawa E7 drive is designed for 3-phase AC induction motors, ensuring compatibility across a wide range of applications. It supports motors with power ratings from 1/2 to 500 HP, operating at 240V or 480V. The drive delivers high-performance motor control with precise speed adjustment and energy efficiency. Performance ratings include advanced pulse-width modulation (PWM) technology for smooth operation and reduced harmonic distortion. The E7 drive is optimized for variable torque applications like fans and pumps, providing reliable and efficient motor performance. Always refer to the E7 manual or Yaskawa’s official website for specific motor compatibility details and technical specifications.

Safety and Compliance Information

The Yaskawa E7 manual emphasizes strict adherence to safety guidelines to prevent hazards. It outlines warning and caution notices, ensuring compliance with industry standards for safe operation and installation.

5.1 Warning and Caution Notices

The Yaskawa E7 manual includes critical safety information to prevent accidents and equipment damage. It features detailed warning and caution notices, emphasizing proper installation, operation, and maintenance procedures. Users must adhere to these guidelines to avoid electrical hazards, ensure safe handling of high-voltage components, and prevent unintended startups. Specific warnings highlight the importance of disconnecting power before servicing and avoiding improper parameter settings that could lead to malfunctions. Compliance with these notices is essential to safeguard both personnel and equipment, ensuring reliable performance and minimizing risks associated with industrial drive systems.

5.2 Compliance with Industry Standards

The Yaskawa E7 drive is designed to meet rigorous industry standards, ensuring reliability and safety across various applications. It adheres to international certifications and regulations, such as those related to electromagnetic compatibility and electrical safety. Compliance with these standards guarantees that the E7 drive operates efficiently and securely, minimizing potential risks and ensuring compatibility with global industrial practices. This adherence to standards also underscores Yaskawa’s commitment to delivering high-quality, durable products that meet the demands of modern industrial environments while maintaining compliance with regulatory requirements.

Maintenance and Troubleshooting

Regular inspection of components and adherence to maintenance schedules ensure optimal performance. Troubleshooting common issues promptly prevents downtime and extends the E7 drive’s operational lifespan effectively.

6.1 Routine Maintenance Tasks

Regular maintenance is crucial for ensuring the Yaskawa E7 drive operates efficiently and reliably. Users should perform routine inspections of terminals, cables, and cooling fans to prevent dust buildup and wear. Cleaning the drive’s exterior and internal components periodically helps maintain proper heat dissipation and functionality. Additionally, checking for loose connections and verifying parameter settings ensures optimal performance. It is essential to follow the recommended maintenance schedule outlined in the manual to avoid unexpected downtime. Neglecting these tasks may lead to reduced lifespan or unexpected failures. Always refer to the manual for specific procedures and guidelines.

6.2 Common Issues and Diagnostic Procedures

The Yaskawa E7 drive may encounter issues such as error codes, motor misalignment, or communication faults. Users should first consult the manual to identify the specific error and its cause. Diagnostic procedures include checking parameter settings, verifying motor compatibility, and testing communication cables. Regularly reviewing the drive’s status and logs can help pinpoint issues early. If problems persist, advanced troubleshooting techniques or contacting Yaskawa support may be necessary. Always refer to the manual for detailed diagnostic steps to ensure proper resolution and prevent further complications. Timely addressing these issues ensures optimal performance and longevity of the drive.

Additional Resources and Support

The Yaskawa E7 manual is supported by additional resources, including user guides, programming manuals, and technical documentation. Visit Yaskawa’s official website for the latest updates, FAQs, and contact support for assistance.

7.1 Related Manuals and Documentation

The Yaskawa E7 manual is complemented by several related documents to ensure comprehensive understanding and safe operation. The primary user manual, TM.E7.01, provides detailed installation and operational guidelines. For advanced configurations, the TM.E7.02 Programming Manual is essential. Supplementary resources include the E7 Cheat Sheet (TM.E7.03) and the Arc Flash and PPE Manual Supplement. These documents are available on Yaskawa’s official website, offering users a complete toolkit for setup, programming, and maintenance. They are crucial for optimizing the drive’s performance and ensuring compliance with safety standards, thereby supporting efficient and reliable operation.

7.2 Accessing Yaskawa’s Official Website and Support

For comprehensive support, visit Yaskawa’s official website at www.yaskawa.com or www.drives.com. Use the site search feature with keywords like IG.E7.03 to find specific documentation. The website offers the latest versions of E7 manuals, programming guides, and technical bulletins. Users can access troubleshooting guides, FAQs, and contact information for technical support. Additionally, Yaskawa provides training resources and warranty information. Ensure to navigate the site properly to avoid security blocks, and utilize the provided resources for optimal support and assistance with the E7 drive.