
Safety Precautions
Always unplug the Oster Roaster Oven when not in use and avoid operating it with a damaged cord or plug․ Never cook directly in the roaster oven body—use the provided roasting pan․ Keep children away from the oven while it’s in operation․ Use oven mitts to handle hot pans and avoid touching the oven body immediately after cooking․ Ensure the appliance is placed on a heat-resistant surface to prevent damage․ Follow all safety guidelines to avoid electrical shock or product malfunctions․
1․1․ General Safety Guidelines
Always unplug the Oster Roaster Oven when not in use and avoid operating it with a damaged cord or plug․ Ensure the appliance is placed on a heat-resistant surface to prevent damage․ Use oven mitts to handle hot pans, and never touch the oven body immediately after cooking․ Keep children away from the oven while in operation․ Do not cook directly in the roaster oven body—use the provided roasting pan only․ Avoid overloading the pan and ensure all parts are in good condition before use․
1․2․ Electrical Safety Tips
Never operate the Oster Roaster Oven with a damaged cord or plug․ Ensure the appliance is plugged into a 120-volt AC outlet only․ Avoid exposing the oven or cord to water or moisture․ Do not overload electrical outlets or use extension cords, as this may cause electrical issues․ Keep the oven away from water sources to prevent shock or malfunction․ Always follow proper electrical safety practices․
1․3․ Precautions for Children
Keep children away from the Oster Roaster Oven while it is in use or cooling down․ Supervise children at all times near the appliance․ Teach them to never touch hot surfaces or attempt to open the oven․ Store the oven out of children’s reach when not in use․ Ensure all cords and handles are secure to prevent accidental contact or burns․
Understanding Your Oster Roaster Oven
The Oster Roaster Oven is a versatile 22-quart appliance for roasting, baking, and slow cooking, featuring a self-basting lid and removable pan for even heat distribution and easy cleanup․
2․1․ Key Components of the Oster Roaster Oven
The Oster Roaster Oven features a removable roasting pan for easy food placement and cleanup, a roasting rack for even air circulation, and a temperature control knob for precise heat adjustment; The self-basting lid ensures moisture retention, while the keep-warm setting maintains food temperature․ These components work together to enhance cooking efficiency and versatility․
2․2․ Temperature Control and Settings
The Oster Roaster Oven features a temperature control knob allowing you to set precise heat levels for various cooking methods․ Preheating is essential, typically requiring 15-20 minutes to reach the desired temperature․ The oven operates within a range of 150°F to 450°F, ensuring flexibility for roasting, baking, or slow cooking; Always monitor the temperature to achieve optimal results․
2․3․ Removable Roasting Pan and Rack
The removable roasting pan and rack are designed for easy food placement and cleanup․ Always use the pan for cooking, as direct cooking in the oven body is unsafe․ Metal pans are recommended for better heat transfer․ After cooking, allow the pan and rack to cool before washing․ Regular cleaning prevents food residue buildup and maintains performance․
Initial Setup and Preheating
Unpack and prepare the Oster Roaster Oven for first use․ Place the removable roasting pan inside, plug in, and set the temperature control to the minimum․ Preheat for 15-20 minutes before cooking․
3․1․ Unpacking and First-Time Preparation
Carefully unpack the Oster Roaster Oven and inspect for damage․ Place the removable roasting pan inside the oven body․ Ensure the temperature control is in the minimum position before plugging in․ Preheat the oven for 15-20 minutes to prepare for first use․ Always use oven mitts when handling hot components․ For optimal performance, use metal pans for better heat transfer during cooking․
3․2․ Placing the Roasting Pan and Rack
Position the removable roasting pan inside the oven body, ensuring it fits securely․ Place the roasting rack on top of the pan, aligning it properly for even cooking․ Always use the rack for roasting meats or vegetables to prevent food from touching the oven bottom․ Never cook directly in the oven body; use the provided pan and rack for safe and efficient cooking․
3․3․ Preheating the Oven
Place the removable roasting pan in the oven body before preheating․ Set the temperature control to the desired setting and plug in the oven․ Allow the oven to preheat for 15 to 20 minutes․ Ensure the oven is fully heated before adding food for even cooking results․ Always preheat with the roasting pan inside to maintain proper heat distribution․

Operating the Oster Roaster Oven
Plug in the oven, set the temperature, and preheat for 15-20 minutes․ Use the removable pan for cooking and adjust settings for roasting, baking, or slow cooking․ Utilize the keep-warm feature to maintain meal temperature after cooking․
4․1․ Basic Cooking Functions
The Oster Roaster Oven offers versatile cooking options․ Start by placing the removable roasting pan inside and plugging in the unit․ Set the temperature using the control knob, then preheat for 15-20 minutes․ Use the roaster for baking, slow cooking, or roasting․ The oven distributes heat evenly, ensuring consistent results for meats, vegetables, and more․ Adjust settings as needed for perfect cooking outcomes․
4․2․ Roasting and Baking Instructions
For roasting, preheat the Oster Roaster Oven to the desired temperature and place the roasting rack in the pan․ Position your meat or vegetables evenly and roast at 325°F to 425°F․ For baking, ensure the oven is preheated and use appropriate bakeware․ The oven’s even heat distribution ensures perfect results for both methods, making cooking effortless and efficient․
4․3․ Slow Cooking and Keep-Warm Features
For slow cooking, set the temperature to low and cook for 8-12 hours․ Use the removable pan for even heat distribution․ The keep-warm feature maintains food at a safe temperature (160°F) for serving convenience․ Avoid operating the oven with a damaged cord or plug․ Ensure the appliance cools down before cleaning to prevent burns or damage․

Cleaning and Maintenance
Clean the Oster Roaster Oven with a damp cloth, avoiding abrasive cleaners․ Remove food residue from the pan and rack․ Allow the oven to cool before cleaning to prevent burns․ Regular maintenance ensures optimal performance and longevity of the appliance․
5․1․ Routine Cleaning Tips
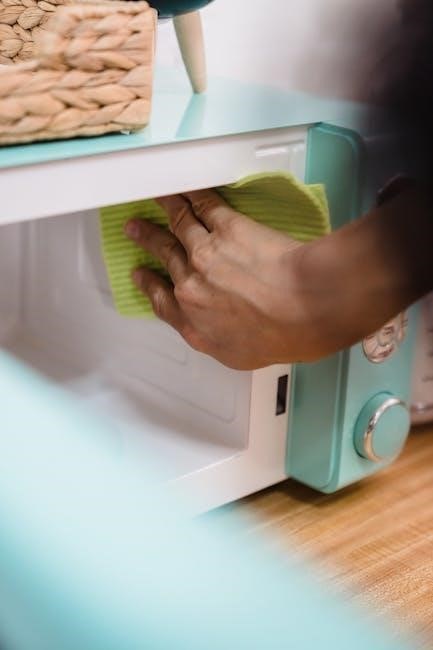
For routine cleaning, unplug the Oster Roaster Oven and allow it to cool completely․ Wipe the exterior with a damp cloth and mild detergent․ Remove the roasting pan and rack, washing them with warm soapy water․ Use a soft brush to scrub away stubborn food residue․ Avoid using abrasive cleaners or scouring pads to prevent scratching the surfaces․ Regular cleaning ensures optimal performance and hygiene․
5․2․ Deep Cleaning the Oven
For deep cleaning, mix baking soda and water to form a paste․ Apply the paste to the interior surfaces and let it sit overnight․ Use a soft brush to scrub away tough stains․ Rinse thoroughly with warm water and dry with a clean cloth․ Avoid using abrasive cleaners or harsh chemicals to protect the oven’s finish․ Regular deep cleaning ensures long-lasting performance and a pristine appearance․
5․3․ Maintaining the Exterior
Regularly wipe the exterior with a damp cloth after each use to remove splatters and spills․ Avoid using harsh chemicals or abrasive cleaners, as they may damage the finish․ Dry the surface thoroughly to prevent water spots․ For stubborn stains, dilute a mild detergent in warm water and gently scrub․ Always place the oven on a heat-resistant surface to protect it from damage․ Proper exterior care ensures a polished appearance and longevity of your Oster Roaster Oven․
Troubleshooting Common Issues
Refer to the user manual for solutions to common problems like uneven cooking or malfunctioning controls․ Ensure proper power supply and check for blockages in heating elements․ Regular maintenance and cleaning can prevent many issues․ Contact Oster Consumer Service for persistent problems or damaged parts․
6․1․ Oven Not Heating
If the Oster Roaster Oven isn’t heating, ensure the power cord is securely plugged into a 120V outlet․ Check for tripped circuit breakers or blown fuses․ Verify that the temperature control is set correctly․ If issues persist, consult the user manual or contact Oster Consumer Service for assistance․ Always follow safety guidelines when troubleshooting electrical appliances․
6․2․ Uneven Cooking
If food is cooking unevenly, ensure the roasting pan and rack are placed correctly․ Check that food is spread evenly and not overcrowded․ Verify that the oven is preheated properly․ Rotate the pan halfway through cooking for consistent results․ If issues persist, refer to the user manual or contact Oster Consumer Service for further assistance․
6․3․ Malfunctioning Controls
If the controls on your Oster Roaster Oven are malfunctioning, first ensure the appliance is properly plugged into a 120-volt outlet․ Check the cord for damage and avoid using it if compromised․ If issues persist, unplug the oven, wait a few minutes, then plug it back in to reset the controls․ Contact Oster Consumer Service for further assistance or repairs․
Additional Features and Accessories
The Oster Roaster Oven includes a self-basting lid for even moisture distribution and a keep-warm setting for maintaining food temperature․ Use recommended metal pans for optimal heat transfer and durability․
7․1․ Using the Keep-Warm Setting
After cooking, select the keep-warm feature to maintain your dish at a safe temperature․ This setting ensures food stays warm without overcooking, perfect for buffet-style meals or delayed serving․ Simply press the keep-warm button and let the oven handle the rest, providing convenience and preserving flavor․
7․2․ Self-Basting Lid Instructions
The self-basting lid is designed to circulate moisture and flavor during cooking․ Place the lid securely on the roaster oven to ensure even basting․ For optimal results, position the lid with the basting channels facing downward․ Avoid removing the lid frequently, as this may disrupt the cooking process․ Refer to the manual for specific instructions on lid placement and removal․
7․3․ Recommended Accessories
Enhance your cooking experience with Oster’s recommended accessories, such as durable roasting racks and non-stick pans for easy food release․ Use oven mitts to safely handle hot cookware․ Additionally, invest in a basting brush for even flavor distribution and a meat thermometer for precise temperature control․ These accessories ensure optimal performance and convenience when using your Oster Roaster Oven․

Recipe Ideas for Your Oster Roaster Oven
Explore delicious recipes like classic roasted turkey, slow-cooked beef stew, and baked vegetables․ The Oster Roaster Oven’s even heat and self-basting lid ensure perfect results every time․
8․1․ Classic Roasted Turkey
For a perfect roasted turkey, preheat your Oster Roaster Oven to 325°F․ Season a 14-16 lb turkey with salt, pepper, and herbs․ Place it in the roasting pan, breast side up․ Roast for 2-2․5 hours, basting occasionally․ Use the self-basting lid for even moisture․ Let the turkey rest 20 minutes before carving for juicy, flavorful results․
8;2․ Slow-Cooked Beef Stew
Preheat your Oster Roaster Oven to 300°F․ Brown beef cubes in a skillet, then transfer to the roasting pan․ Add diced vegetables, broth, and seasonings․ Cover with the self-basting lid․ Cook on low for 6-8 hours or high for 3-4 hours․ Use the keep-warm setting until serving․ Serve hot, garnished with fresh herbs for a hearty, flavorful meal․
8․3․ Baked Vegetables
Preheat your Oster Roaster Oven to 375°F․ Toss sliced or chopped vegetables (like potatoes, carrots, and zucchini) with olive oil, salt, and pepper․ Spread evenly in the roasting pan․ Cover with the self-basting lid or foil․ Roast for 30-40 minutes, stirring halfway․ Use the rack for even browning․ Serve hot, garnished with fresh herbs for a delicious side dish․

Warranty and Customer Support
For inquiries, contact Oster Consumer Service at 1-800-334-0759 (USA) or 1-800-667-8623 (Canada)․ Visit www․oster․com for warranty details and support․ Warranty covers defects under normal use․
9․1․ Understanding Your Warranty
Your Oster Roaster Oven is backed by a limited warranty covering manufacturing defects under normal use․ The warranty period varies by product, typically 1-5 years․ Register your product to ensure coverage․ For claims, contact Oster Consumer Service with proof of purchase․ Damage from misuse or accidents is not covered․ Warranty is non-transferable and applies only to the original purchaser․
9․2․ Contacting Oster Consumer Service
For assistance with your Oster Roaster Oven, contact Consumer Service at 1-800-334-0759 (USA) or 1-800-667-8623 (Canada)․ Visit www․oster․com for support, manuals, and troubleshooting․ Have your product details and proof of purchase ready for faster service․ Oster Consumer Service is available to address warranty claims, repair needs, and general inquiries about your roaster oven․
9․3․ Online Resources and Manuals
Visit www․oster․com to access user guides, instruction manuals, and troubleshooting tips for your Oster Roaster Oven․ Download PDF manuals for detailed instructions and safety guidelines․ For specific product questions, use the website’s support section or contact Consumer Service directly․ Online resources provide comprehensive assistance for optimal use and maintenance of your appliance․