Monthly Archives: November 2025

car manual written for nyt

Recent New York Times coverage highlights a surprising trend: renewed interest in driving cars with manual transmissions, despite increasing automation.

This revival isn’t merely nostalgia; studies suggest manuals foster attentiveness, and enthusiasts appreciate the direct connection to the vehicle.

The manual gearbox, once fading, now offers a unique driving experience, attracting a new generation alongside seasoned drivers seeking engagement.

Why a Manual in the Modern Era?

The New York Times has observed a counter-current to the automotive industry’s relentless push towards automation. Why choose a manual transmission when most new cars offer effortless automatics? The answer lies in a growing desire for driver engagement and a more visceral connection with the machine.

Modern driving often feels detached, with technology mediating the experience. A manual gearbox demands active participation – selecting gears, coordinating clutch and throttle – fostering a sense of control often absent in automatic vehicles. Furthermore, research referenced in Times articles suggests manual transmissions can promote safer driving habits by requiring greater driver attention.

Beyond safety, the appeal is also rooted in the sheer enjoyment of mastering a skill. The deliberate act of shifting gears, the feeling of the engine responding to precise inputs, provides a rewarding experience that many drivers find deeply satisfying. It’s a return to a more fundamental form of driving, a deliberate rejection of passive transportation.

Target Audience: The New York Times Reader

The New York Times readership, known for its intellectual curiosity and appreciation for nuanced perspectives, represents an ideal audience for a deep dive into the world of manual transmissions. This demographic values understanding how things work, not just that they work – a mindset perfectly aligned with the intricacies of a manual gearbox.

They are likely to be drawn to the historical context, the engineering principles, and the cultural significance of the manual, as frequently explored in Times features on automotive history and technology. Furthermore, this audience appreciates well-researched, thoughtful analysis, moving beyond simple “how-to” guides to explore the philosophical implications of driver engagement.

The New York Times reader isn’t necessarily a “car person,” but they are a discerning consumer of information, open to appreciating the artistry and skill involved in a traditionally mechanical process within a rapidly digitizing world. They seek enrichment and understanding, making them receptive to the unique appeal of the manual transmission.

Understanding the Basics of a Manual Transmission

Manual transmissions, unlike automatics, require driver control of gear selection via a clutch and shifter, offering a direct mechanical link to the engine.

Components of a Manual System

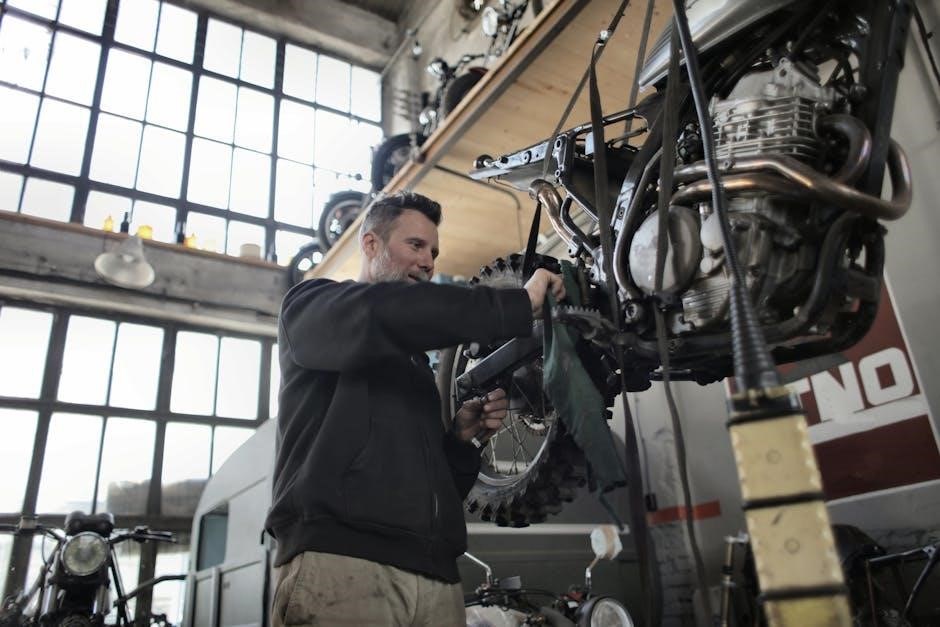
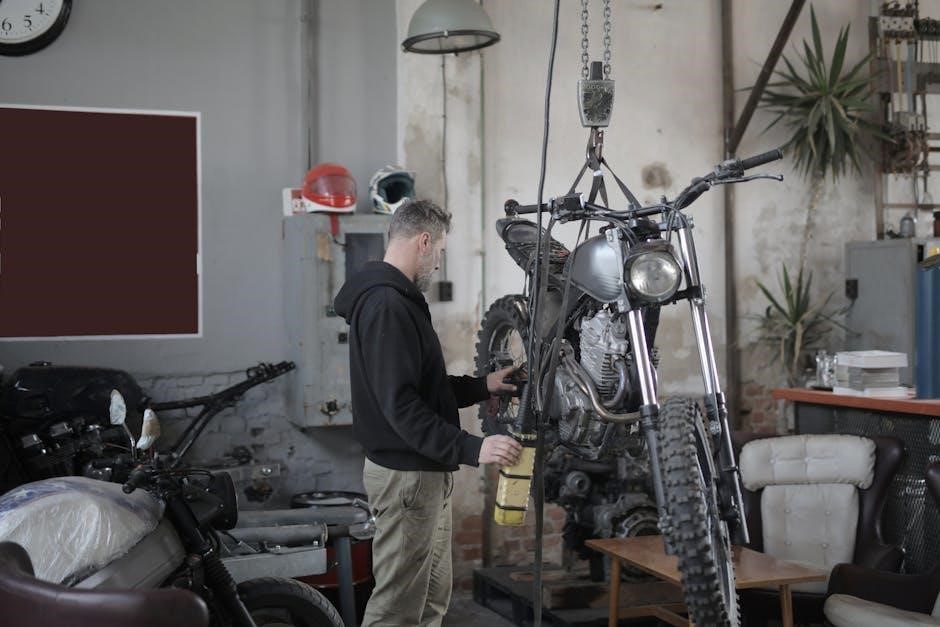
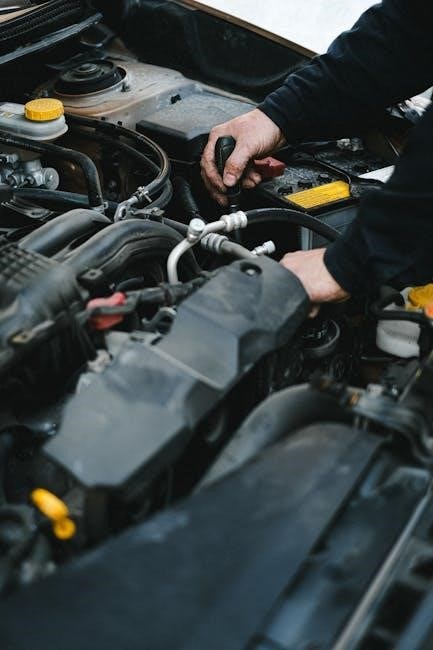
A manual transmission system is a carefully orchestrated assembly of interconnected parts, working in harmony to deliver power from the engine to the wheels. Central to this is the transmission itself, a housing containing a series of gears, each designed for a specific speed and torque range.

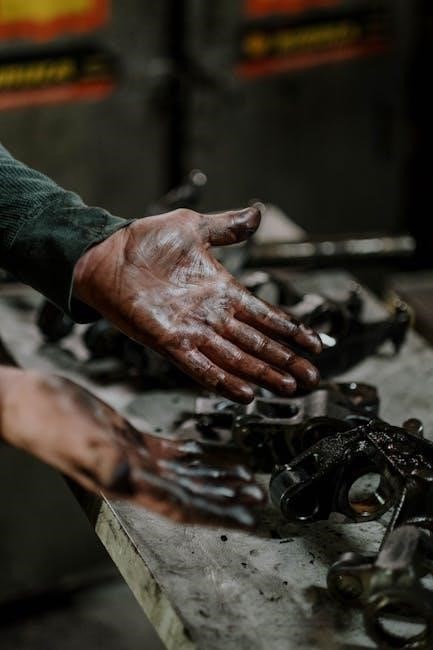
The clutch, a critical component, temporarily disconnects the engine from the transmission, allowing for smooth gear changes. Connected to the engine’s flywheel, the clutch engages and disengages via the clutch pedal. The shift linkage, often utilizing cables or rods, transmits the driver’s gear selection from the shifter to the transmission.

Furthermore, the driveshaft transfers power from the transmission to the differential, which then distributes it to the wheels; Synchronizers within the transmission ensure smooth gear engagement by matching the speeds of the gears before they mesh. Finally, the flywheel, bolted to the engine, provides rotational inertia and a surface for the clutch to engage against, contributing to smooth operation.

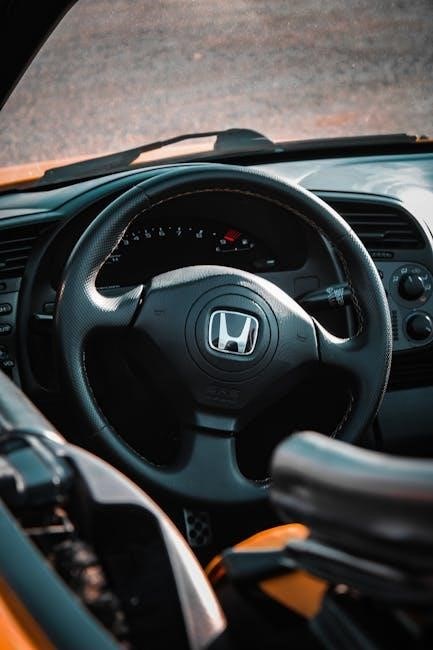
The Clutch: Mastering Control

The clutch pedal is the gateway to controlling a manual transmission, demanding coordination and finesse. Its primary function is to momentarily disconnect the engine’s power from the wheels, enabling gear changes without damaging the transmission. Proper clutch engagement involves a smooth, progressive release of the pedal, avoiding abrupt jolts or stalling.

The “friction point” – where the clutch begins to engage – is crucial to master. Finding this point allows for controlled starts and seamless shifts. Holding the clutch at the friction point while applying throttle prevents stalling, especially during hill starts.

Avoid “riding” the clutch – resting your foot on the pedal while driving – as this causes premature wear. Fully depress the clutch when shifting and release it completely when not changing gears. Understanding the clutch’s role is fundamental to enjoying the engaging experience a manual transmission offers, as highlighted in recent automotive reviews.

Gear Ratios and Their Purpose

Manual transmissions utilize a series of gears, each with a specific ratio, to optimize engine performance for varying driving conditions. Lower gears (first, second) provide increased torque for acceleration and climbing hills, sacrificing speed. Higher gears (fifth, sixth) prioritize fuel efficiency and cruising speed at the expense of immediate power;

Understanding these ratios is key to efficient driving. Selecting the appropriate gear ensures the engine operates within its optimal power band. Downshifting to a lower gear provides more power for overtaking or navigating challenging terrain, while upshifting to a higher gear conserves fuel during steady-state cruising.

The gear ratio dictates how many times the engine must rotate to turn the wheels once. As noted in automotive guides, mastering gear selection enhances both performance and fuel economy, contributing to a more connected driving experience.

Operating a Manual Vehicle: A Step-by-Step Guide

Successfully driving a manual requires coordination and practice. This guide, informed by automotive resources, details the process from starting the engine to mastering shifting techniques.

Starting the Engine and Getting into Gear

Initiating the driving experience in a manual transmission vehicle demands a specific sequence. First, ensure the parking brake is engaged. Fully depress the clutch pedal – this disengages the engine from the transmission, preventing stalling. Next, shift the gear lever into neutral. Confirm it’s in neutral by gently wiggling the lever side to side; it should move freely.

Turn the ignition key to start the engine. Once running, keep the clutch fully depressed. Now, shift into first gear. Press the clutch pedal again, and firmly move the gear lever into the first gear position.

Preparing to move involves a delicate balance. Slowly release the clutch pedal while simultaneously applying gentle pressure to the accelerator. This coordinated action engages the engine and begins to propel the vehicle forward. Avoid releasing the clutch too quickly, as this will likely cause the engine to stall. Practice this coordination to achieve a smooth start, as highlighted in various automotive guides.

Smooth Shifting Techniques: Upshifting

Upshifting, transitioning to a higher gear, requires a fluid motion for a seamless experience. Begin by fully depressing the clutch pedal. Simultaneously, release pressure from the accelerator. Swiftly, but deliberately, move the gear lever to the next higher gear.

As you move the lever, begin to slowly release the clutch pedal while simultaneously reapplying pressure to the accelerator. The key is coordination – matching the engine speed to the wheel speed for the new gear.

Avoiding jerkiness involves a smooth clutch release and a proportionate increase in throttle. A slight pause at the engagement point can help synchronize the engine and transmission. Mastering this technique, as emphasized in automotive reviews like those in The New York Times, enhances driving comfort and efficiency, minimizing wear and tear on the drivetrain.

Smooth Shifting Techniques: Downshifting

Downshifting, selecting a lower gear, demands precision to maintain vehicle control and engine responsiveness. Initiate by fully depressing the clutch pedal and releasing the accelerator. Move the gear lever to the desired lower gear with a deliberate motion.

Unlike upshifting, downshifting often benefits from a technique called “rev-matching” – briefly blipping the throttle while the clutch is disengaged. This raises the engine speed to better align with the wheel speed in the lower gear.

Slowly release the clutch while simultaneously reapplying the accelerator; As noted in automotive guides, including those featured in The New York Times, proper downshifting prevents abrupt deceleration and maintains momentum, particularly useful for cornering or preparing to overtake. Mastering this skill enhances driving enjoyment and safety.

Hill Starts: Avoiding Rollback

Hill starts in a manual transmission vehicle present a unique challenge: preventing the car from rolling backward while transitioning from brake to accelerator. Engage the handbrake firmly before attempting to move forward. With the handbrake applied, shift into first gear and begin to slowly release the clutch pedal while gently pressing the accelerator.

As you feel the engine begin to pull, simultaneously release the handbrake and continue coordinating the clutch and accelerator. This requires practice to find the “bite point” – the point where the clutch begins to engage.

The New York Times has previously covered driver attentiveness, and hill starts demand focused coordination. Avoiding jerky movements is key; a smooth transition prevents rollback and ensures a controlled start. Mastering this technique builds confidence and prevents potentially hazardous situations.

Advanced Techniques for Manual Drivers

Experienced drivers refine skills like heel-toe downshifting and rev matching, enhancing control and smoothness. The New York Times notes driver engagement,

and these techniques exemplify that connection, offering a more rewarding and precise driving experience.

Heel-Toe Downshifting

Heel-toe downshifting is an advanced technique favored by performance drivers, allowing for smoother and faster gear changes during braking. It involves simultaneously braking with the ball of your foot while “blipping” the throttle with your heel – or the side of your foot, depending on pedal configuration.

This throttle blip raises the engine RPM to match the lower gear’s speed, minimizing disruption to the vehicle’s balance when you release the clutch. The New York Times’ coverage of automotive techniques often emphasizes the importance of driver control, and heel-toe downshifting is a prime example of that.

Mastering this technique requires practice and coordination, but the benefits include reduced wear on the clutch, improved cornering stability, and a more engaging driving experience. It’s a skill that truly connects the driver to the mechanics of the car, offering a level of control unavailable with automatic transmissions.

Rev Matching for Seamless Shifts

Rev matching is a crucial skill for smooth manual transmission operation, particularly appreciated by those seeking the driver engagement often discussed in New York Times automotive reviews. It involves briefly increasing engine RPMs to synchronize with the speed of the transmission before engaging the next gear.

This technique minimizes the jolt felt during gear changes, reducing stress on the drivetrain and creating a more fluid driving experience. By “blipping” the throttle while the clutch is disengaged, you anticipate the engine speed needed in the lower gear.

Successful rev matching requires a keen ear and a feel for the car’s responsiveness. It’s a technique that elevates driving beyond simple operation, transforming it into a more connected and rewarding activity. Mastering it contributes to a smoother, more controlled ride, enhancing overall vehicle performance.

Emergency Procedures: What to Do When Stalled

Even experienced manual drivers can occasionally stall, a situation potentially unsettling, especially in traffic – a concern often highlighted in New York Times automotive reporting. The first step is to remain calm. Immediately depress the clutch pedal fully to disengage the engine from the wheels.

Next, attempt to restart the engine. If it doesn’t start immediately, try again, ensuring the gear selector is in neutral. If on a hill, firmly apply the parking brake. Once restarted, gently engage first gear and proceed cautiously.

If stalled in a hazardous location, activate hazard lights to warn other drivers. Understanding your vehicle’s owner’s manual (often extensive, as noted in recent articles) is crucial for specific emergency procedures. Prioritize safety and awareness of your surroundings.

Maintenance and Troubleshooting

New York Times articles emphasize diligent upkeep for manual cars, including regular clutch checks and addressing issues promptly. Dealerships prioritize service, ensuring longevity.

Regular Clutch Inspection and Maintenance

As highlighted in New York Times automotive coverage, the clutch is the heart of a manual transmission, demanding consistent attention. Routine inspection, often overlooked, can prevent costly repairs. Begin by observing clutch pedal feel – any sponginess or unusual resistance warrants investigation.

Check for fluid leaks around the master and slave cylinders, crucial components in the hydraulic system. A failing clutch can manifest as slipping gears, difficulty shifting, or a burning smell. The Times’ reporting on vehicle maintenance stresses the importance of adhering to manufacturer-recommended service intervals.

Avoid “riding” the clutch, which causes premature wear. Proper adjustment ensures optimal engagement and disengagement. Consider a professional inspection every 30,000 miles, or sooner if you notice performance degradation. Ignoring these signs can lead to complete clutch failure, requiring a significant and potentially expensive repair.

Identifying Common Manual Transmission Problems

Drawing from automotive insights featured in The New York Times, several issues commonly plague manual transmissions. Grinding gears, particularly when shifting, often indicates a worn synchronizer or improper clutch adjustment. Difficulty getting into gear, especially first or reverse, can signal low transmission fluid or internal damage.

Unusual noises – whining, clunking, or rattling – are red flags demanding immediate attention. These sounds could stem from worn bearings, damaged gears, or a failing differential. The Times’ coverage of vehicle reliability emphasizes proactive diagnosis. A slipping clutch, as previously discussed, is a frequent culprit, but internal transmission issues can mimic this symptom.

Vibrations felt through the floorboard or shifter may point to a bent shift fork or worn U-joints. Ignoring these warning signs can escalate minor problems into major, expensive repairs. Regular fluid checks and attentive driving are key to early detection.

When to Seek Professional Help

As highlighted in The New York Times’ automotive sections, attempting complex manual transmission repairs without proper expertise can exacerbate problems. If you experience persistent grinding, difficulty shifting, or concerning noises despite basic troubleshooting, professional diagnosis is crucial.

Ignoring these symptoms, as cautioned in various Times articles on vehicle maintenance, can lead to catastrophic failure and significantly higher repair costs. A qualified mechanic possesses the tools and knowledge to accurately pinpoint the issue – whether it’s a worn clutch, damaged synchronizers, or internal gear damage.

Furthermore, any suspected fluid leaks, especially if accompanied by performance issues, warrant immediate professional attention. Don’t hesitate to consult a trusted mechanic; preventative maintenance, as emphasized by The Times, is always more cost-effective than extensive repairs.

The Future of the Manual Transmission

The New York Times reports a niche but dedicated following, particularly in performance cars, where driver engagement remains paramount.

Automated launch control in manuals, a modern anomaly, suggests continued innovation despite the broader shift towards automatics.

Manuals in Performance Cars

Performance car enthusiasts, as frequently discussed in The New York Times automotive sections, often prioritize the direct connection and control offered by a manual transmission. This isn’t simply about tradition; it’s about maximizing the driving experience.

The ability to precisely select gears allows drivers to optimize power delivery and maintain momentum, crucial for track days and spirited driving. Modern performance cars, while increasingly offering dual-clutch transmissions, continue to provide manual options, acknowledging the demand from a dedicated segment of drivers.

Interestingly, some manufacturers are even incorporating advanced technologies, like automated launch control, into their manual offerings – a seemingly paradoxical blend of old and new. This demonstrates a commitment to preserving the engaging nature of the manual while enhancing performance. The manual gearbox remains a symbol of driver skill and involvement in the automotive world, as highlighted in various car reviews.

The Role of Driver Engagement

Driver engagement is a recurring theme in automotive journalism, including coverage within The New York Times. The resurgence of the manual transmission directly correlates with a desire for a more involved driving experience, moving away from the detachment of fully automated systems.

Operating a manual gearbox demands active participation – coordinating the clutch, shifter, and throttle – fostering a stronger connection between driver and machine. This heightened awareness can translate to safer driving habits, as noted in studies referenced by the publication, requiring greater attentiveness.

Beyond safety, the tactile feedback and sense of control offered by a manual contribute to a more rewarding and enjoyable driving experience. It’s a deliberate choice, a rejection of passive transportation in favor of active participation, resonating with drivers who value skill and connection, as seen in numerous car reviews.

2014 honda cr v owners manual

This 2014 Honda CR-V owner’s manual provides essential information for safe operation, maintenance, and understanding of your vehicle’s features and systems.

Purpose of the Manual

This owner’s manual serves as a comprehensive guide to familiarize you with the operation and maintenance of your 2014 Honda CR-V. It details features, controls, and safety precautions, ensuring responsible vehicle ownership. The manual aims to help you understand your vehicle’s capabilities, perform basic maintenance tasks, and address common issues. It also provides vital information regarding warranty coverage and procedures, alongside details for locating additional support from Honda customer service and online resources.

Scope of Information

This manual encompasses all aspects of your 2014 Honda CR-V, from vehicle identification – including the VIN location – to detailed specifications like engine details and fluid capacities. It covers safety features like seat belts, airbags, and crucial warning systems. Operational guidance, maintenance schedules, and DIY procedures are included, alongside explanations of the audio, navigation, and climate control systems. Troubleshooting tips and warranty details complete the scope, offering a holistic resource for owners.

Vehicle Identification

Locating your 2014 CR-V’s Vehicle Identification Number (VIN) is crucial for service, warranty claims, and confirming engine/transmission specifics.

Vehicle Identification Number (VIN) Location

The 17-digit Vehicle Identification Number (VIN) for your 2014 Honda CR-V is essential for various reasons, including vehicle history reports, warranty work, and theft recovery. You can find this unique identifier in several locations on your vehicle. Look on the driver’s side dashboard, visible through the windshield. It’s also located on the driver’s side doorjamb, on a plate affixed during manufacturing. Additionally, the VIN is stamped on the vehicle’s registration and insurance documents.

Engine and Transmission Information

The 2014 Honda CR-V typically comes equipped with a 2.4-liter, inline-4 cylinder engine, delivering a balance of power and fuel efficiency. This engine generally produces around 185 horsepower and 181 lb-ft of torque. Transmission options include a standard 6-speed manual or a Continuously Variable Transmission (CVT) for smoother operation. Knowing your specific engine and transmission type is crucial for proper maintenance, like oil changes and fluid checks, ensuring optimal performance and longevity.

Safety Information

Prioritize safety by understanding precautions, seat belt usage, child restraints, and the airbag/SRS system detailed within this manual for your 2014 CR-V.

Safety Precautions

This vehicle is designed for safe operation when all occupants follow essential safety guidelines. Always ensure proper seating positions and secure all cargo to prevent shifting during travel. Never operate the vehicle under the influence of drugs or alcohol, and avoid distracted driving. Regularly inspect tires for proper inflation and tread depth. Familiarize yourself with emergency procedures, including hazard light operation and proper roadside assistance techniques. Prioritize vehicle maintenance to ensure all safety systems function correctly, contributing to a secure driving experience for you and your passengers.

Seat Belts and Child Restraints

Proper seat belt usage is crucial for all occupants during every trip. Ensure belts are correctly positioned across the shoulder and lap, never twisted or frayed. Children require appropriate restraint systems based on age, weight, and height – utilizing car seats or booster seats as mandated by law. Never place a rear-facing infant seat in front of an active airbag. Regularly inspect child restraints for damage and proper installation, prioritizing child safety above all else.

Airbags and SRS System

The 2014 CR-V is equipped with a Supplemental Restraint System (SRS) including airbags. These deploy in severe collisions, supplementing seat belts. Front, side, and curtain airbags offer comprehensive protection. Never obstruct airbag deployment areas. A warning light monitors SRS functionality; address any illuminated warnings promptly. Improper repairs to the SRS can be dangerous. Understand that airbags are supplemental and seatbelts remain the primary safety device.

Understanding Your Vehicle

Familiarize yourself with the 2014 CR-V’s dashboard indicators, instrument panel, and steering wheel controls for optimal driving and vehicle awareness.

Dashboard Indicators and Warnings

The 2014 Honda CR-V’s dashboard features various indicators and warning lights crucial for monitoring vehicle health and safety. Understanding these symbols is paramount. Lights illuminate to signal system status – from low fuel and seatbelt reminders to critical engine or brake issues.

A comprehensive guide within the owner’s manual details each indicator’s meaning, outlining necessary actions. Ignoring warning lights can lead to more significant problems, so prompt attention is vital for maintaining vehicle reliability and ensuring a safe driving experience.

Instrument Panel Overview

The 2014 Honda CR-V’s instrument panel is designed for clear and concise information delivery to the driver. It prominently displays the speedometer, tachometer, fuel gauge, and temperature indicator. A multi-information display provides access to trip data, average fuel economy, and outside temperature readings.

Warning lights and indicator icons are strategically positioned for immediate visibility. The owner’s manual offers a detailed diagram and explanation of each component, ensuring drivers can quickly and easily interpret vital vehicle data during operation.

Steering Wheel Controls

The 2014 Honda CR-V features integrated controls on the steering wheel for enhanced convenience and safety. These controls allow the driver to manage audio functions – volume, track selection, and source changes – without removing hands from the wheel.

Cruise control settings are also accessible via steering wheel buttons. Depending on the trim level, additional controls may include hands-free telephone operation and voice command functionality. The owner’s manual details the specific layout and operation of each control.

Operating Your Vehicle

This section details procedures for starting, stopping, and safely driving your 2014 Honda CR-V, including information on available driving modes and fueling.

Starting and Stopping the Engine

To start your 2014 Honda CR-V, ensure the parking brake is engaged and the transmission is in Park. Fully depress the brake pedal, then insert and turn the ignition key to the ‘START’ position, releasing it once the engine starts. For stopping, gently apply the brake pedal to come to a complete halt. Shift the transmission to Park and engage the parking brake. Always turn the ignition key to the ‘LOCK’ position and remove it to secure the vehicle and prevent accidental operation.

Driving Modes (if applicable)

The 2014 Honda CR-V typically doesn’t feature selectable driving modes like “Sport” or “Eco” found in newer vehicles. However, driver control over performance is achieved through throttle input and gear selection. Utilizing the available gear positions – Drive, Sport, and Low – allows adapting to varying road conditions and driving preferences. ‘Sport’ mode offers enhanced responsiveness, while ‘Low’ provides increased engine braking for descending steep inclines, optimizing control and efficiency.

Fueling Information

The 2014 Honda CR-V requires unleaded gasoline with an octane rating of 87 or higher. The fuel tank capacity is 15.3 gallons. Always ensure the fuel filler cap is securely tightened after refueling to prevent fuel vapor emissions. Avoid overfilling the tank; stop when the fuel nozzle automatically clicks off; Refer to the owner’s manual for specific fuel recommendations and warnings regarding fuel additives or alternative fuel types.

Maintenance Schedule

The 2014 CR-V maintenance schedule details regular intervals for fluid checks, replacements, and inspections to ensure optimal vehicle performance and longevity.

Regular Maintenance Intervals

Maintaining your 2014 Honda CR-V involves adhering to a specific schedule for optimal performance. Key intervals include oil changes every 7,500-10,000 miles with synthetic oil, tire rotations every 5,000 miles, and air filter replacements around 15,000-30,000 miles.

Inspect brake pads, fluids, and belts regularly. Following these guidelines, detailed in the owner’s manual, helps prevent costly repairs and ensures a reliable driving experience. Adherence to the schedule preserves your vehicle’s value and safety.

Fluid Checks and Replacements

Regularly checking and replacing fluids is crucial for your 2014 CR-V’s health. Inspect engine oil, coolant, brake fluid, power steering fluid, and windshield washer fluid levels. Honda recommends coolant replacement every 30,000 miles or 5 years, brake fluid every 3 years, and transmission fluid at 60,000 miles.

Low fluid levels can cause significant damage. Refer to the owner’s manual for specific fluid types and capacities to ensure proper maintenance and optimal vehicle performance.

Tire Maintenance

Proper tire maintenance enhances safety and extends tire life for your 2014 CR-V. Regularly check tire pressure – including the spare – and inflate to the recommended PSI found on the driver’s side doorjamb. Inspect tires for wear, damage, and uneven tread.

Rotate tires every 5,000-7,500 miles to promote even wear. Honda recommends a wheel alignment check if uneven wear is detected, ensuring optimal handling and fuel efficiency.

DIY Maintenance Procedures

This section details simple maintenance tasks owners can perform, like oil changes, air filter replacements, and wiper blade checks, saving time and money.

Changing Engine Oil

Regular oil changes are crucial for your 2014 CR-V’s engine health. This procedure involves warming the engine, locating the oil drain plug, and safely draining the old oil. Ensure you have the correct oil type and filter specified in the manual.

After draining, replace the drain plug with a new crush washer, install the new oil filter, and refill with the recommended amount of oil. Always properly dispose of used oil at a recycling center, adhering to local regulations for environmental responsibility.

Replacing Air Filter

Maintaining a clean air filter is vital for optimal engine performance in your 2014 CR-V. Locate the air filter housing, usually a black plastic box. Open the housing, noting the filter’s orientation for correct reinstallation. Remove the old filter, ensuring no debris falls into the intake.

Install the new air filter, confirming a proper seal. Securely close the air filter housing. A clean air filter improves fuel efficiency and protects the engine from damaging particles.

Checking and Replacing Wiper Blades

Regularly inspect your 2014 CR-V’s wiper blades for cracks, tears, or streaking during operation. If visibility is compromised, replacement is necessary. Lift the wiper arm away from the windshield and detach the old blade, noting the connection method.

Attach the new wiper blade securely, ensuring it clicks into place. Lower the wiper arm gently. Replacing wiper blades ensures clear visibility during inclement weather, enhancing driving safety.

Features and Systems

Explore the 2014 CR-V’s advanced features, including the audio system, climate control, and available navigation system, for an enhanced driving experience.

Audio System Operation

The 2014 Honda CR-V’s audio system offers various functionalities for entertainment while driving. Users can access AM/FM radio, CD playback, and auxiliary input for external devices. Bluetooth connectivity enables wireless audio streaming and hands-free calling. The system features intuitive controls on the steering wheel and the central display screen, allowing for easy operation. Volume, tuning, and source selection are readily accessible. Detailed instructions on pairing devices and customizing audio settings are available within the owner’s manual for optimal enjoyment.

Navigation System (if equipped)

If your 2014 Honda CR-V is equipped with a navigation system, it provides turn-by-turn directions and points of interest. The system utilizes a map database, which may require periodic updates for accuracy. Users can input destinations via voice command or the touchscreen interface. Features include route calculation, traffic avoidance, and estimated time of arrival. The owner’s manual details how to operate the system, update maps, and troubleshoot common issues, ensuring a seamless navigation experience during your journeys.

Climate Control System

The 2014 Honda CR-V’s climate control system provides heating, cooling, and ventilation for passenger comfort. Manual or automatic settings allow drivers to adjust temperature and fan speed. Features include defrost and defog modes for optimal visibility. The owner’s manual explains operation of the system, including air recirculation and filter replacement. Proper use ensures efficient climate control and air quality within the vehicle, enhancing driving comfort in various weather conditions and maintaining a pleasant cabin environment.

Troubleshooting

This section details common issues, warning light meanings, and emergency procedures for your 2014 Honda CR-V, aiding quick problem resolution.

Common Issues and Solutions

Addressing typical concerns with your 2014 CR-V is straightforward. Issues like a malfunctioning audio system can often be resolved by checking the fuse box or resetting the unit. Difficulty starting might indicate a weak battery, requiring a jump start or replacement.

For warning lights, consult the dashboard indicator section. Tire pressure monitoring system (TPMS) alerts suggest checking tire inflation. If experiencing persistent problems, referencing online forums or contacting Honda customer service provides further assistance and potential diagnostic support.

Warning Light Meanings

Understanding dashboard warning lights is crucial for your 2014 CR-V’s health. A solid check engine light signals a potential engine issue needing diagnosis. A flashing light indicates a severe problem requiring immediate attention. The brake warning light signifies brake system malfunction or low brake fluid.

The airbag warning light indicates a problem with the SRS system. Refer to the instrument panel overview section for specific light details and recommended actions; ignoring these signals could lead to more significant repairs.

Emergency Procedures

In emergencies, prioritize safety. If a tire blows out, grip the steering wheel firmly and brake gently; avoid sudden steering. For a stalled engine, safely move to the roadside and activate hazard lights.

If involved in a collision, check for injuries and call emergency services. Familiarize yourself with jump-starting procedures and locate the emergency toolkit. Knowing these steps can significantly improve your response during critical situations, ensuring your well-being and vehicle safety.

Specifications

This section details the 2014 Honda CR-V’s dimensions, weight, engine specifications, and fluid capacities, offering crucial technical data for owners and technicians.

Dimensions and Weight

Understanding the 2014 Honda CR-V’s physical characteristics is vital for parking, maneuvering, and assessing cargo capacity. The vehicle’s overall length typically measures around 179.4 inches, with a width of approximately 71.6 inches and a height of 66.1 inches.

Wheelbase is around 103.1 inches, contributing to ride stability. Curb weight varies depending on the trim level and drivetrain, generally ranging from 3,305 to 3,560 pounds. These specifications aid in comprehending the vehicle’s spatial footprint and handling characteristics.

Engine Specifications

The 2014 Honda CR-V primarily features a 2.4-liter inline-4 cylinder engine, delivering a balance of power and fuel efficiency. This engine typically produces around 185 horsepower at 6,000 rpm and 181 lb-ft of torque at 3,800 rpm.

It utilizes SOHC valve train and multi-point fuel injection. The compression ratio is approximately 10.5:1. Understanding these specifications helps owners appreciate the engine’s capabilities and maintenance requirements for optimal performance.

Fluid Capacities

For the 2014 Honda CR-V, the engine oil capacity is approximately 4.2 US quarts with a filter change. The cooling system requires around 1.76 US gallons of coolant. Power steering fluid capacity is roughly 0.8 US quarts.

Brake fluid capacity is about 1.0 US quart, and the transmission fluid capacity varies depending on whether it’s a 2WD or AWD model, typically around 3.3-4.4 US quarts. Accurate fluid levels are crucial for optimal vehicle operation.

Warranty Information

The 2014 Honda CR-V warranty details cover specific components and durations, outlining owner rights and procedures for claiming warranty services.

Warranty Coverage Details

The 2014 Honda CR-V’s warranty typically includes a bumper-to-bumper coverage for 3 years/36,000 miles, protecting against defects in materials and workmanship. Powertrain coverage extends to 5 years/60,000 miles, safeguarding the engine, transmission, and drivetrain. Corrosion protection lasts for 5 years/unlimited miles.

Specific components, like emissions systems, may have separate, longer coverage periods as mandated by federal or state regulations. Review your warranty booklet for precise terms, exclusions, and claim procedures.

Warranty Claim Procedures

To initiate a warranty claim for your 2014 Honda CR-V, first, schedule a service appointment with an authorized Honda dealership. Clearly describe the issue and provide your vehicle identification number (VIN). The dealership will diagnose the problem and determine if it’s covered under warranty.

Required documentation includes proof of regular maintenance. Honda will then authorize repairs or replacements, if applicable, based on warranty terms.

Technical Data

This section details crucial specifications for your 2014 Honda CR-V, including torque settings, basic wiring diagrams, and essential fluid capacity information.

Torque Specifications

Precise torque values are critical for proper component assembly and vehicle reliability. This data outlines the recommended torque specifications for various engine and chassis components on your 2014 Honda CR-V. Incorrect torque can lead to fastener failure, leaks, or diminished performance. Always utilize a calibrated torque wrench when performing maintenance or repairs. Refer to the detailed charts for specific bolt sizes, thread pitches, and corresponding torque values, ensuring optimal clamping force and preventing damage to threaded parts during reassembly procedures.

Wiring Diagrams (Basic)

These simplified wiring diagrams provide a foundational understanding of the 2014 Honda CR-V’s electrical system. They illustrate the connections between key components like the battery, starter, alternator, and lighting. While not exhaustive, these diagrams aid in tracing circuits for basic troubleshooting and identifying potential wiring issues. Always disconnect the negative battery terminal before working on electrical components. For complex repairs or detailed schematics, consult a professional service manual or qualified technician for accurate and safe procedures.

Frequently Asked Questions (FAQ)

This section addresses common owner inquiries regarding the 2014 Honda CR-V, offering troubleshooting tips and solutions to frequently encountered issues.

Common Owner Inquiries

Owners frequently ask about the location of the vehicle identification number (VIN) and how to interpret engine/transmission details. Questions arise concerning dashboard indicator meanings, proper tire maintenance, and audio system operation. Many seek guidance on resetting maintenance reminders or understanding specific warning lights. Concerns about the navigation system, if equipped, and climate control functionality are also common. Furthermore, owners often inquire about warranty coverage details and claim procedures, seeking clarification on what is included and how to proceed with a claim.

Troubleshooting Tips

If encountering issues, first consult the warning light meanings section to diagnose the problem. For common issues, check fluid levels and ensure proper tire inflation. A failing air filter can reduce engine performance, while worn wiper blades impair visibility. If the engine won’t start, verify the battery connections and fuel level. Refer to the manual for specific error codes and recommended solutions, and always prioritize safety when attempting DIY repairs.

Where to Find Additional Help

For further assistance, contact Honda Customer Service or explore online resources and forums dedicated to the 2014 Honda CR-V model.

Honda Customer Service

Should you require direct support, Honda’s Customer Service is readily available to address your concerns regarding the 2014 CR-V. Contact them through the official Honda website, where you’ll find a dedicated support section with contact numbers and online chat options. They can assist with warranty inquiries, technical questions, or locating authorized service centers. Expect knowledgeable representatives prepared to guide you through any issues, ensuring a positive ownership experience with your vehicle. Prompt and efficient assistance is their priority.

Online Resources and Forums

Numerous online resources and dedicated forums cater specifically to 2014 Honda CR-V owners, offering a wealth of information and peer support. These platforms provide access to downloadable manuals, troubleshooting tips, and shared experiences from fellow enthusiasts. Explore websites hosting PDF versions of the owner’s manual and participate in discussions regarding maintenance, repairs, and vehicle features. Benefit from collective knowledge and find solutions to common issues quickly and efficiently, enhancing your ownership journey.

sie practice exam pdf

The SIE Practice Exam PDF offers a comprehensive resource to prepare for the Securities Industry Essentials Exam, featuring 75 multiple-choice questions, detailed explanations, and updated study materials for 2025.

Overview of the SIE Exam

The Securities Industry Essentials (SIE) Exam is a foundational exam administered by the Financial Industry Regulatory Authority (FINRA). It consists of 75 multiple-choice questions and must be completed within 1 hour and 45 minutes. The exam assesses knowledge of securities industry concepts, regulatory frameworks, and ethical practices. It is designed for individuals seeking entry-level positions in the financial services industry. The SIE Exam is a prerequisite for many other FINRA qualifications and is a critical first step for professionals aiming to work in securities. The exam focuses on essential topics such as financial markets, instruments, and regulatory compliance. Passing the SIE Exam demonstrates a fundamental understanding of the securities industry and is a key milestone in building a career in financial services.

Importance of Practice Exams in SIE Preparation

Practice exams are a crucial tool for SIE preparation, offering candidates firsthand experience with the exam format and content. They provide an opportunity to assess knowledge gaps, refine test-taking strategies, and build confidence. The SIE Practice Exam PDF includes 75 multiple-choice questions, mirroring the actual exam, allowing candidates to familiarize themselves with the question types and time constraints. Regular practice helps identify weak areas, enabling focused study. Additionally, many resources, such as flashcards and online platforms, complement practice exams, offering detailed explanations and feedback. Utilizing these tools ensures a well-rounded preparation, enhancing the likelihood of success. By simulating real exam conditions, practice exams help candidates develop effective time management and problem-solving skills, which are essential for achieving a high score on the SIE Exam.

Structure of the SIE Practice Exam PDF

The SIE Practice Exam PDF is designed to mirror the actual exam experience, featuring 75 multiple-choice questions divided into key topics such as securities essentials, financial markets, and regulatory compliance. The PDF includes detailed explanations for each answer, allowing candidates to understand their strengths and areas for improvement. It also provides a structured format with clear sections, enabling easy navigation. Many versions of the PDF include flashcards and additional study materials, offering a comprehensive preparation toolkit. The questions are updated annually to reflect the latest exam content, ensuring relevance for candidates preparing for the 2025 exam. This format helps candidates familiarize themselves with the exam structure, question distribution, and time management requirements, making it an invaluable resource for effective SIE preparation.

Understanding the SIE Exam Format

The SIE exam consists of 75 multiple-choice questions, with a 1 hour and 45-minute time limit, covering essential topics like securities, financial markets, and regulatory compliance.

Question Types and Formats

The SIE practice exam PDF features a variety of question types to simulate the actual exam experience. It includes multiple-choice questions, true/false statements, and case studies. The multiple-choice questions are the most common, with four answer options, requiring test-takers to select the correct response. True/false questions assess understanding of key concepts, while case studies present real-world scenarios to evaluate problem-solving skills. The practice exam also includes scenario-based questions that test ethical decision-making and regulatory knowledge. These formats ensure comprehensive preparation for the exam’s diverse question styles. By practicing with these question types, candidates can identify strengths and weaknesses, improving their readiness for the actual SIE exam. The PDF format allows for easy access and review, making it a valuable tool for structured study sessions.

Time Management Strategies

Effective time management is crucial for success on the SIE exam, which allows 1 hour and 45 minutes to answer 75 questions. The practice exam PDF helps candidates refine their pacing by simulating real test conditions. Strategies include allocating 1.5 minutes per question, with extra time for complex scenarios. Practicing under timed conditions builds stamina and reduces anxiety. The PDF format enables users to pause and resume, allowing flexible study sessions. Prioritizing high-probability questions and skipping tougher ones initially can maximize scores. Reviewing answers at the end ensures no question is left unanswered. Regular practice with the PDF enhances speed and accuracy, helping candidates stay calm and focused during the actual exam. These strategies are essential for optimizing performance and achieving a passing score.

Scoring System and Passing Requirements

The SIE exam uses a scoring system where candidates must achieve a minimum score of 50% to pass. The practice exam PDF provides detailed feedback, helping users understand their strengths and weaknesses. Each question is weighted equally, and the final score reflects overall performance. The PDF includes explanations for correct and incorrect answers, allowing candidates to learn from mistakes. Understanding the scoring system is crucial for focused preparation. Regular practice with the PDF helps candidates gauge their progress and identify areas needing improvement. Achieving consistent scores of 50% or higher on practice exams is a strong indicator of readiness for the actual test. The PDF’s scoring insights ensure candidates are well-prepared to meet the passing requirements confidently. This tool is essential for mastering the exam’s scoring structure and achieving success.

Key Topics Covered in the SIE Exam

The SIE exam covers essential topics like securities industry fundamentals, financial markets, instruments, regulatory frameworks, and ethics. These areas are critical for a comprehensive understanding of the industry.

Securities Industry Essentials

The Securities Industry Essentials section of the SIE exam focuses on foundational knowledge, including market structures, regulatory agencies, and ethical practices. It covers the basics of securities, such as types of investments and risks. Candidates learn about the roles of financial institutions and the regulatory framework governing the industry. This section also emphasizes professional conduct, ensuring future professionals understand their responsibilities. Practice exams highlight these topics, providing questions on industry standards and compliance. The SIE Practice Exam PDF includes detailed explanations to help candidates grasp these core concepts. Mastering this section is crucial for building a strong foundation in the securities industry. The practice materials ensure thorough preparation for this critical part of the exam.

Financial Markets and Instruments

The Financial Markets and Instruments section of the SIE exam covers essential concepts related to securities, bonds, derivatives, and other financial products. It explores market structures, including exchanges and over-the-counter markets, and the role of intermediaries. Candidates learn about the characteristics, risks, and valuation methods of various instruments. The section also delves into the functioning of primary and secondary markets, as well as the impact of economic factors like interest rates and inflation. Practice exams include questions on these topics, helping candidates assess their understanding. The SIE Practice Exam PDF provides detailed explanations to clarify complex concepts, ensuring thorough preparation for this critical area of the exam. Mastery of this section is vital for understanding how financial markets operate and how instruments are traded.

Regulatory Framework and Compliance

The Regulatory Framework and Compliance section of the SIE exam focuses on the rules and regulations governing the securities industry. It covers key topics such as FINRA rules, SEC regulations, and compliance obligations. Candidates learn about ethical standards, customer protection laws, and trading practices. The section also explores regulatory bodies’ roles in maintaining market integrity and enforcing compliance. Practice exams include questions on compliance scenarios, helping candidates understand real-world applications. The SIE Practice Exam PDF provides detailed explanations to clarify complex regulatory concepts. Understanding this section is crucial for navigating the legal and ethical landscape of the financial industry. Mastery of these topics ensures compliance with industry standards and prepares candidates for the challenges of working in a regulated environment.

Ethics and Professional Conduct

Ethics and Professional Conduct is a critical component of the SIE exam, emphasizing the importance of maintaining high ethical standards in the securities industry. This section covers key principles such as fiduciary duty, confidentiality, and fair dealing. Candidates learn about the ethical responsibilities of financial professionals and the consequences of unethical behavior. The SIE Practice Exam PDF includes questions that test understanding of ethical dilemmas and professional conduct scenarios. It also highlights the role of regulatory bodies in enforcing ethical standards. Mastery of this section ensures that candidates can navigate complex situations while upholding the integrity of the financial industry. The practice exam provides detailed explanations to help candidates understand how to apply ethical principles in real-world contexts, ensuring they are well-prepared for the exam and their future careers.

Best Resources for SIE Exam Preparation

Utilize the SIE Practice Exam PDF, online courses, flashcards, and study guides for comprehensive preparation. These resources provide updated questions, detailed explanations, and expert strategies to ensure success.

Recommended Study Guides and Materials

Top-rated study guides like the SIE Exam 2025/2026 For Dummies and Series 7 Exam Prep 2024-2025 are essential for comprehensive preparation. These guides include practice questions, flashcards, and detailed explanations to help candidates master key topics. The STC SIE Learning Guide is particularly praised for its structured approach, breaking down the exam format and question distribution. Additionally, the SIE Practice Exam PDF offers a free, downloadable resource with 75 multiple-choice questions, mirroring the actual exam experience. These materials are regularly updated to reflect the latest exam content, ensuring candidates are well-prepared for the 2025 exam. By combining these study guides with active learning techniques, aspirants can build a strong foundation and improve their test-taking skills effectively.

Online Courses and Tutorials

Online courses and tutorials are invaluable resources for SIE exam preparation, offering flexible and interactive learning experiences. Platforms like SIE Exam 2025/2026 For Dummies provide comprehensive courses with expert-led tutorials, practice tests, and flashcards. These resources are designed to complement the SIE Practice Exam PDF, ensuring a well-rounded study approach. Many courses include video lectures, progress tracking, and personalized feedback, helping candidates identify weak areas. Additionally, websites like dummies.com offer extensive study materials, including 1,001 practice questions, to reinforce learning. These online tools are regularly updated to align with the latest exam content, making them indispensable for candidates aiming to pass the SIE exam in 2025 and beyond. By leveraging these resources, aspirants can enhance their understanding and confidence, ensuring they are fully prepared for the exam.

Flashcards and Practice Questions

Flashcards and practice questions are essential tools for active learning and retention in SIE exam preparation. The SIE Practice Exam PDF often includes flashcards that cover key terms, concepts, and formulas, allowing candidates to review material quickly. Practice questions, such as those found in the SIE Exam 2025/2026 For Dummies guide, provide hands-on experience with exam-like scenarios. These resources are designed to test knowledge and identify areas for improvement. Many online platforms offer interactive flashcards and practice questions with detailed explanations, enabling candidates to understand their mistakes. Regular use of these tools enhances problem-solving skills and builds confidence. By incorporating flashcards and practice questions into their study routine, candidates can master the Securities Industry Essentials and approach the exam with assurance.

Effective Study Strategies for the SIE Exam

Utilize active learning techniques, spaced repetition, and practice exams to reinforce concepts. Incorporate flashcards and study guides to master key topics efficiently and retain information long-term.

Creating a Study Schedule

A well-structured study schedule is essential for effective SIE exam preparation. Start by breaking down the syllabus into manageable sections, focusing on key topics like securities essentials, financial markets, and regulatory frameworks. Allocate specific days for each subject, ensuring a balanced approach. Set weekly goals and track progress to stay motivated. Incorporate regular practice exams to assess understanding and identify weak areas. Dedicate time for reviewing explanations and refining concepts. Consistency is key; aim for daily study sessions, even if brief. Use flashcards for quick revision and prioritize active learning over passive reading. Adjust the schedule as needed to accommodate strengths and challenges, ensuring ample time for rest and mental refreshment. A disciplined yet flexible plan will help maximize efficiency and confidence leading up to the exam.

Active Learning Techniques

Active learning techniques are crucial for mastering the SIE exam material. Engage with practice exams to simulate real-test conditions, focusing on understanding rationales behind answers. Use flashcards to reinforce key terms and concepts, ensuring quick recall of essential information. Interactive study tools, such as online tutorials and video explanations, can enhance comprehension. Summarize complex topics in your own words to identify gaps in knowledge. Teach the material to others or discuss it with peers to deepen understanding. Regularly review and apply concepts through practical exercises, ensuring active participation rather than passive reading. These methods promote retention, clarify doubts, and build confidence, making study sessions more productive and effective in preparing for the SIE exam.

Utilizing Practice Exams for Assessment

Practice exams are a vital tool for assessing readiness for the SIE exam. They provide firsthand experience with the exam format, featuring 75 multiple-choice questions similar to the actual test. By completing practice exams, candidates can evaluate their knowledge, identify weak areas, and track progress over time. Many resources offer detailed feedback, including correct answers and rationales, helping learners understand their mistakes. Regularly taking practice exams builds familiarity with the question types and time management skills. Additionally, resources like flashcards and study guides complement practice exams, offering a well-rounded preparation strategy. Utilizing these tools consistently ensures a thorough understanding of the material and boosts confidence for the actual exam. They are essential for anyone aiming to excel in the SIE exam and advance their career in the financial securities industry.

Common Mistakes to Avoid

  • Time management errors during practice exams can lead to poor performance.
  • Misunderstanding question types may result in incorrect answers.
  • Neglecting key topics covered in the SIE exam can weaken overall preparedness.

Time Management Errors

One of the most common mistakes candidates make during the SIE exam is poor time management. The exam consists of 75 multiple-choice questions, and candidates have 1 hour and 45 minutes to complete it. Many individuals either rush through questions, leading to careless errors, or spend too much time on a single question, leaving insufficient time for others. To avoid this, practice exams are essential. They help candidates gauge their pace and allocate time effectively. A suggested strategy is to allocate approximately 1.5 minutes per question. Additionally, skipping difficult questions initially and returning to them later can prevent time wastage. Practicing under timed conditions using the SIE Practice Exam PDF can significantly improve time management skills and reduce exam-day anxiety.

Misunderstanding Question Types

Misunderstanding the types of questions on the SIE exam is a common pitfall for many candidates. The exam includes multiple-choice questions, true/false statements, and scenario-based problems, each requiring a different approach. Many test-takers incorrectly assume all questions are straightforward multiple-choice, leading to confusion when encountering other formats. For example, scenario-based questions often involve complex financial situations, requiring careful analysis. Additionally, some multiple-choice questions include “all of the above” or “none of the above” options, which can be tricky if not interpreted correctly. To avoid this, candidates should thoroughly review the question types in the SIE Practice Exam PDF and practice interpreting each format. Understanding the nuances of each question type can significantly improve accuracy and confidence during the actual exam.

Neglecting Key Topics

Neglecting key topics is a significant mistake many candidates make when preparing for the SIE exam. The exam covers a wide range of subjects, including securities industry essentials, financial markets, regulatory frameworks, and ethics. Candidates often focus on areas they find easier, overlooking critical topics like municipal securities, corporate finance, or ethical dilemmas. This oversight can lead to poor performance, as these topics frequently appear on the exam. To avoid this, candidates should use the SIE Practice Exam PDF to identify weak areas and ensure they allocate study time to all sections. Neglecting even one key topic can result in missing multiple questions and potentially failing the exam. A well-rounded study approach is essential for success. Utilize practice exams to gauge knowledge gaps and address them promptly.

Additional Resources and Support

Supplement your SIE exam preparation with recommended books, online forums, and professional tutoring services for personalized guidance and in-depth understanding of complex topics.

Recommended Books and Publications

Enhance your SIE exam preparation with highly recommended books like the “SIE Exam 2025/2026 For Dummies,” which includes practice tests and flashcards. The “Series 7 Exam Prep 2024-2025” study guide offers 375 practice questions and detailed explanations. Additionally, the “SIE Learning Guide/workbook” by STC is designed for note-taking and practice, breaking down the exam structure and question distribution. These resources provide comprehensive coverage of essential topics, ensuring a thorough understanding of securities industry fundamentals, financial markets, and regulatory compliance. They are updated for 2025 and beyond, making them reliable tools for achieving exam success. Utilize these publications alongside practice exams for a well-rounded study approach.

Online Communities and Forums

Engage with online communities and forums to enhance your SIE exam preparation. Websites like YouTube offer playlists dedicated to SIE practice tests, such as the “SIE Exam Playlist 4 of 4,” featuring video explanations and tips. Additionally, forums and discussion groups provide valuable insights from candidates who have taken the exam. Platforms like Reddit and specialized financial forums allow you to ask questions, share study strategies, and learn from others’ experiences. Many online communities also offer free practice tests and study guides, such as the “SIE Exam FREE Practice Tests and Questions” playlist. These resources not only provide additional study materials but also foster a sense of camaraderie and support among candidates preparing for the exam. Leveraging these online spaces can significantly enrich your preparation journey.

Professional Tutoring Services

Professional tutoring services are an excellent way to receive personalized guidance for the SIE exam. Many tutoring programs offer one-on-one sessions with experienced instructors who specialize in securities industry essentials. These experts can help clarify complex topics, such as financial markets, regulatory frameworks, and ethics, ensuring a deeper understanding of the material. Additionally, tutoring services often include live Q&A sessions, interactive exercises, and customized study plans tailored to your needs. Some providers also offer progress tracking and feedback to identify areas for improvement. By leveraging professional tutoring, candidates can gain confidence and refine their knowledge, ultimately enhancing their performance on the SIE exam. These services are particularly beneficial for those who prefer structured, interactive learning or need additional support beyond self-study materials.

taylor outdoor thermometer instructions

Taylor Precision Products, established in 1851, offers high-quality outdoor thermometers known for accuracy and durability. These devices provide precise temperature and humidity readings, essential for various applications.

1.1 Overview of Taylor Precision Products

Taylor Precision Products, established in 1851, is a renowned manufacturer of high-quality measurement instruments. Known for their accuracy and durability, Taylor offers a wide range of thermometers, including outdoor models designed for precise temperature and humidity monitoring. Their products are trusted for both residential and professional use, ensuring reliable performance in various environmental conditions. With a focus on innovation and customer satisfaction, Taylor continues to be a leading brand in the industry, providing essential tools for accurate data collection and everyday use.

1.2 Importance of Accurate Temperature Measurement

Accurate temperature measurement is crucial for understanding environmental conditions, ensuring safety, and making informed decisions. Taylor outdoor thermometers provide reliable readings, essential for weather monitoring, agriculture, and home comfort. Their precision helps in tracking climate changes, managing outdoor activities, and maintaining optimal conditions for plants and animals. With accurate data, users can respond to temperature fluctuations effectively, ensuring efficiency and safety in various applications. Taylor’s commitment to accuracy makes their thermometers a trusted choice for outdoor temperature monitoring needs.

1.3 Key Features of Taylor Outdoor Thermometers

Taylor outdoor thermometers boast remote sensors, operating on 2 AAA batteries, ensuring accurate temperature and humidity readings. They feature a wide temperature range (-4°F to 140°F) and customizable units (Fahrenheit/Celsius). The devices include user-friendly displays with symbols for easy interpretation. Durable designs withstand outdoor conditions, while battery compartments are easily accessible. These thermometers also offer quick setup and connectivity, ensuring reliable performance. Their advanced features make them ideal for precise weather monitoring, catering to both home and professional use.

Unboxing and Initial Setup

Unbox the Taylor outdoor thermometer, ensuring all components are included. Carefully remove the battery compartment and install the required batteries. Allow 3 minutes for the base unit to connect with the remote sensor before proceeding.

2.1 Unpacking the Thermometer

When unpacking your Taylor outdoor thermometer, handle the device with care to avoid damage. Gently remove the thermometer from its packaging and ensure all components, such as the base unit, remote sensor, and mounting hardware, are included. Inspect for any visible damage or defects. Take a moment to familiarize yourself with the parts and their functions before proceeding to the setup phase. Always refer to the instruction manual for specific unpacking and handling guidelines to ensure optimal performance and longevity of the product.

2.2 Understanding the Components

Upon unboxing, you’ll find the main display unit, remote sensor, mounting hardware, and batteries. The display shows temperature, humidity, and time, while the sensor measures outdoor conditions. The battery compartment is usually on the back, and buttons like SET and UP/DOWN adjust settings. Mounting hardware includes brackets for secure installation. Understanding these parts ensures proper setup and operation. Always refer to the manual for specific component locations and functions to avoid confusion during installation and use.

2.3 Preparing for Installation

Before installing your Taylor outdoor thermometer, ensure all components are ready. Remove the battery compartment and insert the required AAA batteries, following the polarity markings. Replace the compartment securely. Allow 3-5 minutes for the sensor to connect to the base unit. Ensure the area is clear of debris and obstructions for accurate readings. Refer to the manual for specific alignment and placement guidelines to optimize performance and ensure reliable data collection.

Installation Instructions

Mount the thermometer in a shaded area, ensuring accurate readings. Secure the sensor firmly and insert batteries, following the compartment instructions. Press the SET button to synchronize.

3.1 Choosing the Right Location

When installing your Taylor outdoor thermometer, select a location that provides accurate readings. Avoid direct sunlight, as it can cause temperature inaccuracies. Ensure the thermometer is at least 3-5 feet above the ground to avoid ground-level interference. It should also be placed away from buildings, fences, or other structures that could block airflow or create shade. Choose a spot with good airflow and a clear line of sight for the remote sensor, if applicable. This ensures reliable data transmission and optimal performance.

3.2 Mounting the Thermometer

To mount the Taylor outdoor thermometer, choose a location with optimal exposure to air circulation, avoiding direct sunlight or moisture. Attach the sensor to a sturdy surface using the provided mounting hardware. Ensure the sensor is level and secure to prevent movement. For wall mounting, drill pilot holes and screw the base into place. If using a stake, push it firmly into the ground. Tighten all screws to ensure stability. Avoid obstructing the sensor’s view to maintain accurate readings. Follow the manual for specific mounting recommendations.

3.3 Securing the Sensor

To ensure accurate readings, properly secure the sensor. Pull out the battery compartment on the side of the thermometer. Remove the batteries to prevent power drainage. Wait 3 minutes for the base unit to connect with the remote sensor. Mount the sensor in a shaded area, avoiding direct sunlight and moisture. Use the provided mounting hardware to secure it firmly. Ensure the sensor is level and facing away from direct weather exposure. Replace the batteries and compartment cover. Press the UP C/F button to confirm temperature units. Allow the device to stabilize before taking readings.

Operating the Thermometer

Press and hold the SET button for 3 seconds to enter Clock Setting Mode. Adjust time and date using the arrow buttons. Use the UP C/F button to switch between Fahrenheit and Celsius. Ensure batteries are properly installed for accurate readings.

4.1 Powering On the Device

To power on your Taylor outdoor thermometer, insert 2 AAA batteries into the battery compartment located on the back of the unit. Ensure the batteries are correctly oriented to match the polarity symbols. Gently replace the compartment cover and screw it securely. Press and hold the SET button for 3 seconds to activate the device. The display will illuminate, and the thermometer will begin initializing. Allow a few moments for the system to connect with the remote sensor and start transmitting data. Always refer to the instruction manual for specific battery requirements and initial setup procedures.

4.2 Setting the Time and Date

Press and hold the SET button on the back of the base station for 3 seconds to enter Clock Setting Mode. Use the arrow buttons to select and adjust the hour, minute, and date fields. Press SET to confirm each change. Once done, exit the mode by pressing and holding SET again or waiting a few seconds. Ensure the display shows the correct time and date for accurate temperature and humidity readings. Allow a few minutes for the base unit to connect with the remote sensor and display outdoor data.

4.3 Adjusting Temperature Units (Fahrenheit/Celsius)

To change the temperature unit on your Taylor outdoor thermometer, press and hold the SET button on the back of the base station for 3 seconds to enter Clock Setting Mode. Use the UP or DOWN button to navigate to the temperature unit setting. Press the UP C/F button to toggle between Fahrenheit and Celsius. The display will show a degree symbol (°) followed by either an “F” or “C” to confirm your selection. This feature ensures accurate readings tailored to your preference. The outdoor temperature range is -4°F to 140°F (-20°C to 60°C). Always ensure the device is powered on before making adjustments.

Reading and Interpreting Data

Taylor outdoor thermometers display temperature and humidity readings. Allow 3 minutes for the base unit to connect with the remote sensor. Use the UP C/F button to toggle between Fahrenheit and Celsius for accurate interpretations.

5.1 Understanding Temperature Readings

The Taylor outdoor thermometer displays temperature in either Fahrenheit or Celsius, with a range of -4°F to 140°F. Press the UP C/F button to switch units. Allow 3 minutes for the base unit to connect with the remote sensor. The display shows dashes (–). until connection is established. Use the SET button to adjust settings. Always refer to the instruction manual for accurate operation. Ensure batteries are installed correctly for precise readings. Regularly clean the sensor to maintain accuracy and reliability.

5.2 Monitoring Humidity Levels

The Taylor outdoor thermometer also tracks humidity levels, essential for understanding weather conditions. The display shows humidity as a percentage, with low, medium, or high indicators. Ensure the remote sensor is properly secured to avoid inaccurate readings. Allow 3 minutes for the sensor to connect and stabilize after installation. If humidity levels fluctuate unusually, check the sensor’s battery and placement. Regular monitoring helps maintain optimal performance and reliable data collection for weather tracking and outdoor activities. Always refer to the manual for specific humidity range details and troubleshooting tips.

5.3 Interpreting Display Symbols

Understanding the symbols on your Taylor outdoor thermometer is crucial for optimal use. Common symbols include a battery icon indicating low power, a signal bar showing sensor connectivity, and a degree symbol (°F/°C) for temperature units. Dashes (– ) may appear during sensor pairing or when outdoor temperature is unavailable. A humidity droplet icon signifies moisture levels, while an alert symbol (⚠️) may indicate errors. Refer to the manual for a comprehensive guide to all symbols and their meanings to ensure accurate readings and troubleshooting. Always consult the instruction manual for clarity.

Maintenance and Troubleshooting

Regularly clean the thermometer with a soft cloth and replace batteries every 12-18 months. If issues arise, reset the device or refer to the manual for troubleshooting.

6.1 Cleaning the Thermometer

Regular cleaning ensures accurate readings and prolongs the lifespan of your Taylor outdoor thermometer. Use a soft, dry cloth to wipe the device, avoiding harsh chemicals or abrasive materials. For stubborn dirt, dampen the cloth with water, but ensure no moisture enters the sensor or electronic components. Avoid submerging the thermometer in water. Gently clean the screen to maintain visibility. After cleaning, allow the device to air dry before resuming use. This simple maintenance routine helps preserve accuracy and functionality.

6.2 Replacing Batteries

To replace the batteries in your Taylor outdoor thermometer, locate the battery compartment on the back or side of the device. Open it by sliding or unscrewing the cover. Remove the old batteries and insert new ones, ensuring correct polarity. For the remote sensor, use 2 AAA batteries. Replace the compartment cover securely. If the base unit requires batteries, follow the same steps. Always use alkaline batteries for optimal performance. After replacing, wait a few minutes for the device to reconnect and stabilize. Proper battery maintenance ensures accurate temperature readings.

6.3 Resolving Common Issues

Common issues with Taylor outdoor thermometers include inaccurate readings or display malfunctions. Check the sensor for blockages or damage. Ensure batteries are installed correctly and not expired. If the outdoor temperature displays dashes, allow 3 minutes for the base unit to connect with the remote sensor. Reset the device by pressing the SET button for 3 seconds. For persistent issues, refer to the instruction manual or contact customer support for assistance. Regular maintenance and proper handling can prevent most problems.

Advanced Features

Taylor outdoor thermometers offer remote sensor connectivity, ensuring accurate temperature readings from a distance. Calibration options enhance precision, while customizable settings optimize performance for specific environments and preferences.

7.1 Remote Sensor Connectivity

To connect the remote sensor, ensure it is powered with 2 AAA batteries. The battery compartment is located on the back of the sensor. After installation, press and hold the SET button on the base station for 3 seconds to enter pairing mode. The outdoor temperature and humidity displays will show dashes until connected. Allow 3 minutes for the base unit to sync with the remote sensor. Once connected, the displays will update with accurate readings. Use the UP C/F button to switch between Fahrenheit and Celsius if needed.

7.2 Data Accuracy and Calibration

Taylor outdoor thermometers ensure high data accuracy with a temperature range of -4°F to 140°F. For precise readings, press the UP C/F button to switch units. Calibration is rarely needed but can be done by adjusting the sensor. Ensure the remote sensor connects properly to the base unit for accurate data transmission. Always allow 3 minutes for the sensor to sync after installation. Refer to the manual for detailed calibration steps to maintain optimal performance and reliability in your temperature measurements.

7.3 Customizing Settings

Customizing your Taylor outdoor thermometer allows for personalized preferences. Press and hold the SET button for 3 seconds to enter Clock Setting Mode. Use the arrow buttons to adjust the time, date, and temperature units (Fahrenheit or Celsius). The UP C/F button on the back toggles temperature units. These settings ensure accurate readings tailored to your needs. Always refer to the manual for detailed instructions to avoid errors during customization. Proper setup enhances performance and user experience.

Safety Precautions

Handle the thermometer with care to avoid damage. Keep it away from direct sunlight and extreme weather conditions. Ensure batteries are replaced safely, avoiding leakage risks.

  • Avoid exposing the sensor to water or moisture to prevent malfunction.
  • Do not touch electrical components to avoid shock or damage.
  • Store the thermometer in a dry, cool place when not in use.

Always follow the manufacturer’s guidelines for safe operation and maintenance.

8.1 Handling the Thermometer

Handle the Taylor outdoor thermometer with care to ensure longevity. Avoid exposing it to extreme temperatures or physical stress. Clean the device with a soft cloth and mild soap solution. Never submerge it in water. For battery models, ensure proper handling to prevent leakage. Store in a dry place when not in use. Avoid touching the sensor to maintain accuracy. Always follow the manufacturer’s guidelines for safe handling and maintenance. This ensures reliable performance and extends the product’s lifespan.

8.2 Avoiding Environmental Hazards

To ensure optimal performance, protect your Taylor outdoor thermometer from direct sunlight, heavy rain, and extreme temperatures. Avoid installing it near chemicals or corrosive substances. For accurate readings, place the sensor in a shaded area, away from direct heat sources. Ensure proper ventilation to prevent moisture buildup. Regularly inspect the device for damage caused by pests or weather conditions. By following these guidelines, you can extend the lifespan of your thermometer and maintain reliable data collection.

8.3 Battery Safety

Always use the correct battery type specified in the manual to avoid damage. Avoid mixing old and new batteries, as this can cause leakage. Keep batteries away from children and pets. If a battery leaks, handle it carefully to prevent skin irritation. Dispose of batteries properly, following local regulations. Replace batteries in a well-ventilated area and ensure the compartment is securely closed after replacement. Refer to the instruction manual for specific safety guidelines to maintain optimal performance and longevity of your Taylor outdoor thermometer.

Warranty and Support

Taylor outdoor thermometers come with a limited warranty covering defects for one year. Contact customer support for assistance, and locate authorized repair services for maintenance needs.

9.1 Understanding the Warranty

Taylor outdoor thermometers are backed by a limited warranty that covers manufacturing defects for a specified period. The warranty typically lasts for one year from the date of purchase. Registration may be required to activate the warranty. Damage caused by improper use, extreme weather, or tampering is generally excluded. For detailed terms, refer to the product manual or contact Taylor Precision Products directly. Understanding the warranty ensures protection and peace of mind for your investment in accurate temperature measurement solutions.

9.2 Contacting Customer Support

For assistance with your Taylor outdoor thermometer, contact customer support via phone, email, or live chat through their official website. Visit the Taylor Precision Products website for contact details and support resources. Ensure you have your product model number and a detailed description of your issue ready for efficient service. Representatives are available to address queries, provide troubleshooting guidance, and assist with warranty claims. Check the website for operating hours and response times to ensure timely support.

9.3 Finding Repair Services

If your Taylor outdoor thermometer requires repair, contact Taylor Precision Products’ customer support for authorized service centers. Visit their official website or call their support hotline for assistance. Ensure to have your product model number ready for quicker service. Additionally, local electronics repair shops may offer compatible repair services. Always verify the credibility of the service provider to ensure genuine parts and proper repair. Regular maintenance can often prevent the need for repairs, but professional help is available when issues arise.

Taylor outdoor thermometers offer reliable temperature monitoring, ensuring accuracy and durability. Regular maintenance and proper installation guarantee optimal performance, making them a valuable addition for outdoor enthusiasts and professionals alike.

10.1 Benefits of Using Taylor Outdoor Thermometers

Taylor outdoor thermometers offer exceptional accuracy, durability, and ease of use, making them ideal for monitoring weather conditions. Their precise temperature and humidity readings ensure reliable data for outdoor activities. Durable construction withstands harsh weather, providing long-term performance. Remote sensors and low-maintenance designs enhance convenience, while clear displays make readings easy to interpret. These thermometers are perfect for homeowners, gardeners, and weather enthusiasts, offering a cost-effective solution for accurate outdoor temperature monitoring. Their reliability and user-friendly features make them a top choice for anyone needing dependable weather tracking.

10.2 Final Tips for Optimal Performance

  • Regularly clean the thermometer to ensure accurate readings and prevent dust buildup.
  • Replace batteries promptly when low to avoid interrupted data collection.
  • Position the sensor in a shaded, well-ventilated area for precise temperature measurement.
  • Calibrate the device periodically to maintain accuracy over time.
  • Refer to the instruction manual for troubleshooting common issues;

By following these tips, you can maximize the performance and longevity of your Taylor outdoor thermometer.